How can we help you?
Search our knowledge base to get answers to your questions, access video training & more!
Setup
Authorize.Net Setup
Updated 1 week ago
Follow the Gateway Setup below to obtain an Authorize.Net account (that is if you don’t have one already).
Sign up for Authorize.Net Online Payment Services. You can apply online by following this link.
When signing up, ensure that your account has the AIM API enabled.
Once you have your account setup, login to your account and follow the steps below: (Note that the following steps were current at the time of this writing. Please contact Authorize.NET if you have difficulties obtaining your API credentials)
Go to Merchant Profile, ensure that Payment Gateway is enabled
Go to Account tab | Settings. Click API Login ID and Transaction Key
Enter the answer to the secret question to obtain API Login ID and Transaction Key then click Submit
You will be presented with your API credentials. Please make a note of these values because they will be needed in order to setup the connection between Payment Center and Authorize.Net. Click Continue.
For more information on obtaining API Login ID and Transaction Key, follow this link to Authorize.Net’s videos: http://www.authorize.net/videos/. Look for API Login ID and Transaction Key.
Payment Center Settings
Login to your Salesforce account and go to Payment Center Settings tab.
In the Payment Processors related list, click Authorize.Net.
Click Edit on the bottom right of the Details section. Enter your Authorize.NET API Login ID in Login ID and your transaction key in Transaction Key. Then click Save.

Additional Settings
Require CVV2 – check this box if you require the security code (CVV2) for every payment.
Enable eCheck – check this box to enable eCheck or ACH payments.
Default Business Checking – there is an option when paying by ACH asking whether the account is a business checking account or not, check this box to default the option to true.
Enable Tokenization
Require Billing Address – check this box to require the billing address when paying by credit card.
Require Billing Zip/Postal Code – check this box to require just the zip code.
Enable Card-Present Transactions – more information about this flag can be found here
Duplicate Window – Authorize.Net has a feature that disallows transactions with identical amount and credit card information within the set duplicate transaction window (normally 2 minutes). To disable this feature, enter zero in this field.
Testing
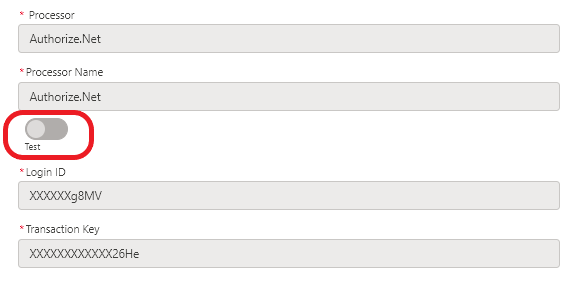
Payment Center comes pre-installed with a test Authorize.Net account. You may use the account to see how payment works. To use the test account, ensure that Test is selected in the account details toggle:
Go to Payment Center Settings tab. In the Payment Processors related list, click Authorize.Net.
Account details toggle should be as below:
To do a test payment transaction, do the following:
Go to Payments tab then click New.
Select Authorize.Net as the Payment Processor.
Use the following credit card information:
Credit Card Type : Visa
Name on Card : Any name
Credit Card Number : 4111111111111111
Expiration : Any future date
Follow onscreen instructions until you successfully process the payment.
Going Live
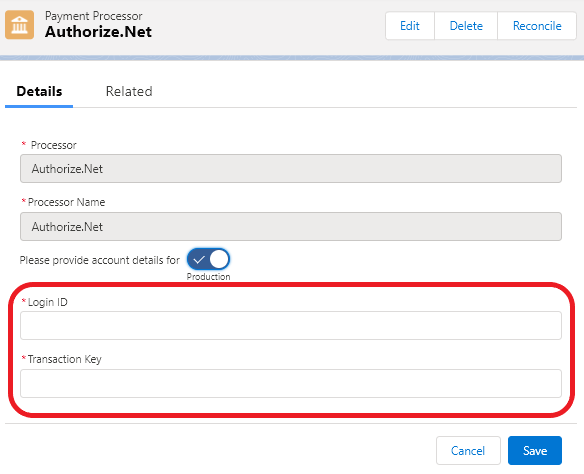
To go live, go to Payment Center Settings tab. Under Payment Processors related list, click Authorize.Net.
Click Edit on the bottom right of the Details section. Switch the account details toggle to Production. Enter your Live credentials if you haven't set them up yet. Click Save.
Under More Settings section, set Use as Default to True.

Also ensure that your Authorize.Net account is in live mode.
Need a Visual Guide?
Watch this video tutorial to quickly learn how to set up your Authorize.Net account.