How can we help you?
Search our knowledge base to get answers to your questions, access video training & more!
Credits
Credit Memo
Updated 3 weeks ago
Payment Center now gives you the ability to issue credit to your customers. This is done using the new feature called Credit Memos (or as some would call them Credit Notes). Here are some of the reasons why you would issue credit to your customers:
Returns – you might want to issue refunds to your customers for products returned
Write-off bad debt – you may have invoices that you know will never get paid
Advance payment – your customers may have sent you advance payments and you somehow would need to record and apply them to future invoices
Invoice error – you may want to simply correct an error on an invoice that was already sent to your customer
With the above transactions recorded, you would have a better visibility of credits that you issue to your customers.
Creating A Credit Memo
There are two ways to create a credit memo. You can either create it manually or create it from an Invoice.
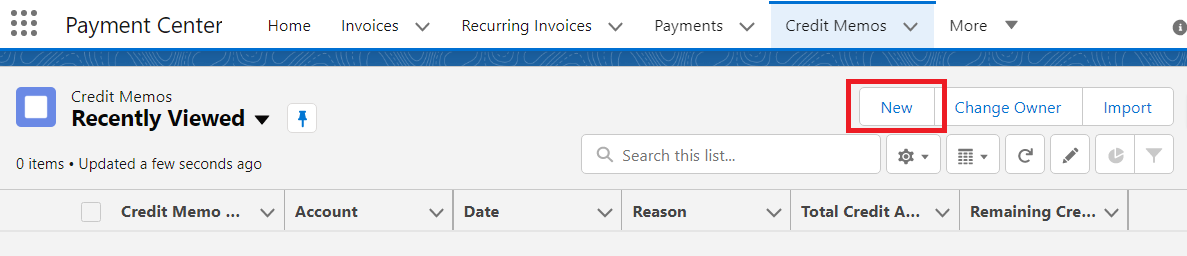
To create it manually, go to Credit Memos tab and click New:
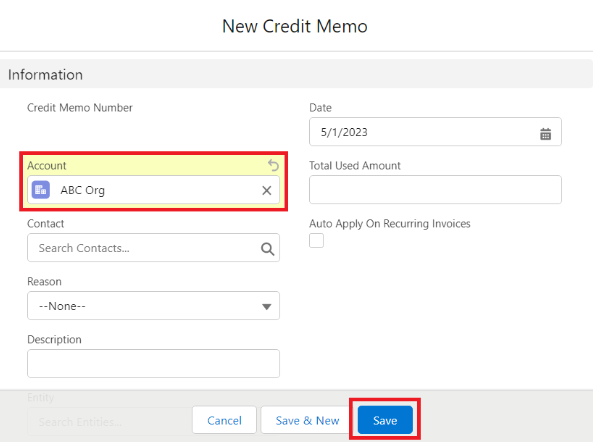
Enter Account then click Save
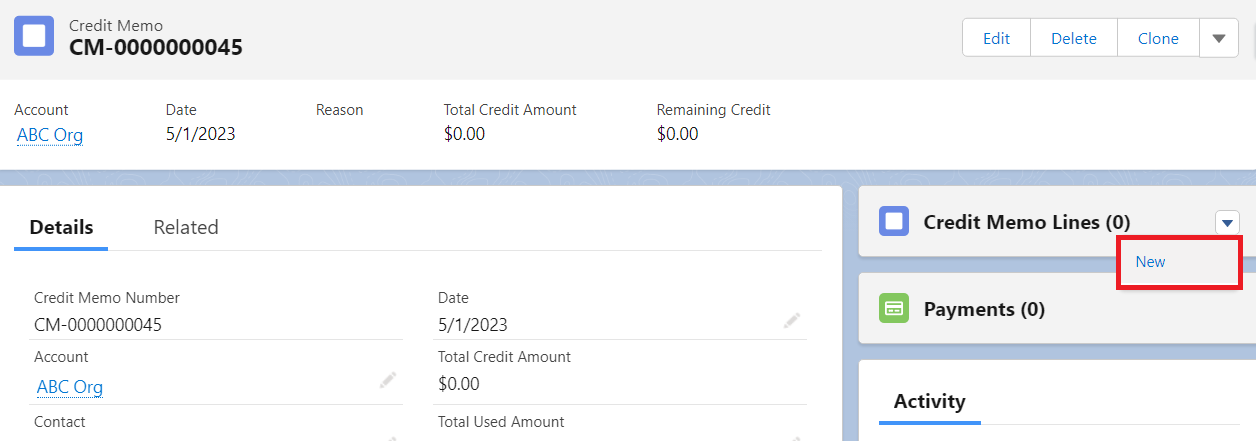
Add Credit Memo Line
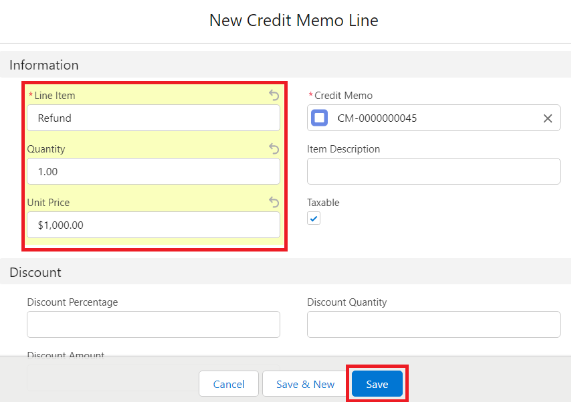
Enter Line Item, Quantity, Unit Price then click Save.
To create a credit memo from an invoice, go to the Invoice record, scroll towards the bottom of the page and click Create Credit Memo From This Invoice (if the link is not available, edit your layout and display the custom link):
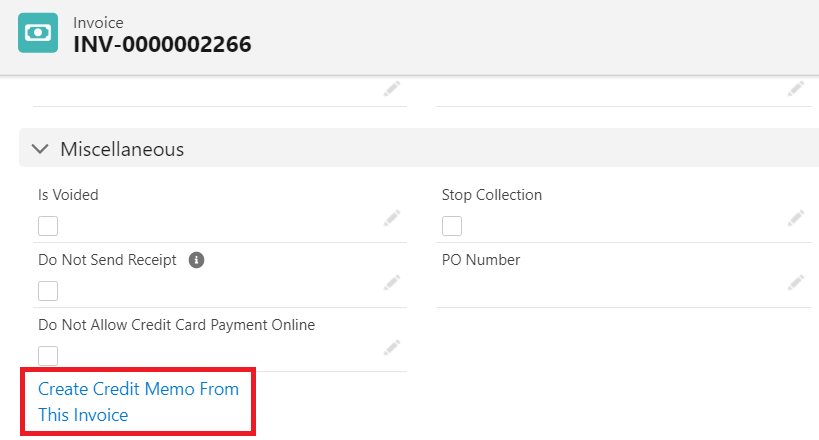
Creating a Credit Memo from an Invoice automatically creates a Credit Memo Line equal to Total Invoice Amount.
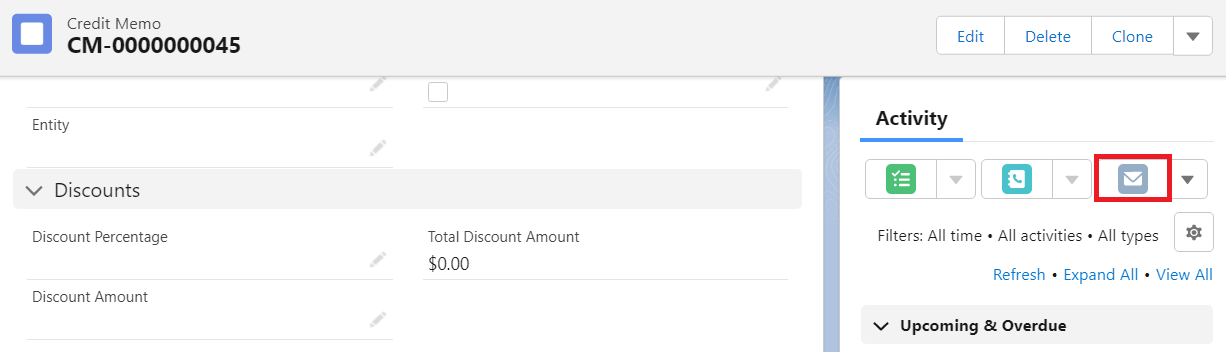
Sending A Credit Memo
To send a credit memo, go to the Credit Memo page, under Activity, click Email button (if the button is not available, edit your layout and display it).
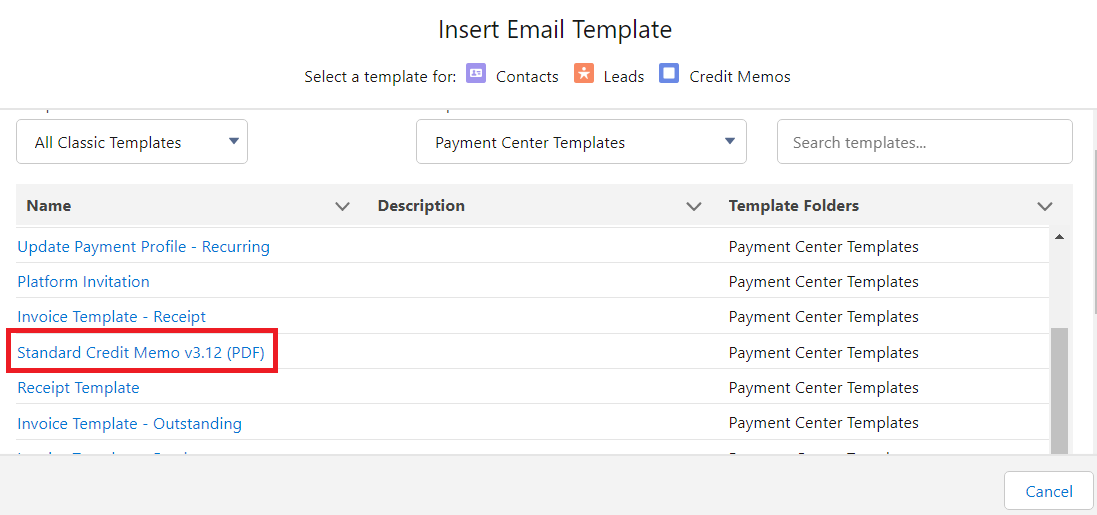
Select template Standard Credit Memo vx.xx, as shown below:
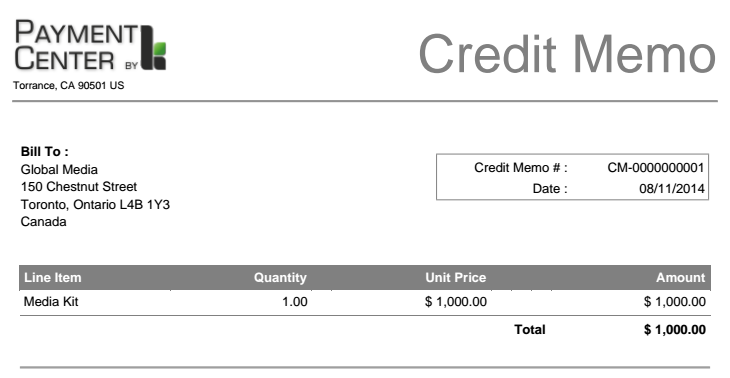
A document, similar to the one displayed below, will be sent to your customer:
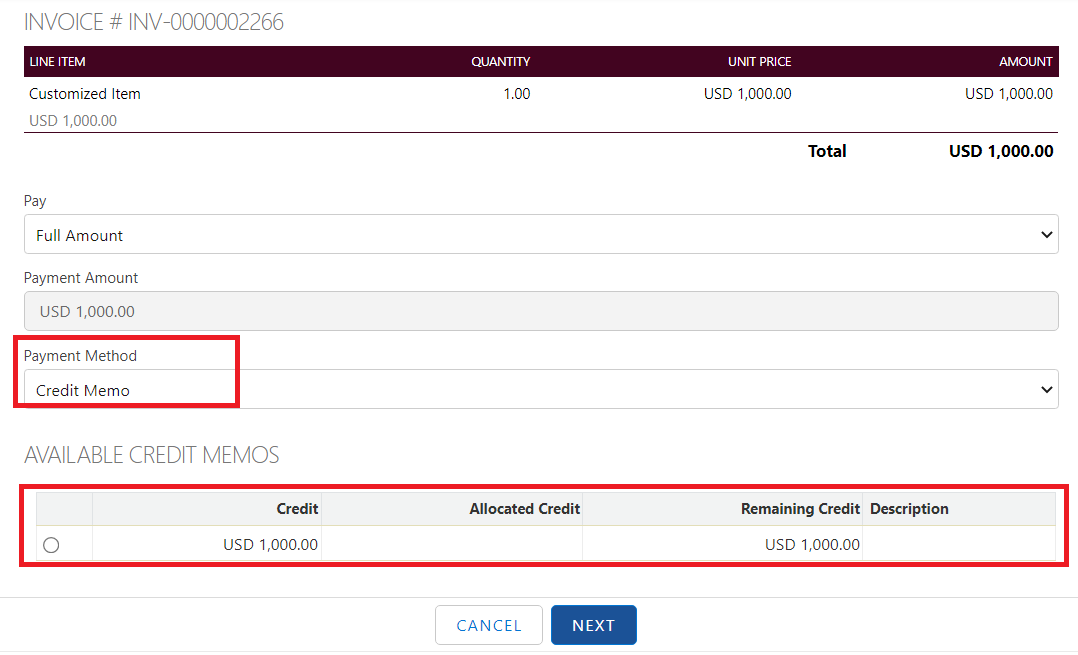
Applying Credit To An Invoice
To apply credit to an Invoice, select Credit Memo as Payment Method then select from the available credit memos:
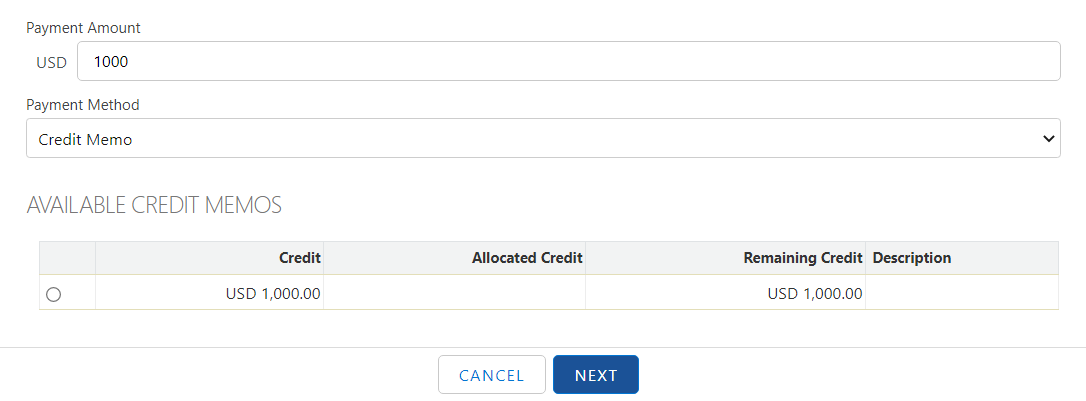
Similarly, when using the “Pay Now” page, available credits for an account will be displayed so they can be chosen as mode of payment:
Applying Credit Memos Automatically
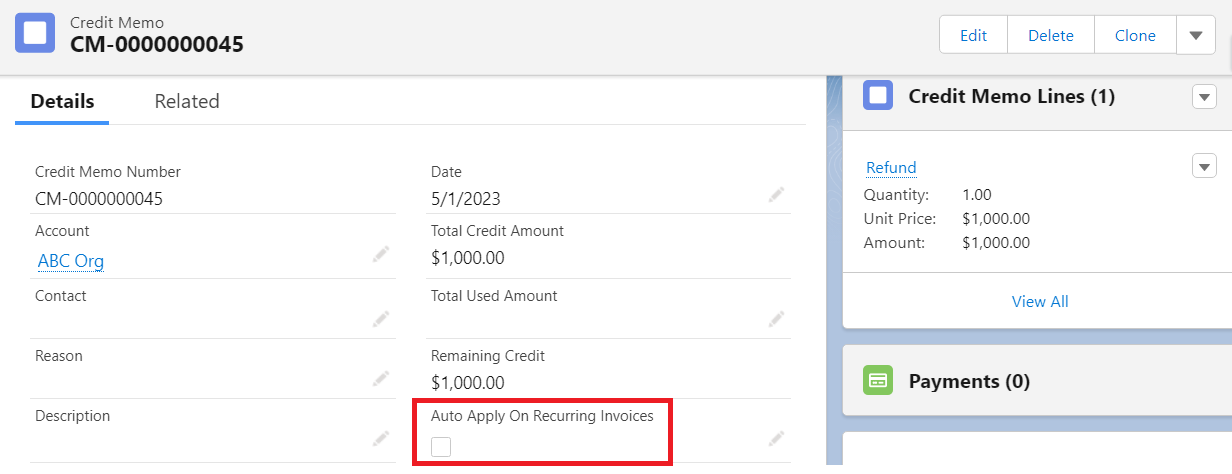
For recurring invoices, you can automatically apply credit memos on future invoices. This is particularly helpful when your customer sent you an advance payment and you want that payment to be automatically applied on future invoices. To do this, check Auto Apply On Recurring Invoices when creating the credit memo, as shown below:
Refunds
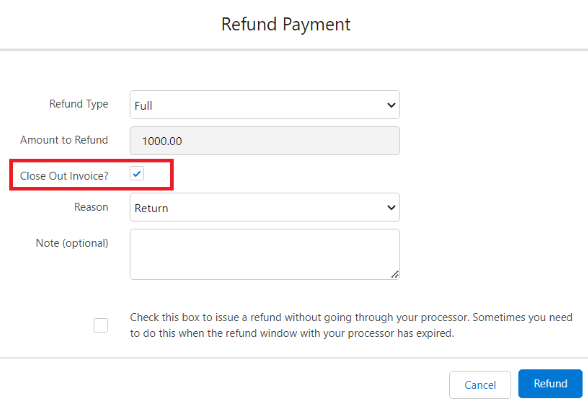
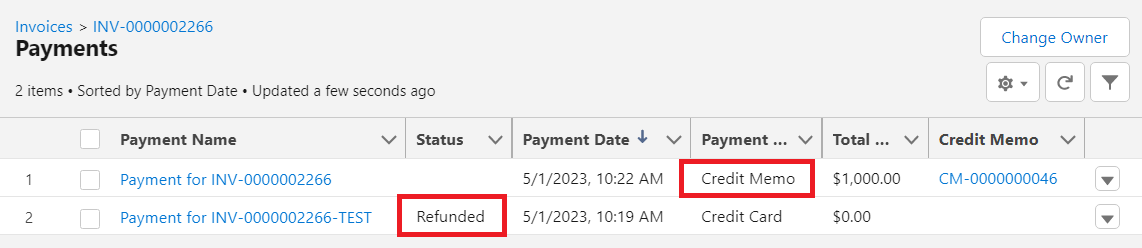
Refunds in Payment Center generally leaves the invoice open. You then have to manually adjust the invoice accordingly. In cases of full refunds, you now have the ability to automatically create a credit memo and apply it to the invoice. This is done by checking Close Out Invoice? box when doing the refund:
After a successful refund, a new payment, of type credit memo will be reflected on the invoice:
Adding Reason Codes
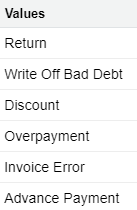
Payment Center comes with default reason codes you can use when creating a credit memo, as shown below:
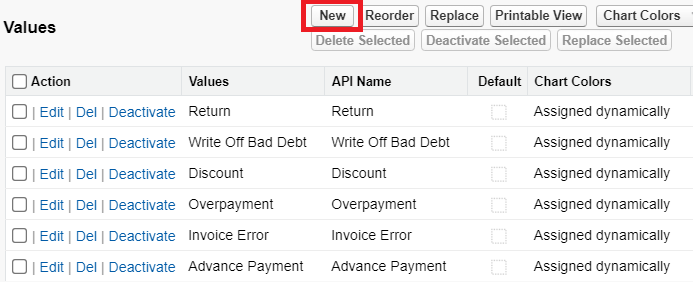
To add your own reason codes, go to Setup | Create | Objects | Credit Memo. Under Custom Fields & Relationships, click Reason. Under Values, click New and enter your own value:
Credit Memo Currency
The Credit Memo uses the same currency as your processor's default currency, but there may be instances that you need to change the Credit Memo currency. To do that, you can change it in the Currency (fw1__Currency__c) field (expose if not visible).
If the Credit Memo currency is changed, you can only use it to Invoices that has the same currency, otherwise the Credit Memo will not be available for paying the Invoice. To make it available, ensure that the Currency field in the Credit Memo and Email Currency Symbol field in the Invoice is the same.