How can we help you?
Search our knowledge base to get answers to your questions, access video training & more!
Payments
How to Process a Refund
Updated 1 week ago
Doing refunds on Payment Center only requires a few clicks.
You may follow the steps below on how to do a refund:
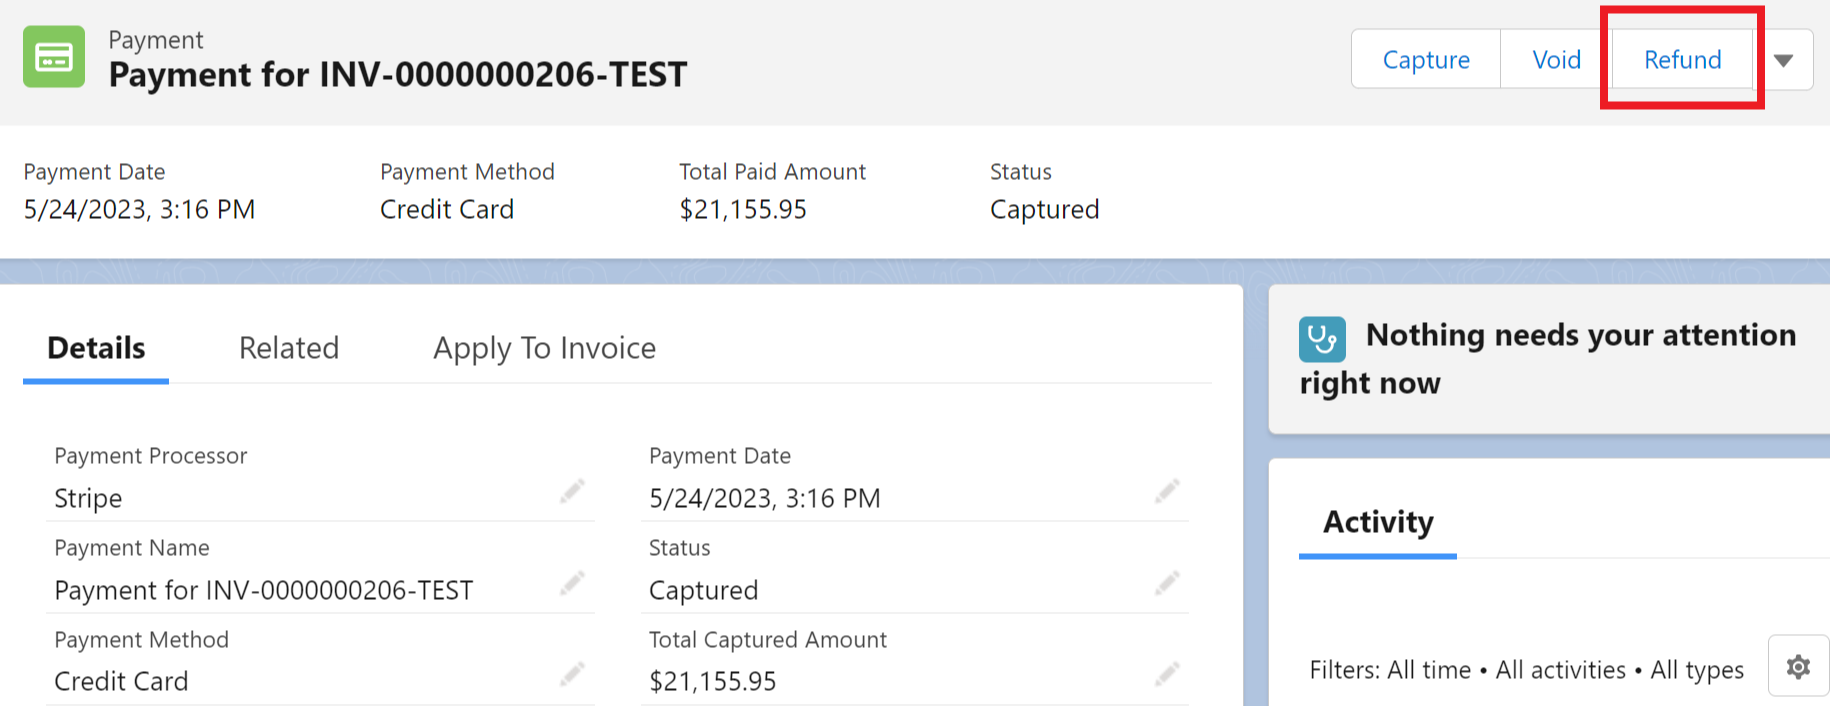
Go to Payments Tab then choose the payment record that needs to be refunded
Click on the Refund button.
A pop up window will open for you to process the refund as shown in the image below. From there, you can select Full or Partial refund, select a Reason, and add a Note if needed.
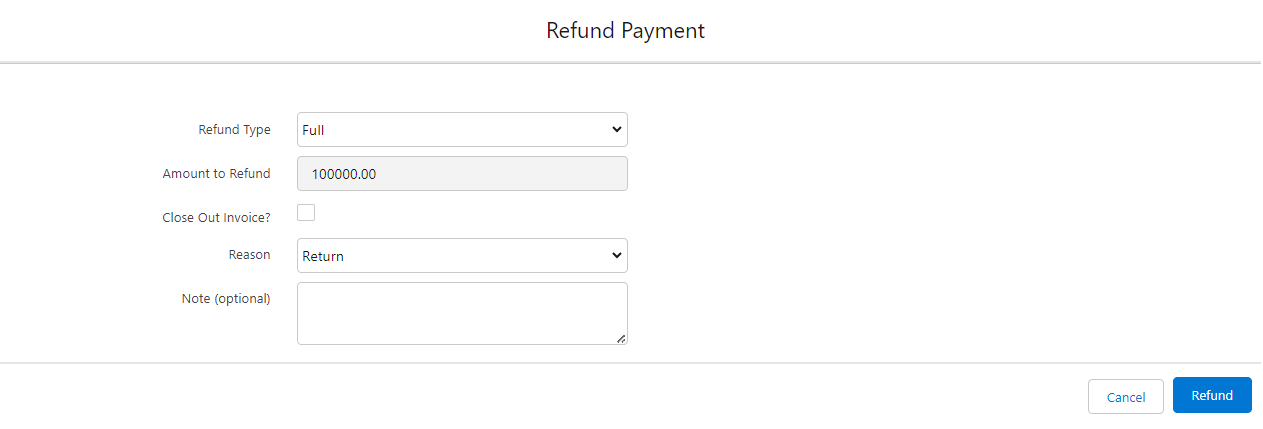
Close Out Invoice?
When you refund a payment in Full, you have the option to close out the Invoice linked to the payment record. If the 'Close Out Invoice?' box is checked, the system will create a Credit Memo and automatically apply it to Invoice so that the customer will not able to make another payment to the invoice. This is applicable to invoices that should no longer get paid for whatever reason (customers cancelled, went out of business.. etc).
In Payment Center Settings, you can set Close Out Invoice Default to True, False or Hide.
If True, the 'Close Out Invoice?' box will be visible in refund screen and it will be checked by default
If False, the 'Close Out Invoice?' box will be visible in refund screen and it will be unchecked by default
If Hide, the 'Close Out Invoice?' will not be visible in the refund screen.

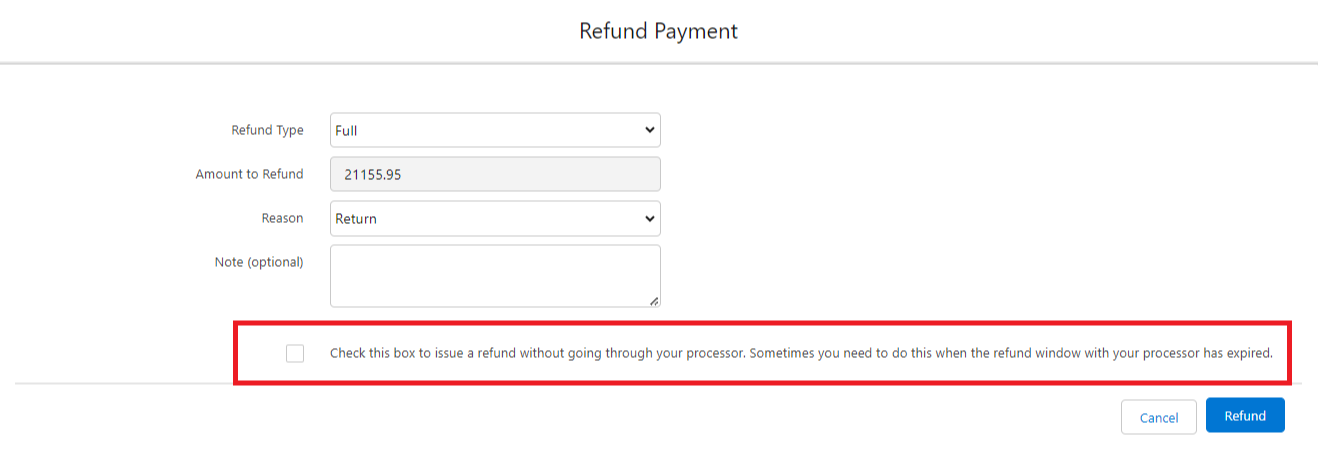
Processing a payment without going through the processor:
If a payment has been made sometime ago, i.e. more than 90 days, most processors do not allow a refund. In these cases, you will have to send the refund to your customers in some other ways, like sending them a check, or wiring them the refund.
After you manually send the refund, record the transaction in Payment Center by going to the payment record and clicking the Refund button (Steps 1 and 2 above). On the next page, tick the box highlighted below and proceed by clicking Refund button.
To add reason codes, you may refer to this article: Add reason code drop-down for both partial and full refund