Does your organization use Salesforce Community and you wish that your community users can view invoices and pay it by themselves? Perhaps you just simply want them to be able to manage their payment information? Or a combination of both?
This can now be easily accomplished using the Account Billing component.
Account Billing Component
The Account Billing component allows you to select which Payment Center objects to show the community users. You may opt to show Invoices, Installments, Payments, Payment Profiles and Recurring Invoices. There is also an option to show the Summary of the records.
Account Billing Versions
Whether you're using LWR or Aura site, we've got you covered!
Kulturra has developed 2 versions of Account Billing component: LWR and Aura. You will get the same user interface, available options and information with these 2 versions. The only difference is during payment, LWR version redirects to the Payment page while Aura version redirects to the Payment Terminal. Now, let's have a look how these 2 screens look like:
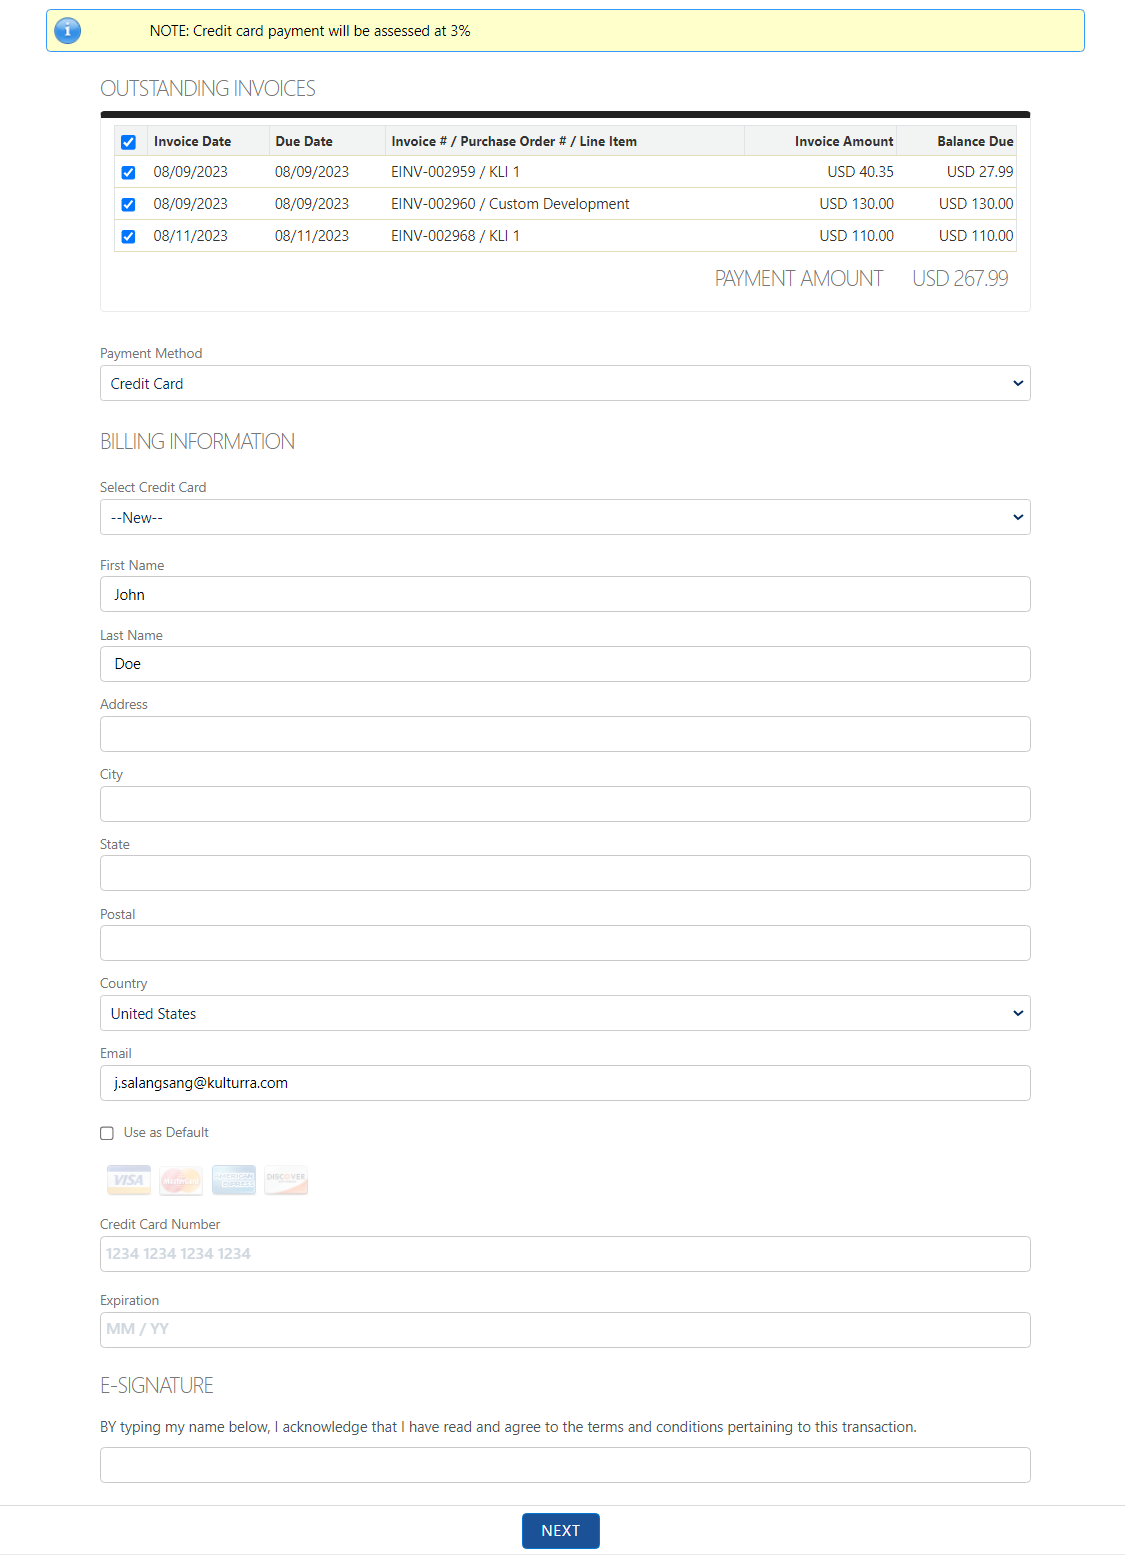
Payment redirection with LWR version - Payment page:
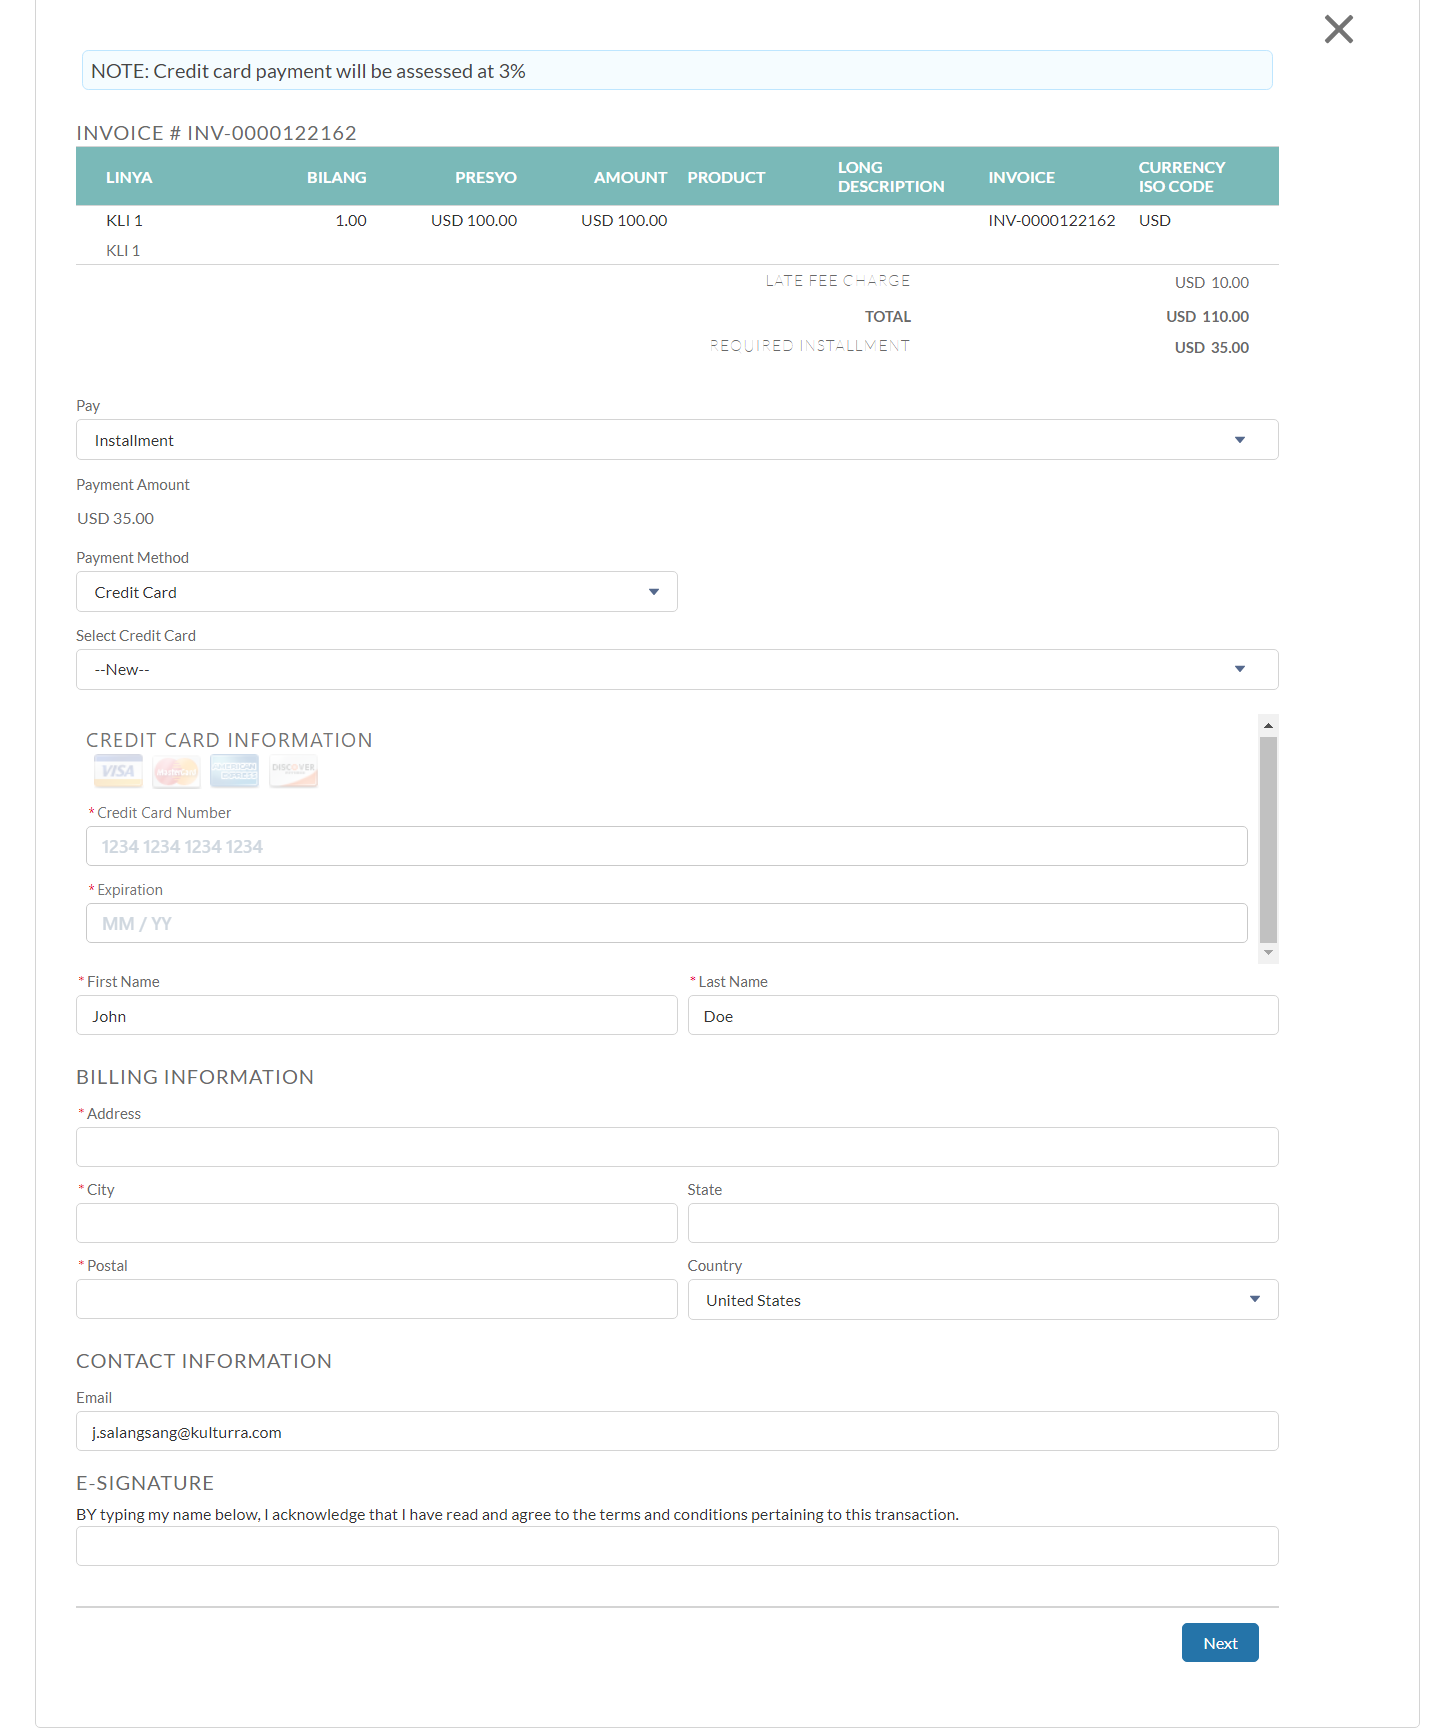
Payment redirection with Aura version - Payment Terminal:
Set-up
1. If you are new to Salesforce Community, you may refer to the following Salesforce articles on how to set-up a community:
Enable Salesforce Digital Experience for Customer Community User
Enable Salesforce Digital Experiences, configure a domain name, and then enable standard external profiles.Create an Account for Customer Community User
Create an account and associate it with a contact.Create a Customer Community User
Create a contact and enable it as customer community user.Create a Digital Experience Site for Customer Community User
Configure a name and a URL for the digital experience site.Configure Digital Experience Site for Customer Community User
Activate the customer community digital experience site and associate the site to a customer community profile and assign relevant permission sets.
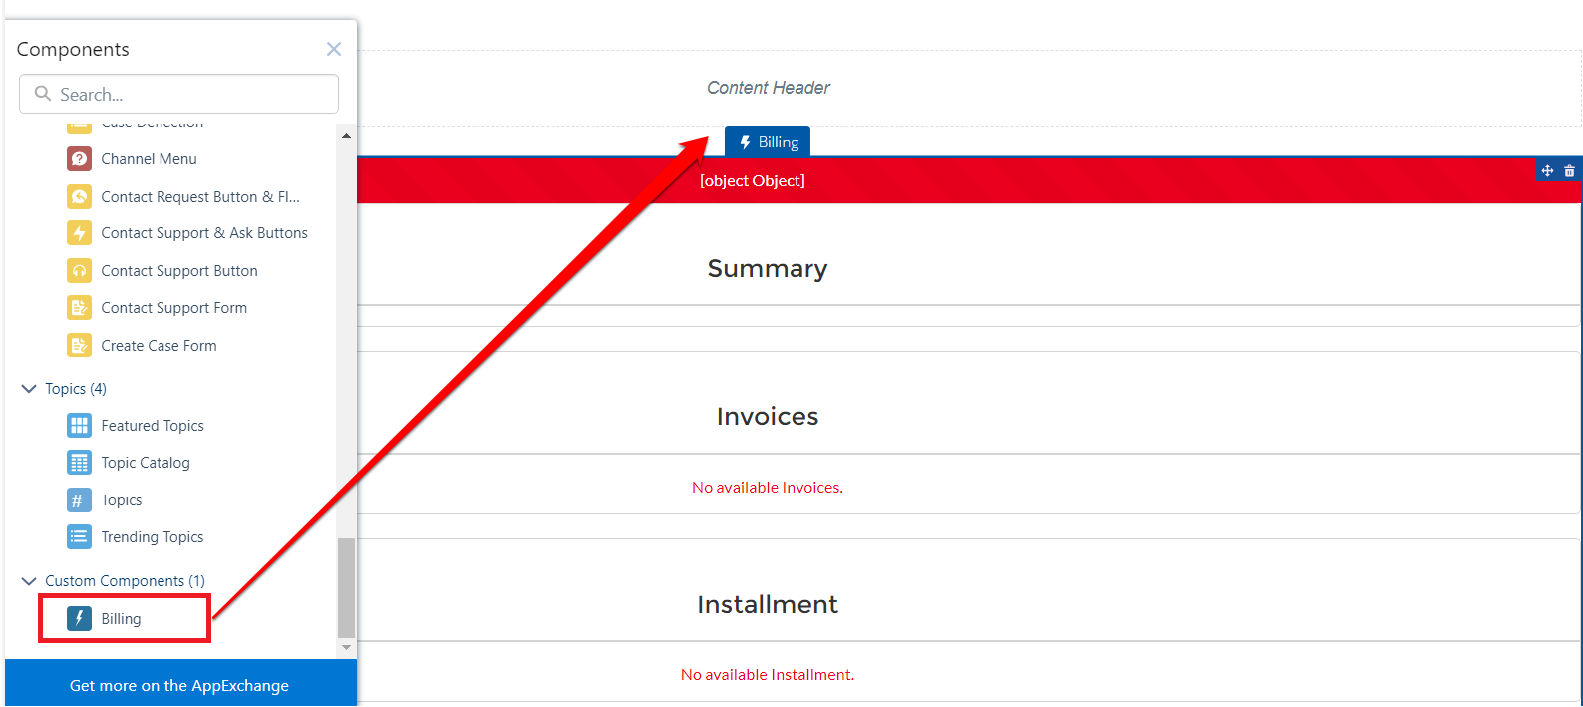
2. To add the Account Billing to your Digital Experience site, go to Digital Experiences | All sites | select your site and click on Builder | search for the Billing component and drag and drop it to the desired location.
3.a If you are using LWR site, make sure that Is Lightning Web Runtime Framework is enabled in the Account Billing Settings. Please refer to the Account Billing Settings of this article for more information.
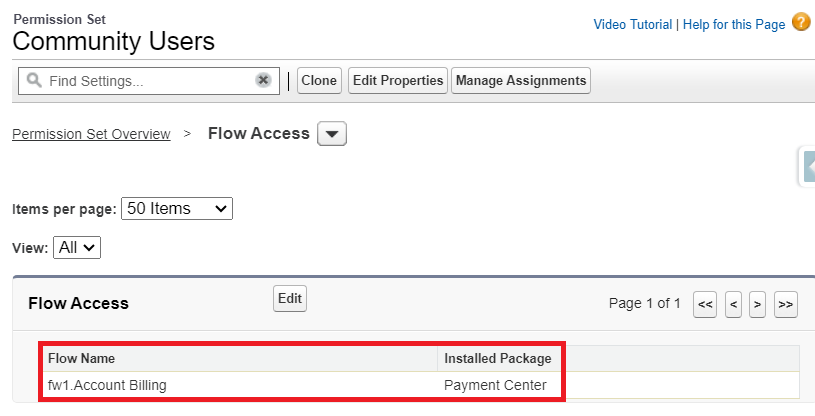
3.b If you are using Aura site, create and assign a permission set to allow the community users' access to the Account Billing flow.
Account Billing Settings
The settings will become visible once you have added the Account Billing component to your site. Here are the options you may enable or disable:
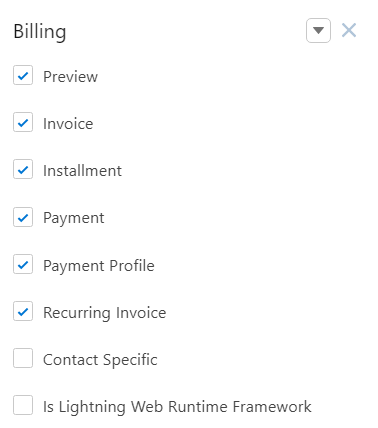
Preview – displays Summary of the records like Total Invoice Amount, Due Installment Amount, Total Payment Amount, Outstanding Balance, Total Recurring Amount
Invoice – displays Invoices and allows community users to pay them
Installment – displays Installments and allows community users to pay them
Payment – displays Payments and Payment Receipt
Payment Profile – displays payment profile and allows community users to create or delete payment profile/s
Recurring Invoice – displays the Recurring Invoices
Contact Specific – displays information related to the Contact. If not selected, records related to the Account will be displayed
Is Lightning Web Runtime Framework – this should be checked when using LWR version
When you’re all set, you can now Publish your site that allows your community users to see and pay their Invoices or add and delete their Payment Profiles!
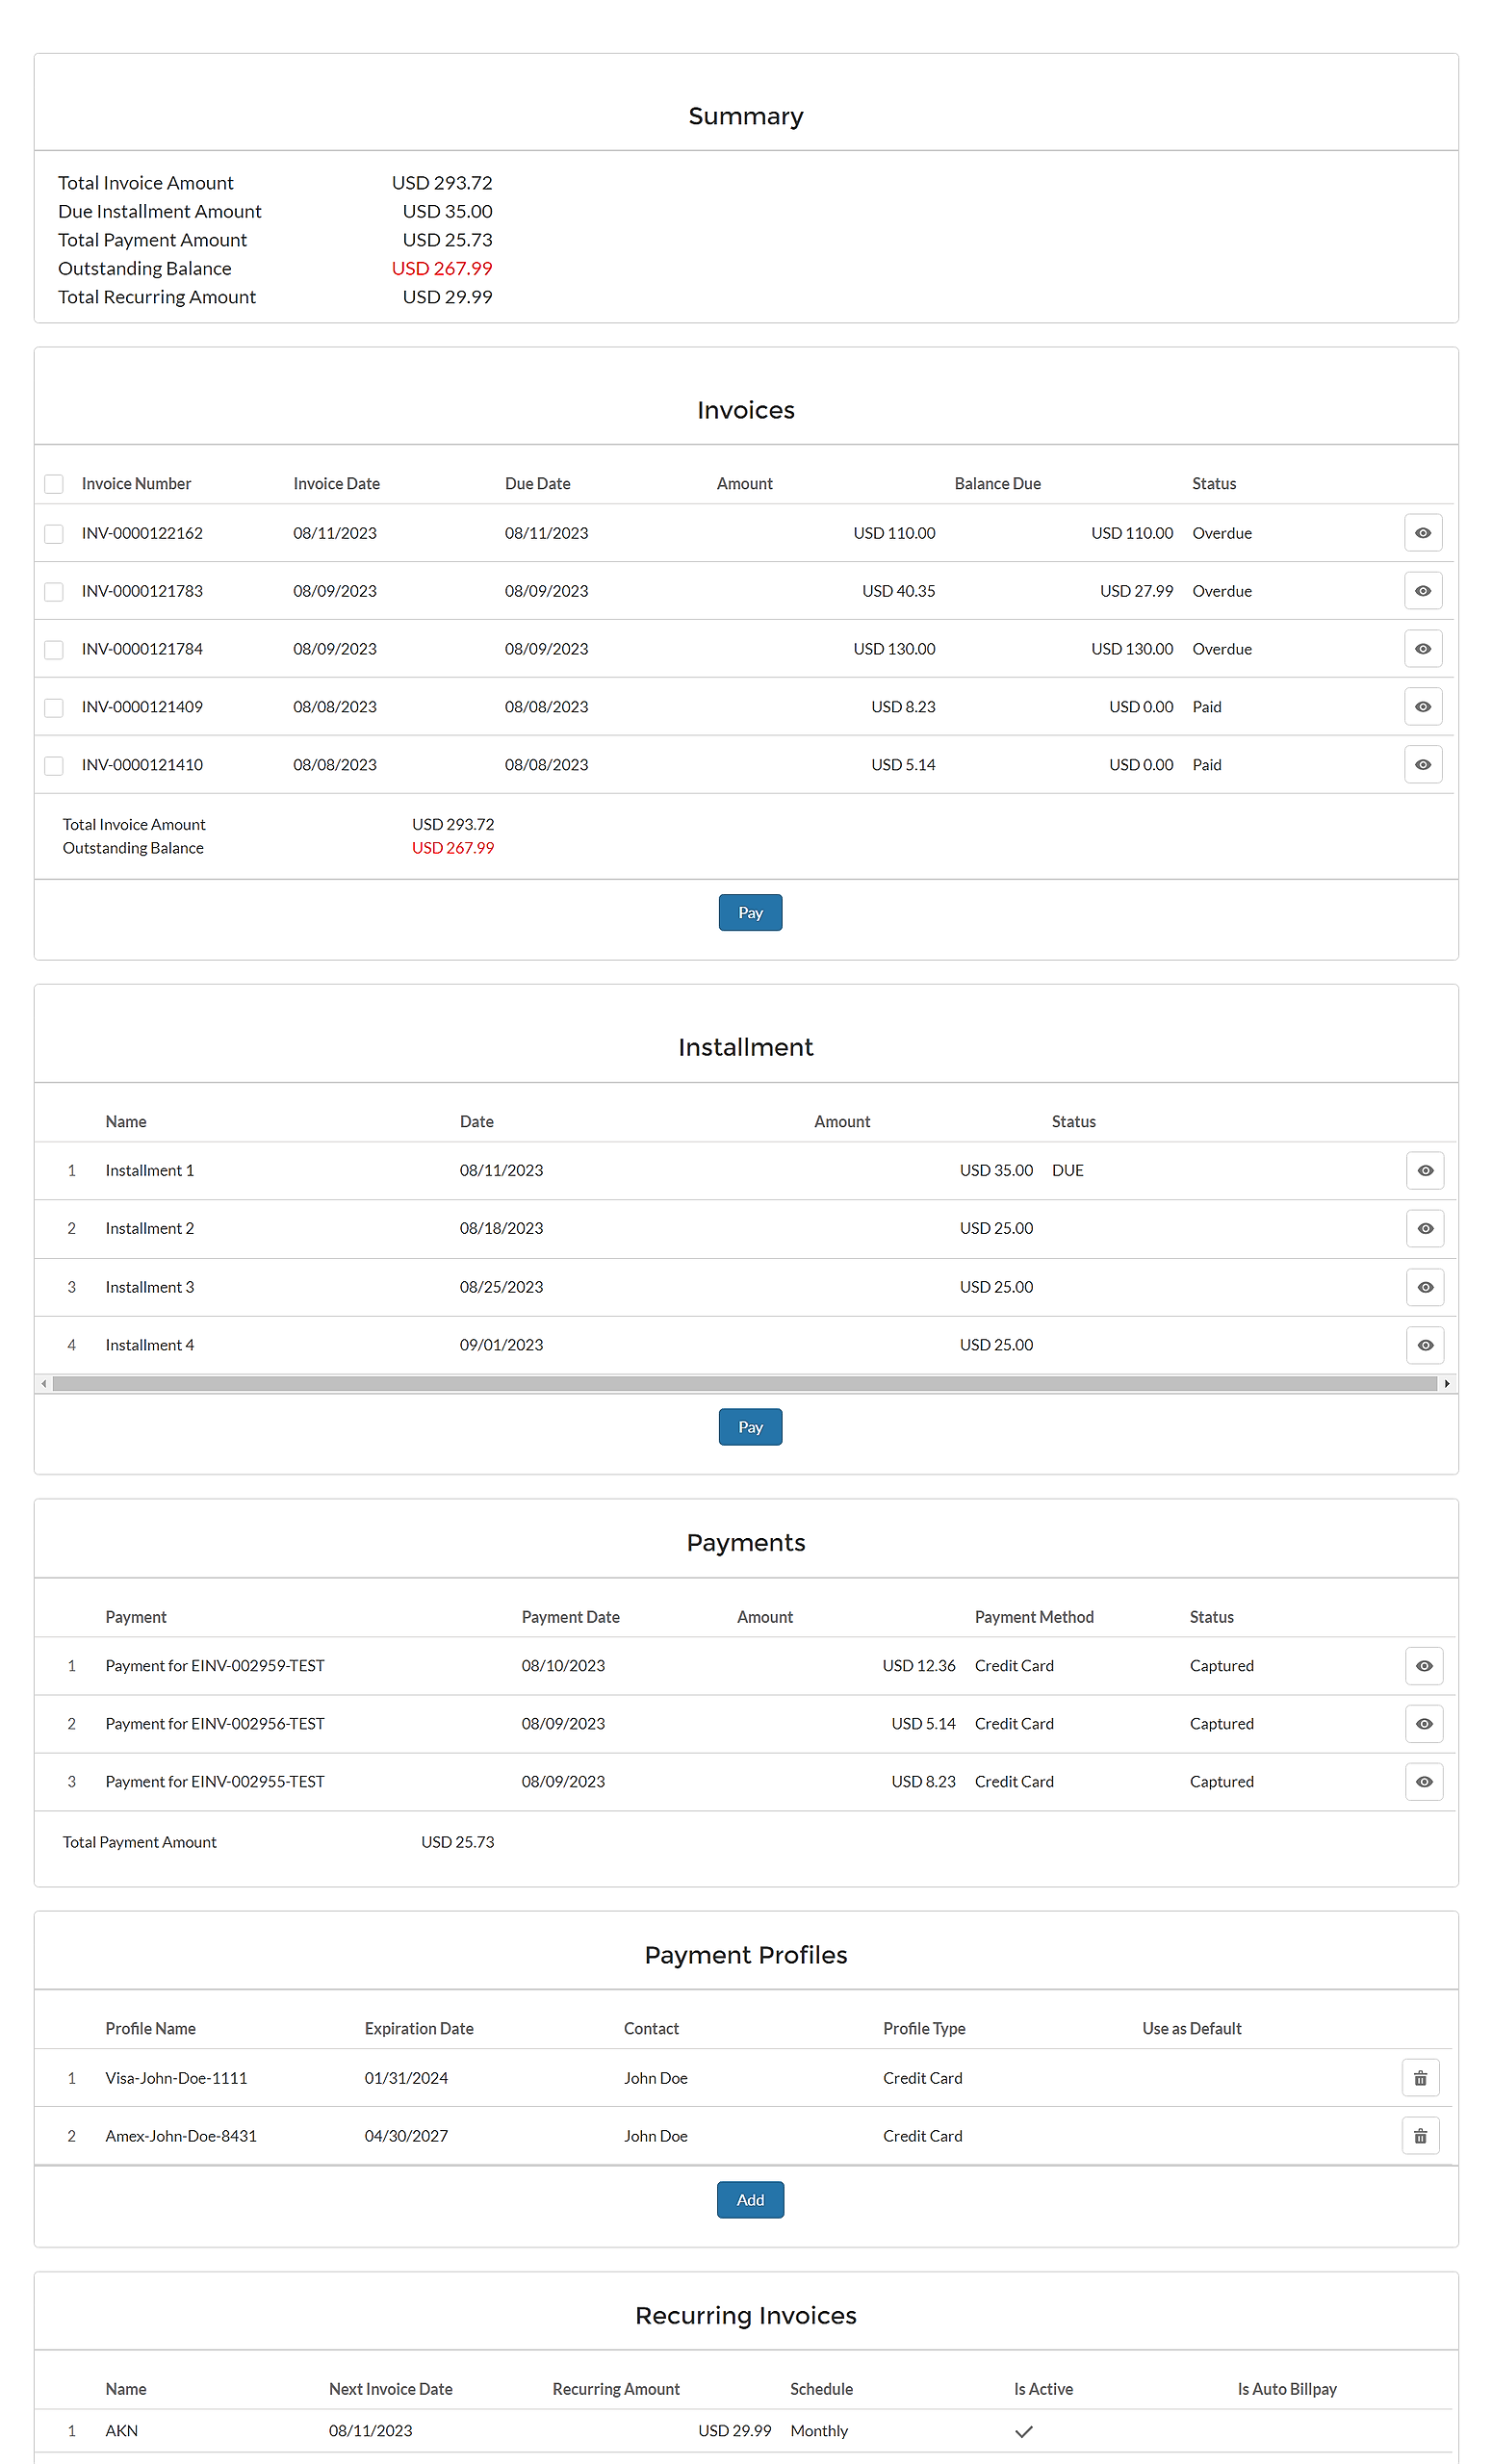
Here's an example of the Account Billing component added to a site:
Availability: Summer '23 Release