There are 2 screen components that you can use when you want to add the Payment Lightning Component in a screen flow:
Payment Terminal - a combination of credit card/bank information entry and review screens
PaymentConfirmation - confirmation page (optional). You can use this if you want your flow to have additional process after a successful payment or if you want a custom payment confirmation. Otherwise, the standard payment confirmation screen is displayed.
Below are the steps to add the Payment Lightning component in your flow.
Adding the Payment Terminal component
1. Add a screen element and then select and add Payment Terminal component.
2. Set the value of each parameter with your flow's variables.

Below are the available input parameters and their descriptions, populate with the same value as you build your payment link parameters:
Account lookup field - The name (API name) of the Account lookup field defined in the custom object (ie Account__c)
Amount - The amount to be charged. Pass variable or numeric value (i.e {!amount}, 99.99)
Amount field - The name of the field in your object that holds the amount to be charged (ie Amount__c)
Contact lookup field - The name (API name) of the Contact lookup field defined in the custom object (ie Contact__c)
Currency - If you use different currencies, you can pass the name of the field currency or currency value (ie Currency__c, {!currency}, USD)
Custom Info - Any information you want saved in the Payment record (ie {!any_text}, payment from sample account)
Default Payment Method - If you wanted the page to default to a specific payment method, you can pass the default here (ie PaymentMethod__c, {!payment_method}, eCheck)
Display Company Logo - true/false, indicates whether company logo is displayed
Do not send receipt - true/false, indicates whether or not you want to send a receipt after payment
Entity - Pass the ID or field name of the entity. Details of the entity will be used where appropriate (ie Entity__c, {!entity_id}, 0011F00000v82kYQAQ)
Error Message - Output. Error message.
Is Successful - Output. Payment transaction result.
Paid amount field - the name of the field in your object that holds the paid amount.
Payment ID - Output. The ID of the payment record created.
Payment lookup field - The name of the field in your object that holds the paid amount (ie Total_Paid_Amount__c)
Payment Type - You can pass 'Charge' or 'Authorization'
Processor - If you are using different processors, you can explicitly pass the processor
name here as defined in settings (ie Processor__c, {!processor}, Stripe)
Processor Category - If you have categorized your processors, you can pass the category here and the system will select the appropriate processor based on the category (ie Processor_Category__c, {!processor_category}, CAD)
Record ID - The ID of the current record in your object
Session Time Out – true/false, Session timed out
Show invoice lines - true/false, indicates whether invoice lines are displayed
SObject Name* - The name (API name) of your object
Time Elapsed - Time elapsed before Payment entry screen
Time Out - time in seconds before payment timed out.
* mandatory parameters
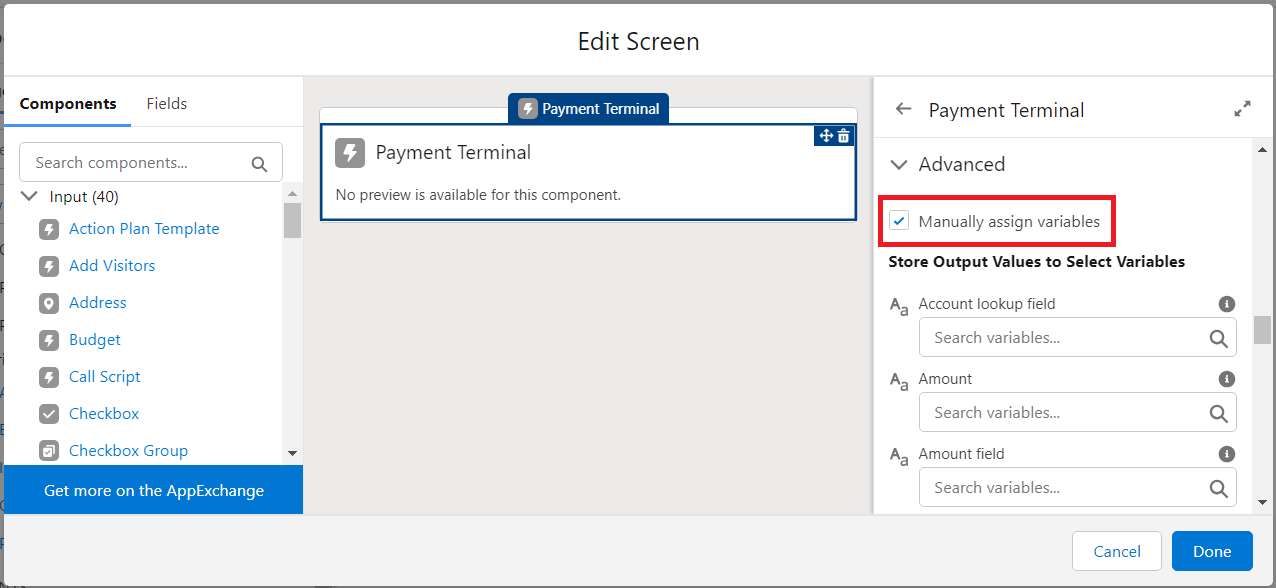
3. If you are to add the PaymentConfirmation screen, store the output values to variables, otherwise, skip this step. To store output values to variables, expand Advanced section, check the Manually assign variables box. Create a new variable resource type in the isSuccessful and paymentId fields.
The output variables are:
isSuccessful - Output - Payment transaction is successful
paymentId - Output - The ID of the payment record created
errorMessage - Output - error message
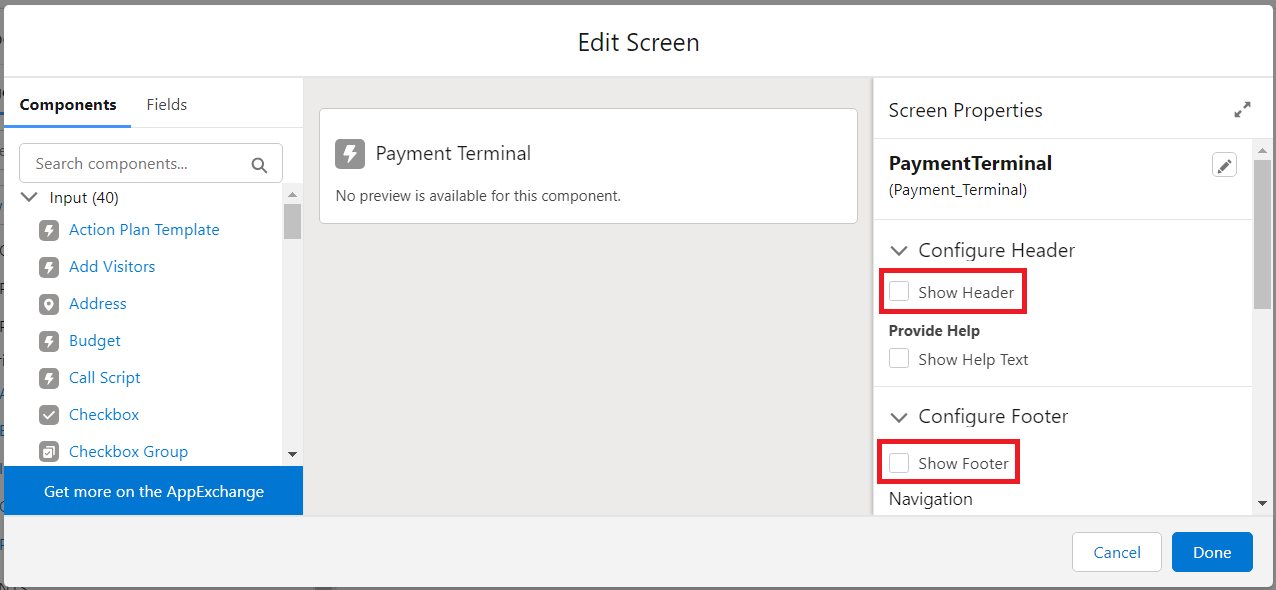
4. Uncheck the Show Header and Show Footer boxes as the component itself already has its own button
Adding PaymentConfirmation Screen
1. To add a custom payment confirmation screen, add a new screen element to your flow and from the custom components section, select and add PaymentConfirmation component.
2. Set the value of each parameter with your flow's variables.
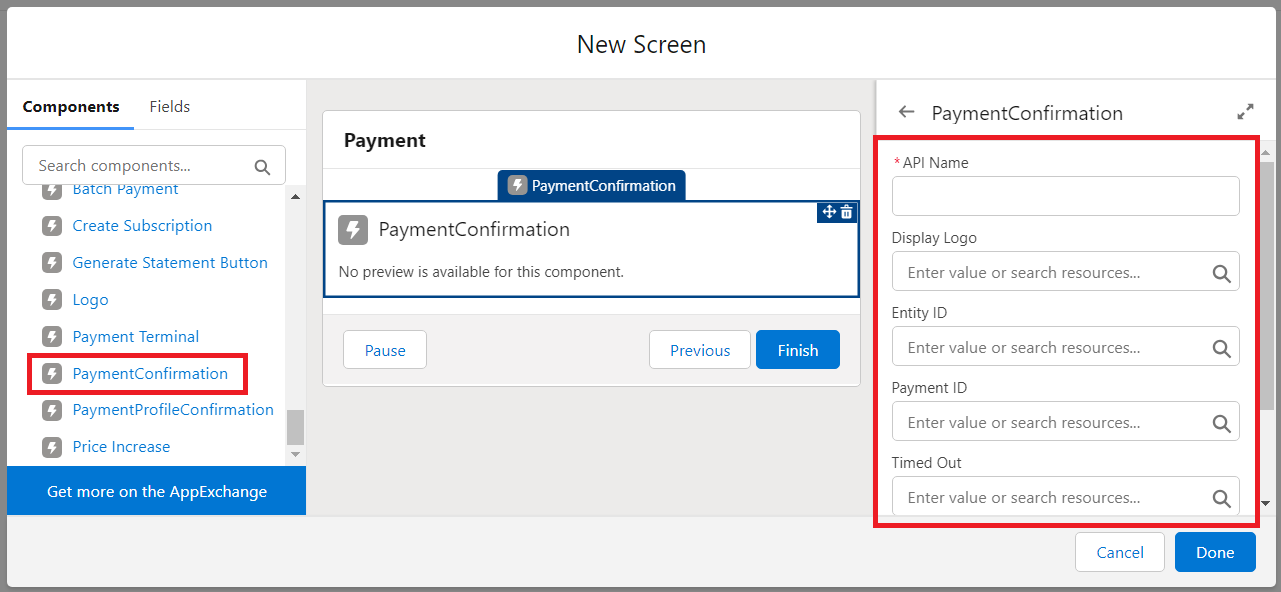
Below are the available input parameters and their descriptions:
Display Company Logo - true/false, indicates whether company logo is displayed
Entity - Pass the ID or field name of the entity. Details of the entity will be used where appropriate (ie Entity__c, {!entity_id}, 0011F00000v82kYQAQ)
Payment ID - The ID of the payment record created.
Time Out - time in seconds before payment timed out.
3. Check Show Footer box to display Finish or Next button depending on your flow:
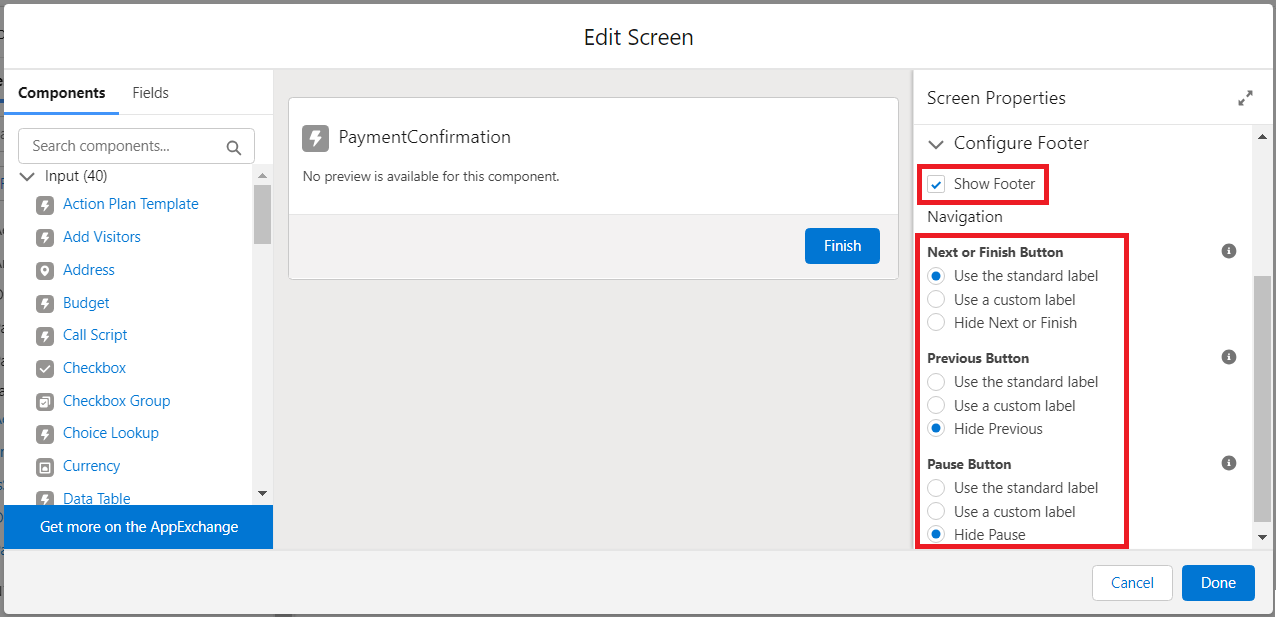
4. Store the Output values to variable. To do this, expand Advanced section, check the Manually assign variables box.
OUTPUT variable: Session Timed Out - TRUE/FALSE, session timed out
Add Payment Lightning Component in your Experience Cloud
You can insert your Payment Flow in your Experience Cloud to allow community members to process payment.
Go to your Experience Builder and insert a Flow component in your desired section. Select the Flow that contains your Payment screen.

We’ll walk you through each step to embed Kulturra’s payment component into any screen flow - watch the video below to get started.