How to add processor for ClearACH:
Login to Salesforce: Log in to your Salesforce account using your credentials.
Navigate to Payment Center Settings: Go to the Payment Center Settings section within your Salesforce environment.
Access Payment Processors: From the Payment Center Settings, find and select the option for Payment Processors.
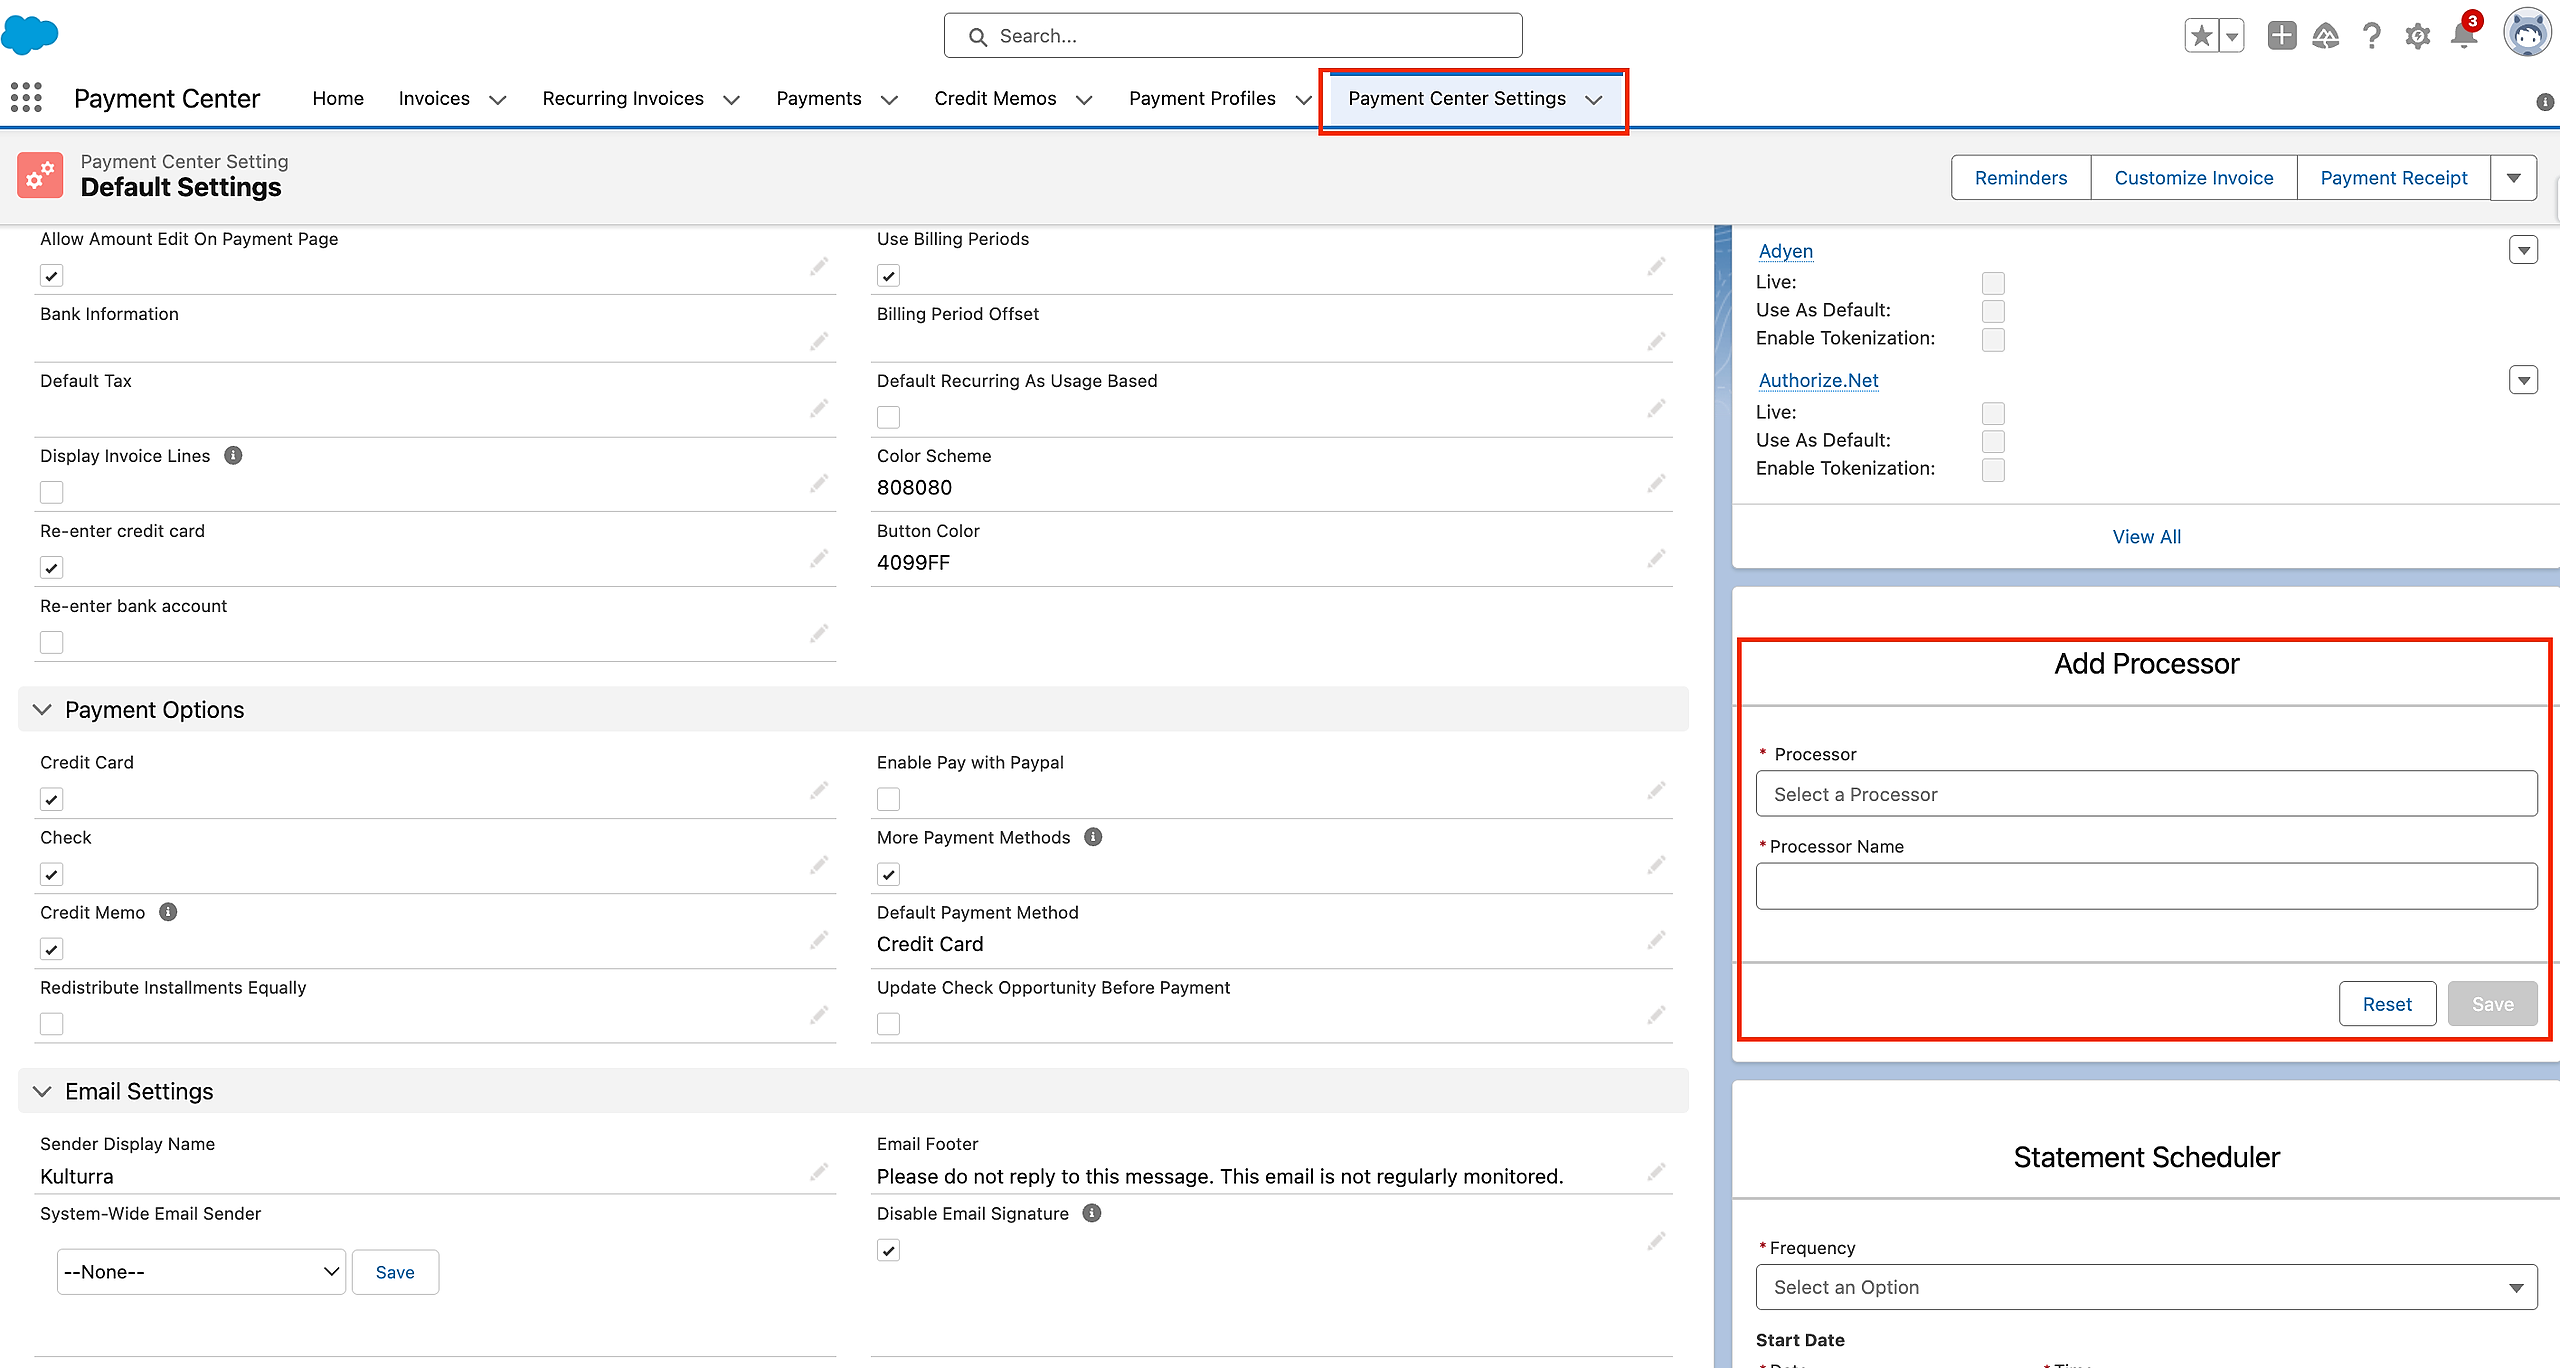
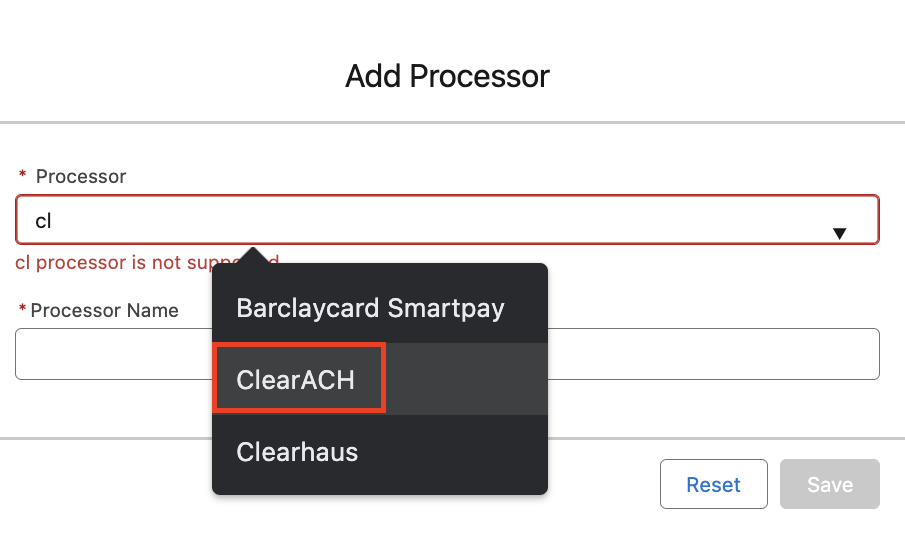
Choose ClearACH: Within the Payment Processors section, locate and click on the entry for ClearACH.
Toggle Account Details: In the ClearACH settings, find the toggle or switch related to Account Details and activate it.
Input your test Company ID in the designated field.
Enter the Access Token provided for testing.
Provide the Payment Terminal information in the respective field.
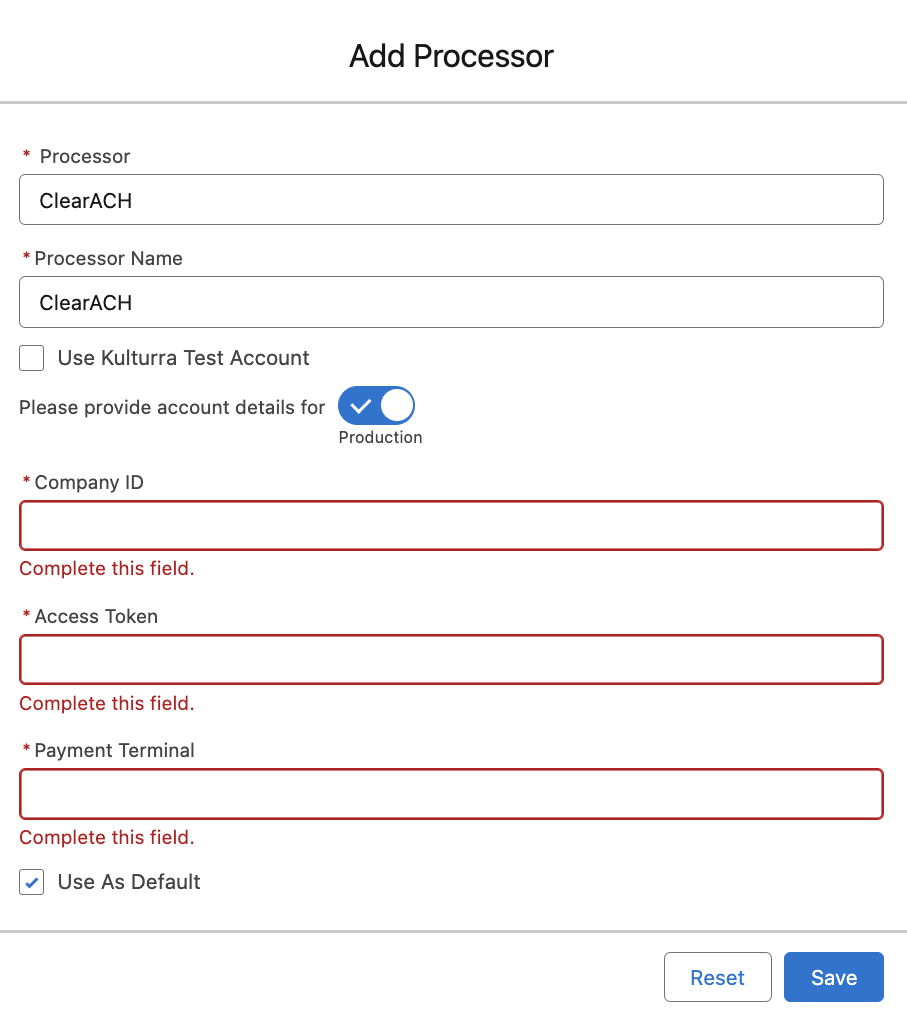
Use Payment Center Pre-installed Test Account (Optional): Alternatively, you can use the Payment Center's pre-installed ClearACH test account for testing purposes. Ensure that the option Use Kulturra Test Account is checked if you opt for this.
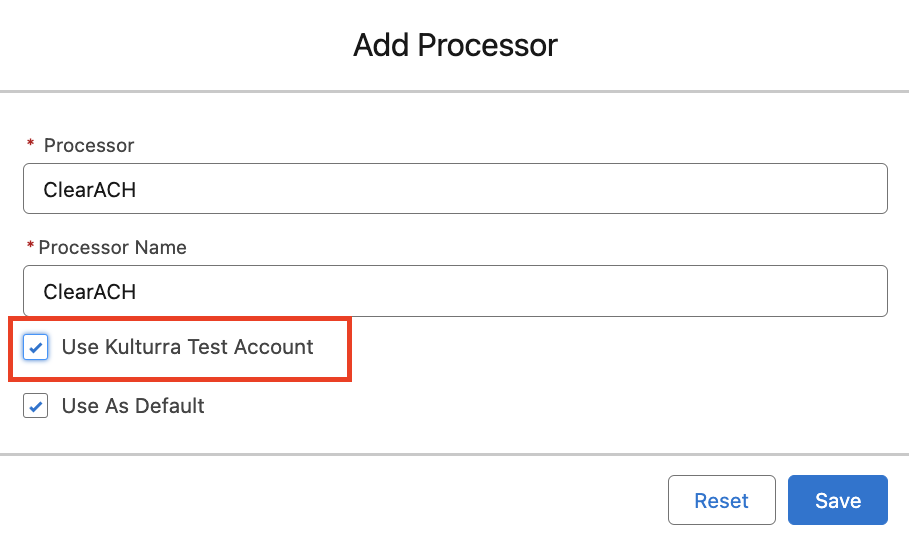
Set as Default (Optional): If you want to use ClearACH as the default processor, check the option labeled Use As Default.
Save the Settings: After entering the test credentials, click the Save button to save the ClearACH settings.
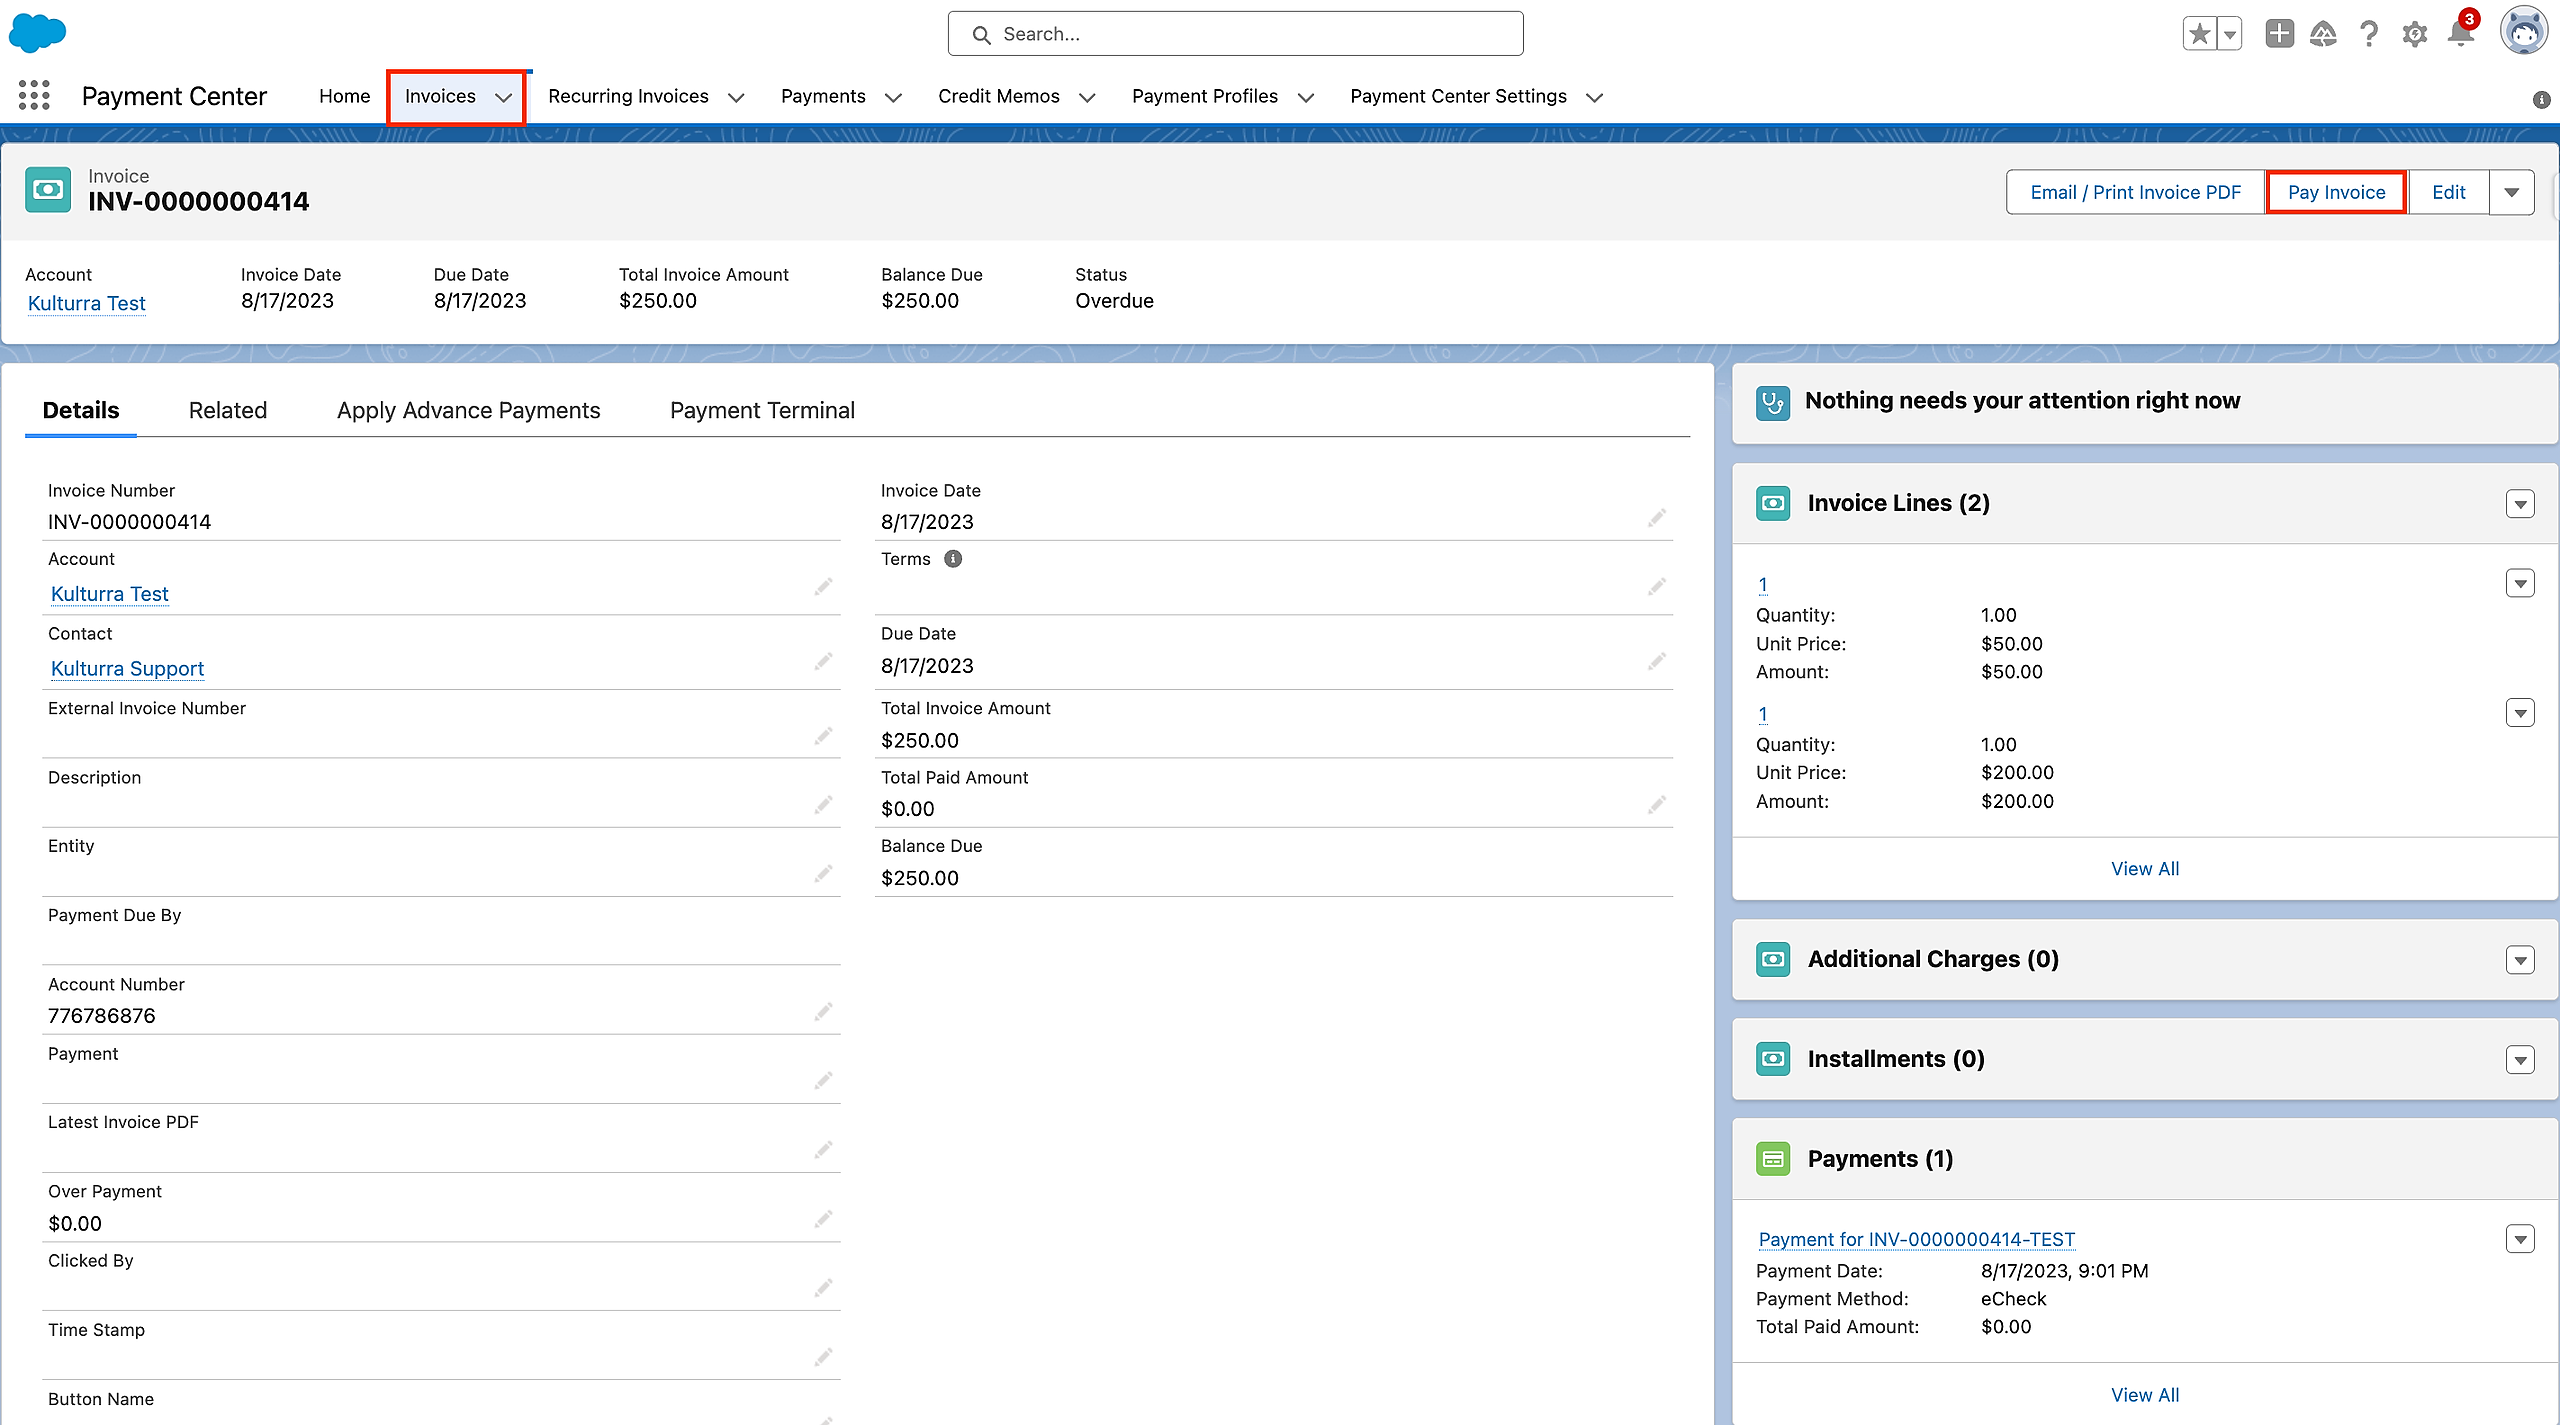
Once the payment processor is generated, this is its resulting appearance.

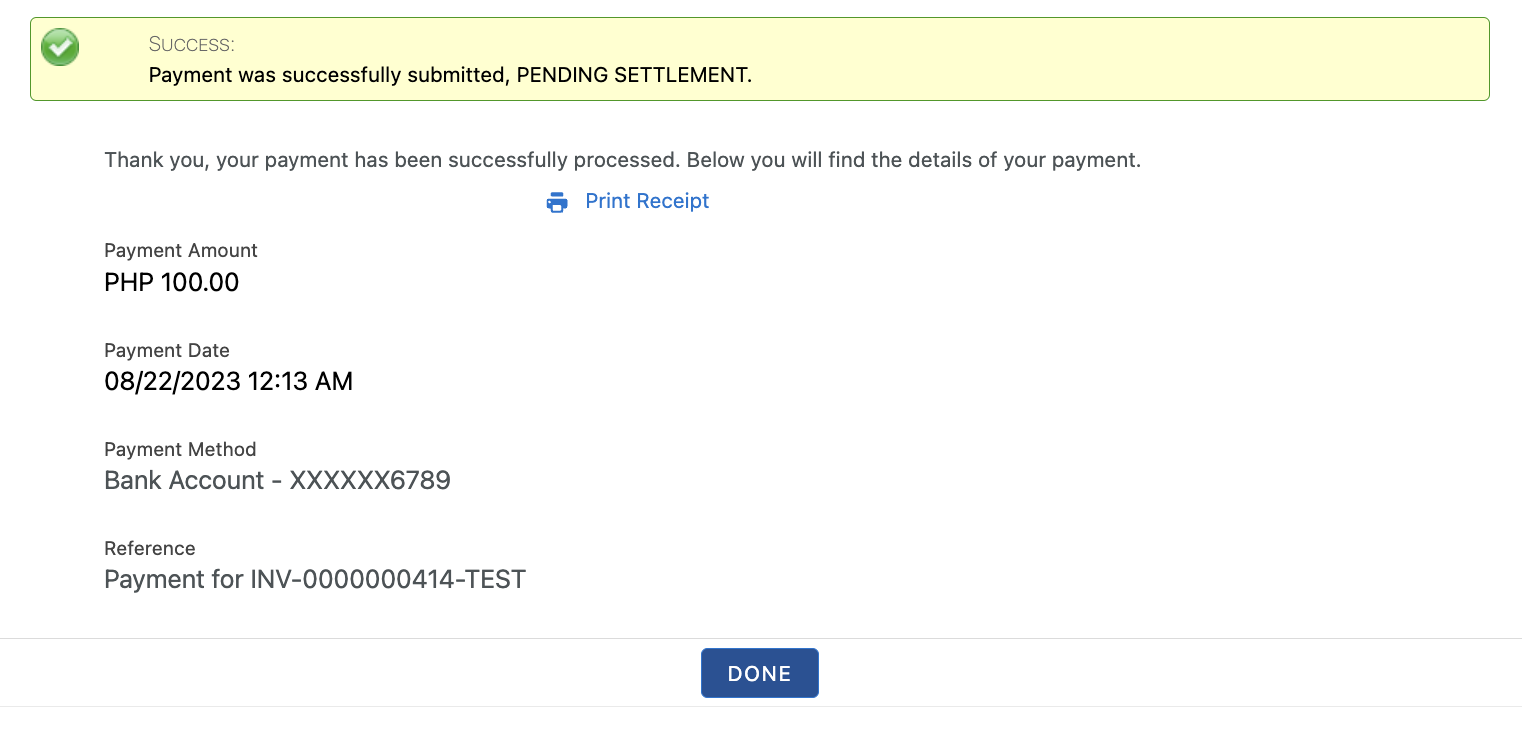
To test how it works, process a payment on an invoice record using the Pay Invoice button.
Navigate to Unpaid Invoice: Locate and select the unpaid invoice that you intend to pay.
Initiate Payment Process: Look for the Pay Invoice option associated with the chosen unpaid invoice. Click on it to start the payment process.
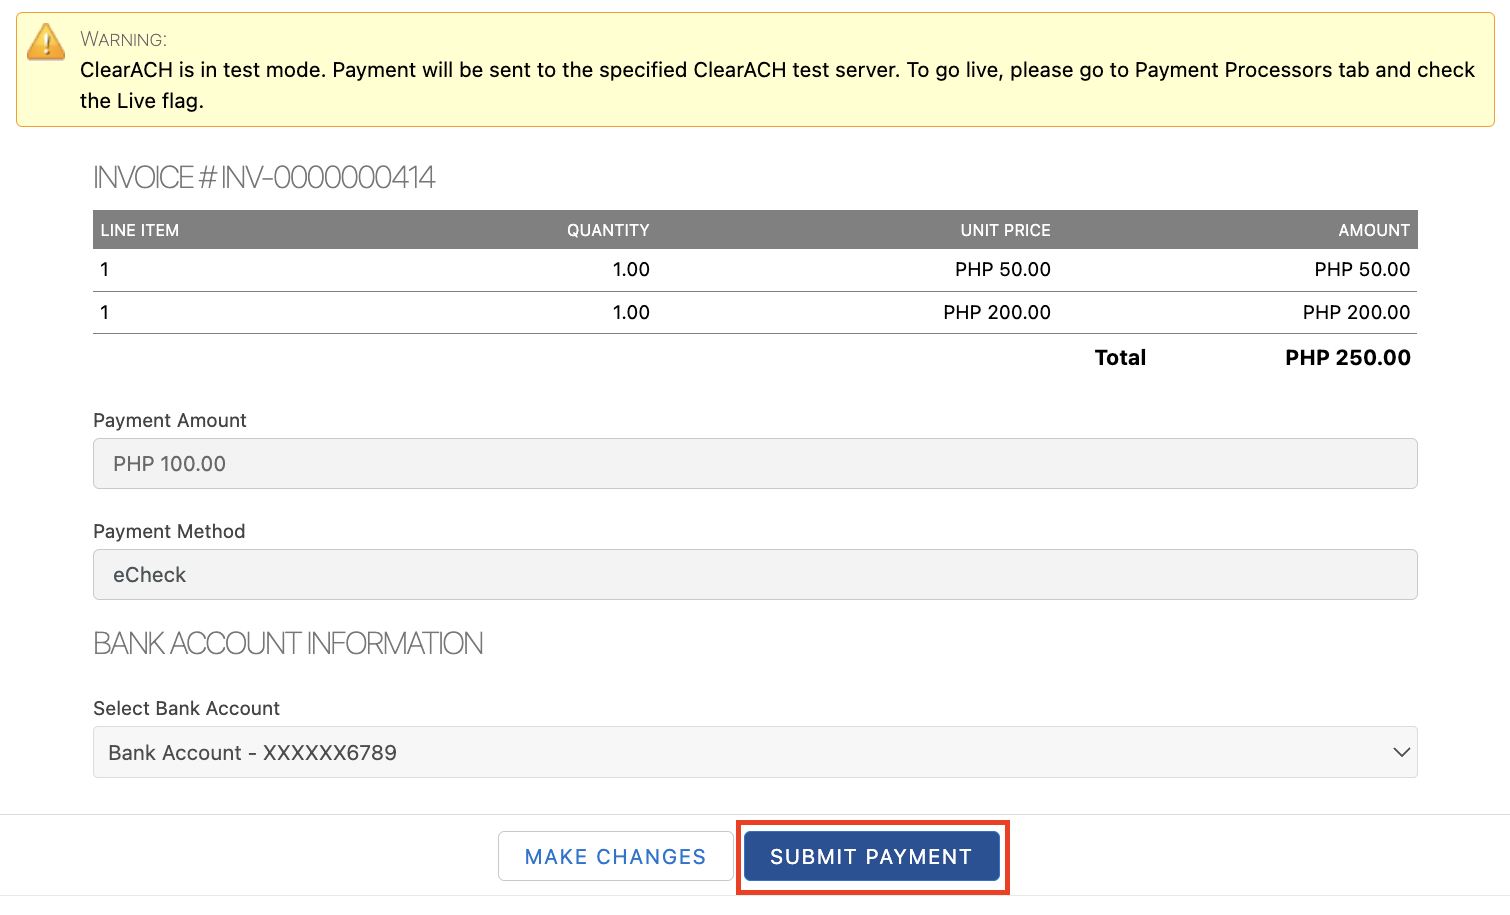
Complete Required Fields: Fill in all the necessary fields on the payment form. Typically, these fields include the payment amount, payment method, bank account details, and any other relevant information. For payment method select eCheck.

Submit Payment: Review the payment information one final time to ensure accuracy. If everything is correct, click the Submit Payment button to initiate the payment transaction.
Payment Confirmation: Once the transaction is processed, you'll receive a payment confirmation. This confirmation might be displayed on the screen, sent to your email, or both.
Availability: Summer '23 Release