This article describes how to create and send invoices.
Follow the steps below to create an invoice:
Go to Invoices tab, then click New.
Select an Account from the Account lookup icon.
Select a Contact. You can only select a contact related to the account. You may leave this blank if you don’t have a contact defined for the account.
Invoice Date takes the current date as its default value. You may change to a different date if desired.
Terms is the number of days the invoice is due.
Due Date is automatically computed based on Terms. If you don’t have Terms, you can also manually enter the Due Date.
Leave Terms Accepted unchecked. This indicates whether or not your customer has agreed to your terms and conditions, which can only happen after you send the invoice.
If you allow your customer to pay a down payment and pay the rest on terms, you can do so by entering the Required Down Payment.
You may enter Invoice Discount Percentage or Invoice Discount Amount. These discounts will be applied against the Total Lines Amount, which is computed based on the invoice lines (you will enter invoice lines right after creating this invoice header). Invoice Discount Percentage is applied first then Invoice Discount Amount is applied to the remaining amount.
You may add Tax percentage, or Shipping and Handling amount.
You should not have to enter anything on the Authorized Amount and Total Paid Amount fields. These fields will be populated when payments are made against this invoice.
Click Save to create the invoice.
On the Invoice Lines related list, click New Invoice Line.
Enter Line Item. This would be any name that identify your product (or service).
Enter Quantity and Unit Price.
You may enter Discount Quantity, Discount Percentage or Discount Amount. Discount Quantity is applied first, then Discount Percentage, then Discount Amount. Each discount is applied to the net amount after the previous discount is applied.
Click Save to create the invoice line or Save & New to create another line.
Sending an Invoice
In the invoice detail, click Email / Print Invoice, as shown below:

You may edit the Subject and Message. Values were taken from the invoice record Email Message and Email Subject fields. These fields are populated with Payment Center Settings default upon invoice creation. CC Recipients can also be added.
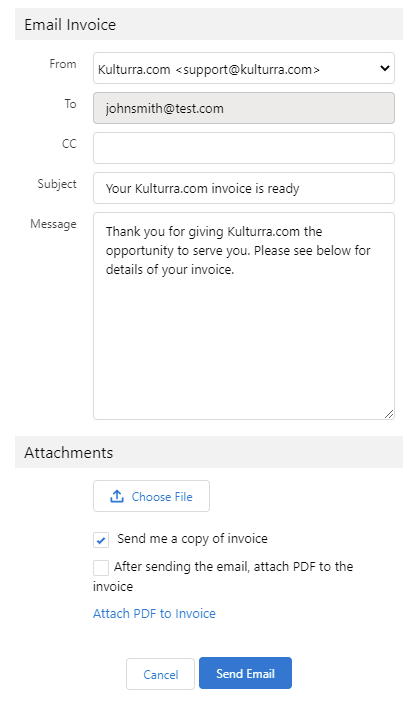
A Preview of the Invoice PDF will also be displayed on the screen.
Click Send Email to email the invoice.
Want to dive deeper? Check out this video for easy-to-follow demos, clear explanations, and more helpful tips on everything we’ve covered here.