What is Custom Payment Validation?
This feature allows you to extend and customize the default payment validation logic by creating your own rules. By using a simple yet powerful approach, developers can craft precise payment validation criteria, ensuring that each transaction adheres to the business's unique requirements.
How to Build Your Custom Payment Validator
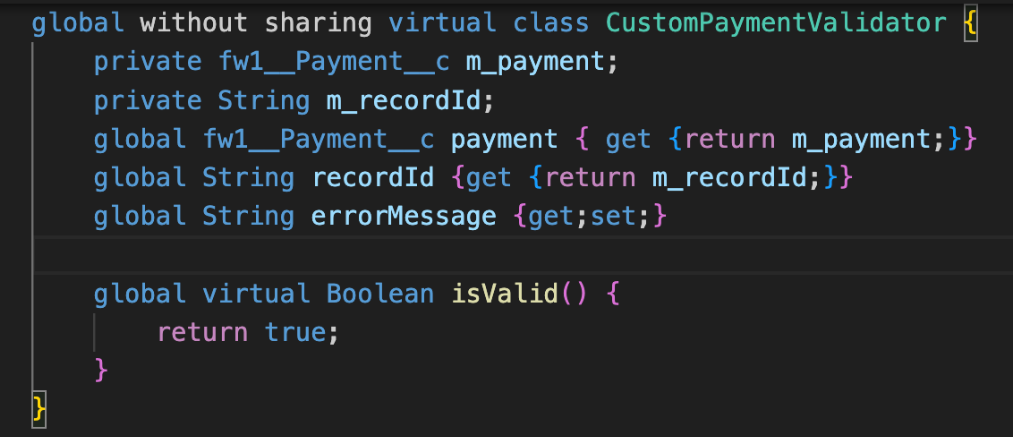
To get started, you’ll need to create an abstract class that holds your custom payment validation logic. This custom validator class takes in an ID representing the record to be paid, as well as the payment details, and uses this information to validate the transaction against your defined rules.
Step-by-Step Guide to Injecting Your Custom Validator
Once you’ve defined your custom validation logic, the next step is integrating it into the Payment Center to enforce your custom rules during payment processing. Here’s how:
1. Create Your Validator Class: Start by building your own custom validator class. To do this, simply extend the fw1.CustomPaymentValidator class. This step gives you access to the core framework needed to define your own validation rules.
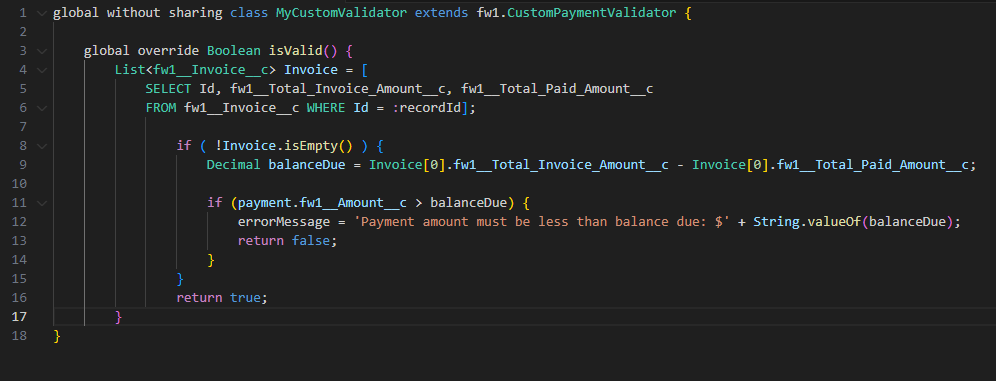
2. Override the isValid() Method: The heart of your custom payment validator lies in the isValid() method. By overriding this method, you gain full control over the validation process, allowing you to define exactly what makes a payment valid according to your business logic.
This is how it will look like:
Configure the Payment Center to Use Your Custom Validator
Now that your custom validator is ready, it’s time to connect it to the Payment Center. Follow these steps:
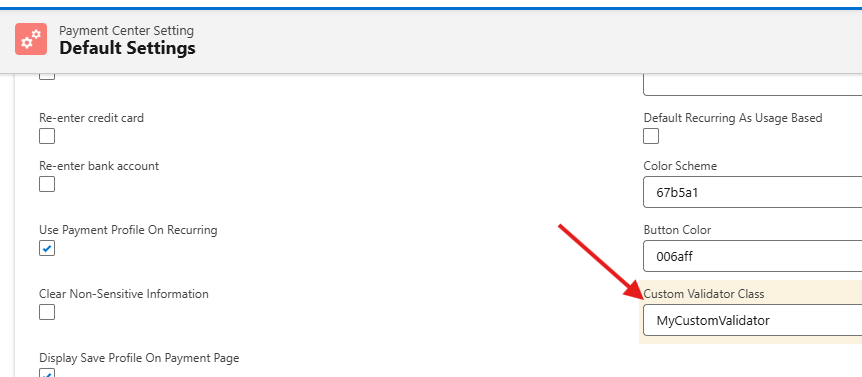
Go to Payment Center Settings and find the field labeled Custom Validator Class. If the field is not available, you need to add it to the Payment Center Settings Page Layout.
Set the value of this field to the name of your Apex class.
Save your changes.
Once completed, the Payment Center will use your custom validation logic during every payment transaction, ensuring that only payments meeting your specific criteria are processed.
Why Use Custom Payment Validation?
By customizing your payment validation logic, you can:
Ensure that only valid transactions proceed through your system.
Implement unique business rules for different types of payments.
Create a more streamlined, secure, and tailored payment experience for both you and your customers.
Whether you're handling complex payment workflows or enforcing strict validation rules, custom payment validation gives you the flexibility you need to meet your business’s unique requirements.
Testing Custom Validation
To test your custom payment validation in a test environment, follow these simple steps:
Navigate to an Unpaid Invoice: Open the unpaid invoice you wish to test and click the Pay Invoice.

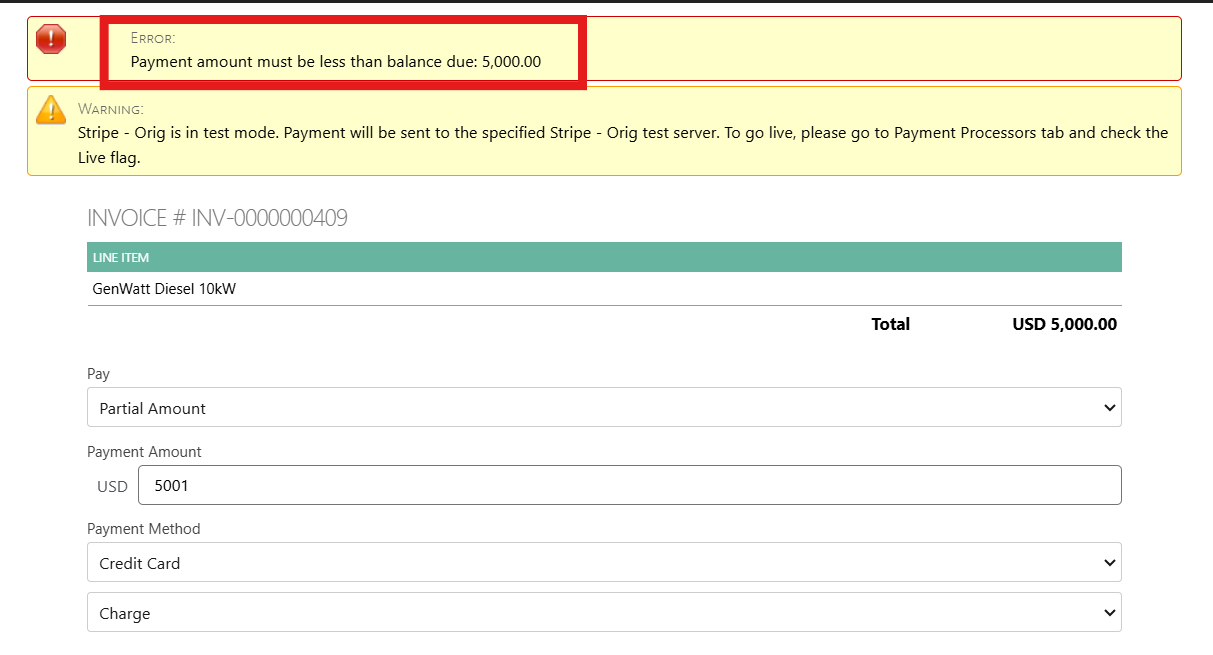
Enter a Payment Amount: In the Payment Amount field, enter an amount greater than the balance due on the invoice.
Process the Payment: Proceed with processing the payment as usual. Once you do this, you will encounter a validation error message, indicating that the payment does not meet your defined validation criteria.
Availability: Winter '25