If you're using IPPay as your processor, this article describes the steps necessary to connect Payment Center to your IPPay account.
IPpay Set up:
Sign up for an IPpay account. You can visit their website for more details.
After signing up, make sure to obtain the Terminal ID from IPpay, as you would be needing this information to connect Payment Center to your IPpay account.
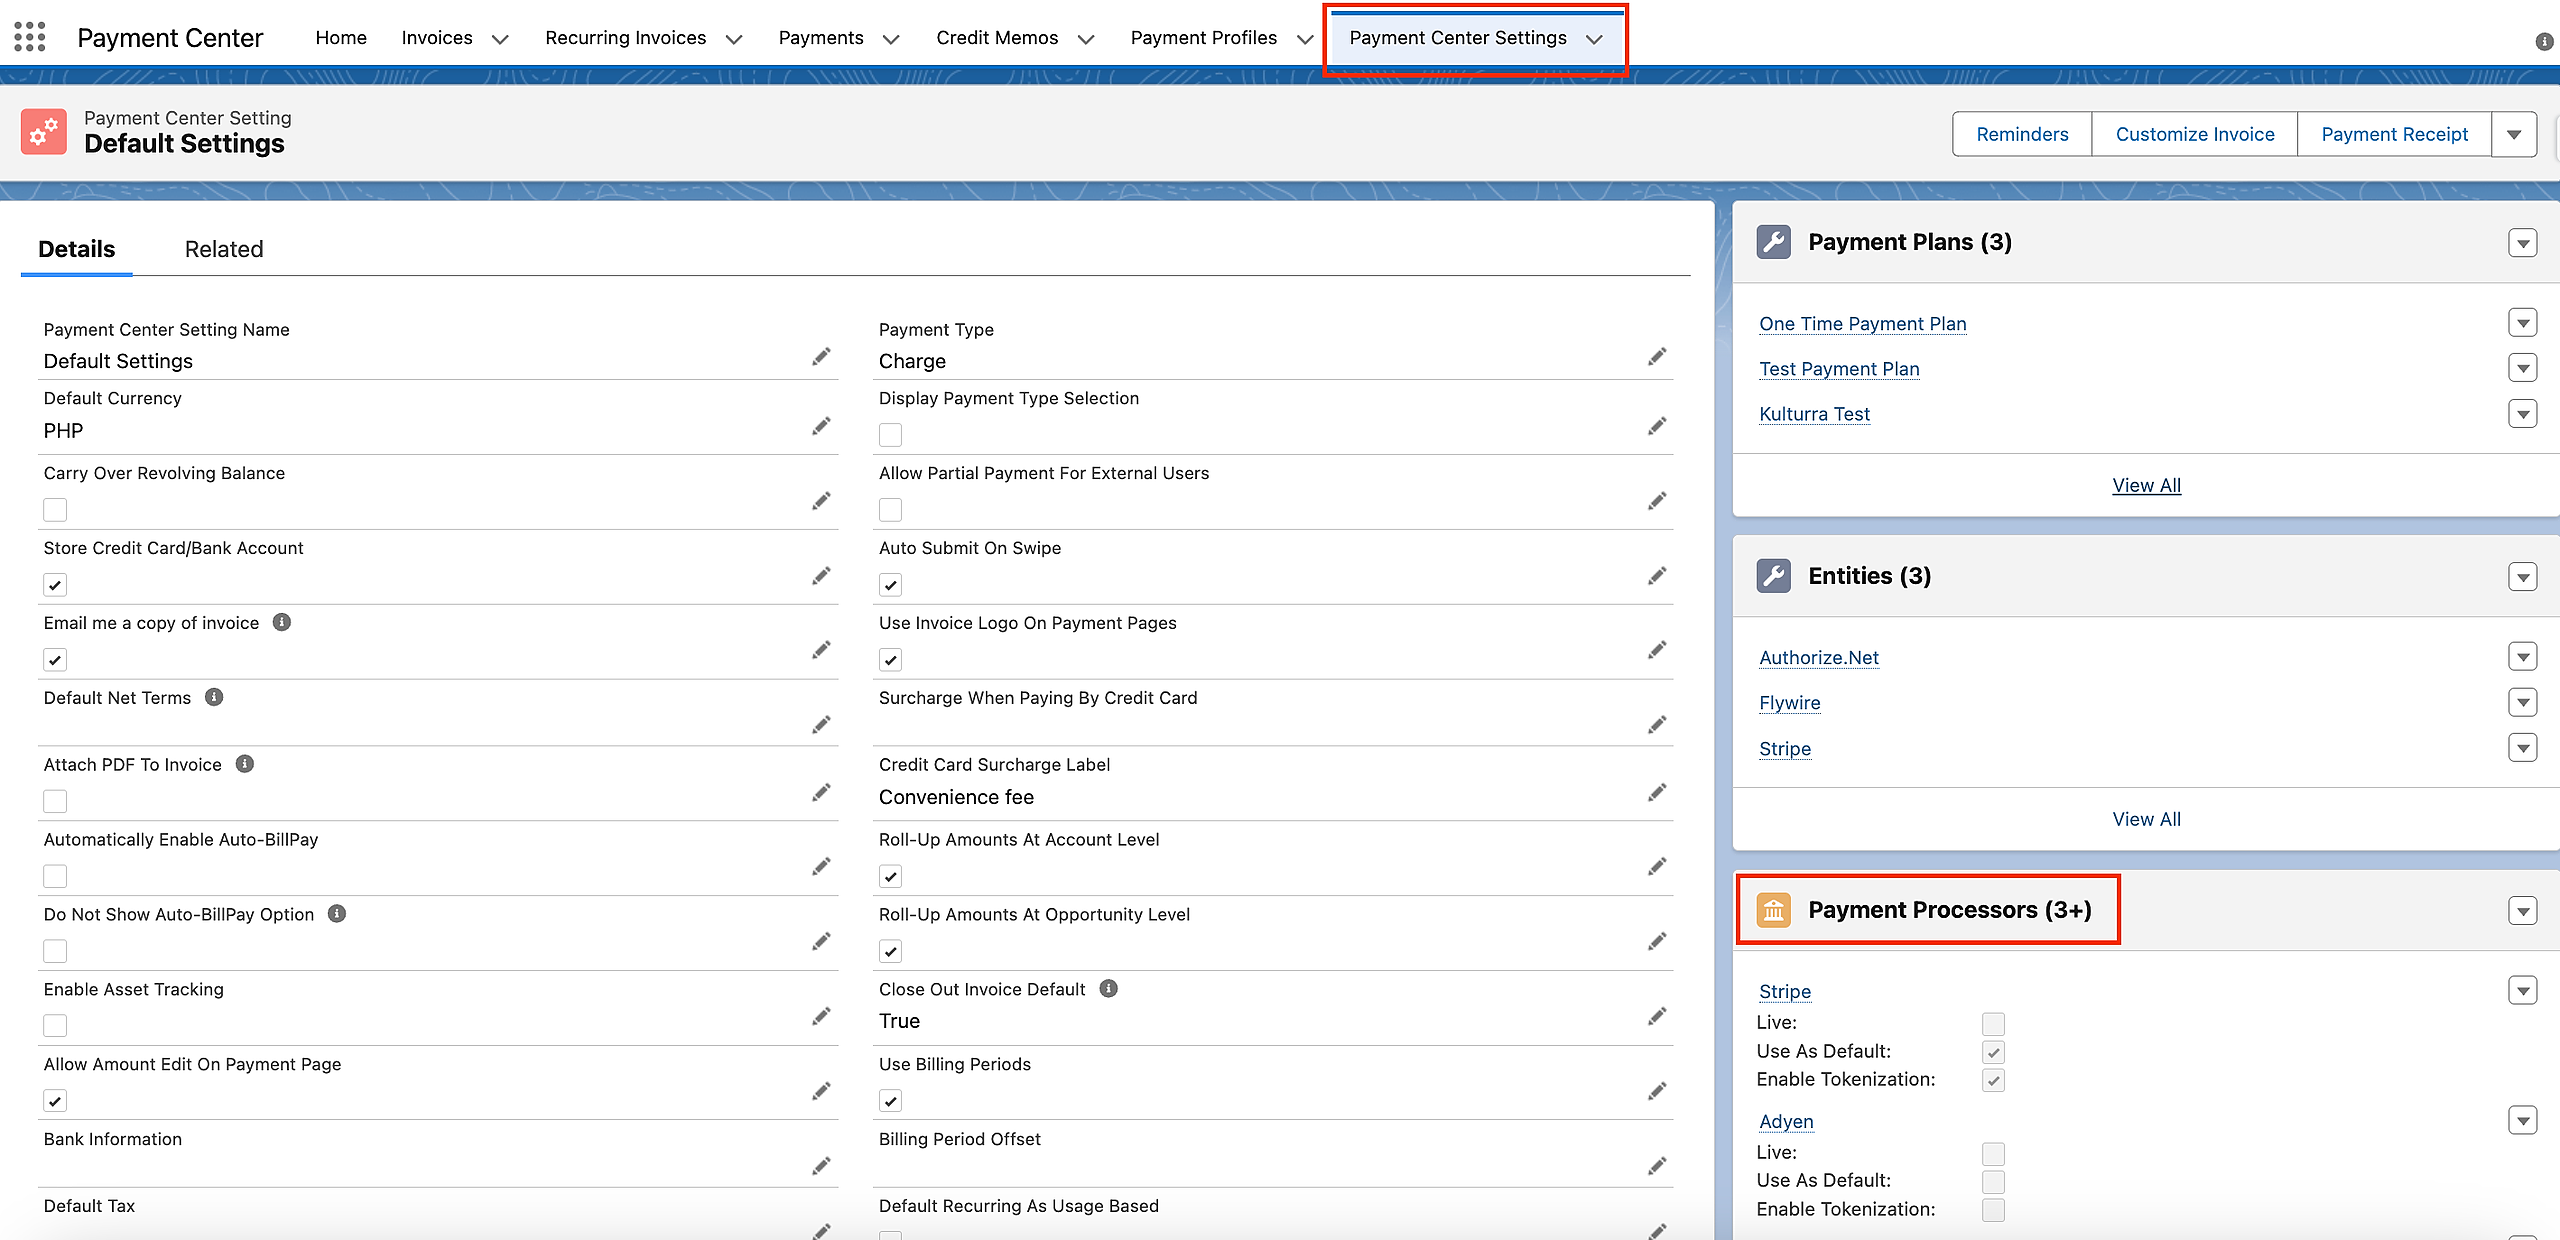
Payment Center Settings
Navigate to Payment Center Settings.
Within Payment Center Settings, locate and select "Payment Processors."
Click New button | Look for IPPay in the list of payment processors and select it.

Choose IPPay as the Processor and input "IPPay" as the Processor Name.
Add the Terminal ID as provided by IPpay.
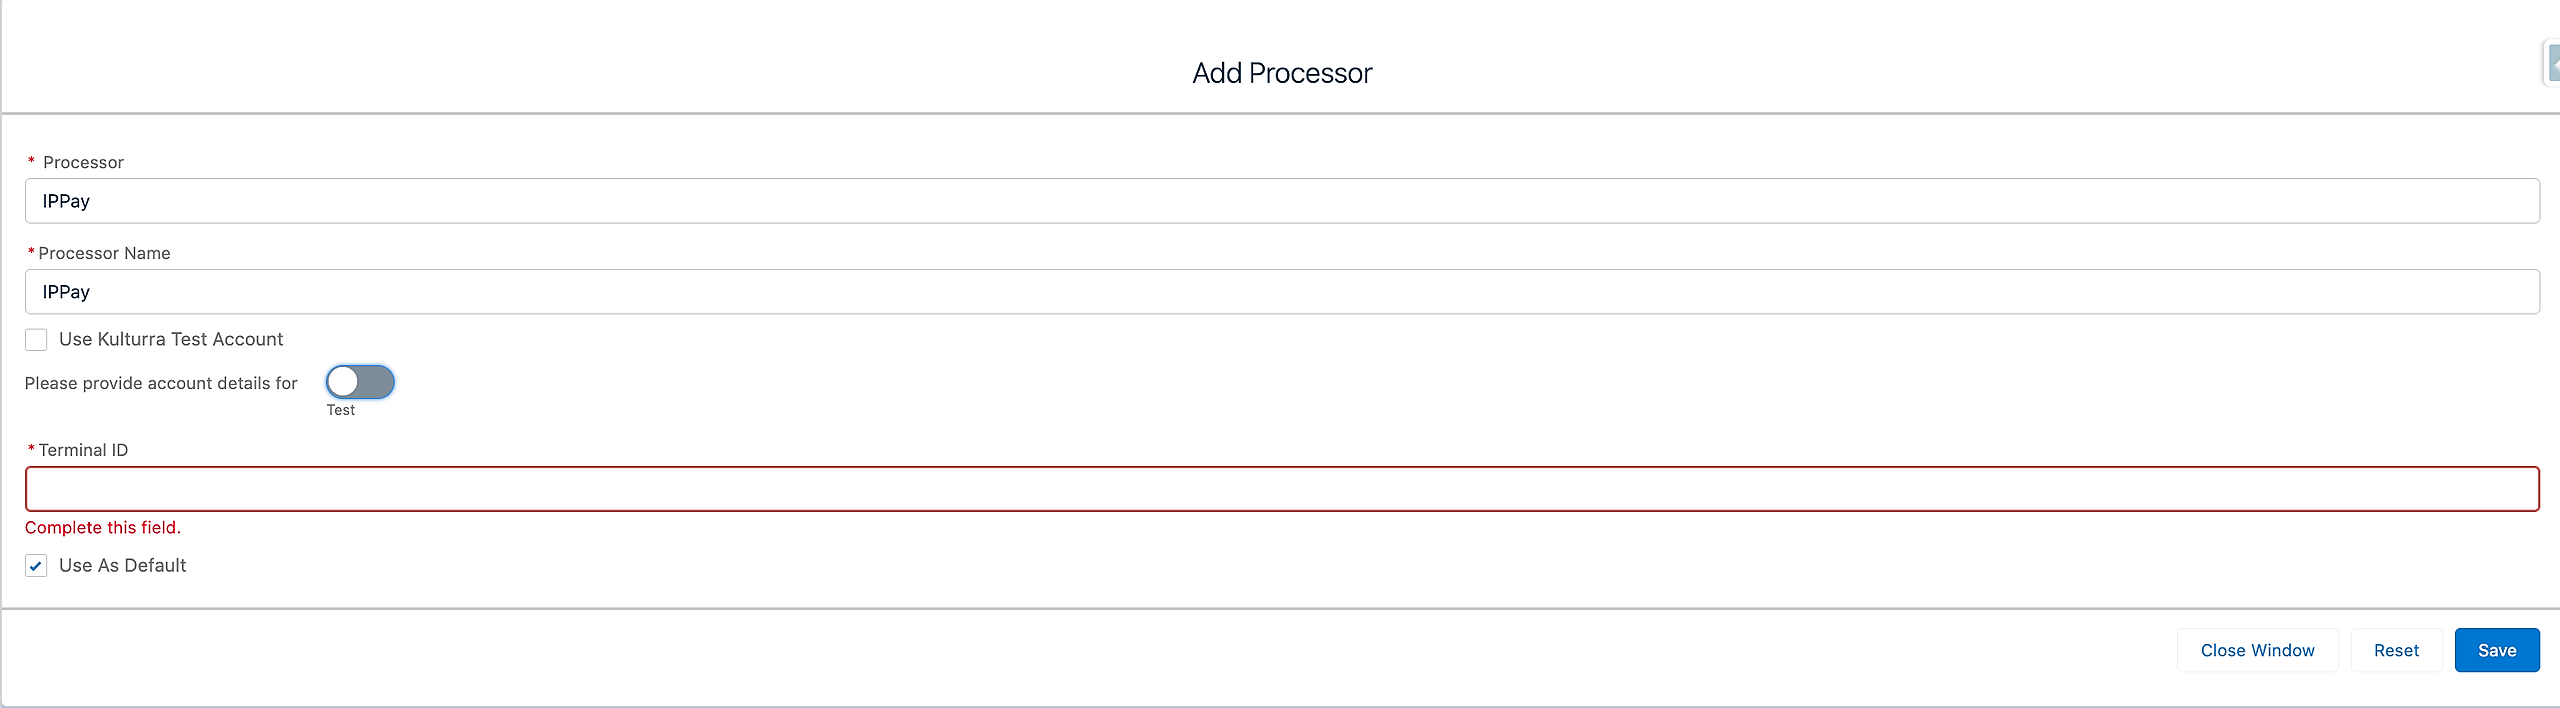
Check ‘Use As Default’ and Save.
Testing
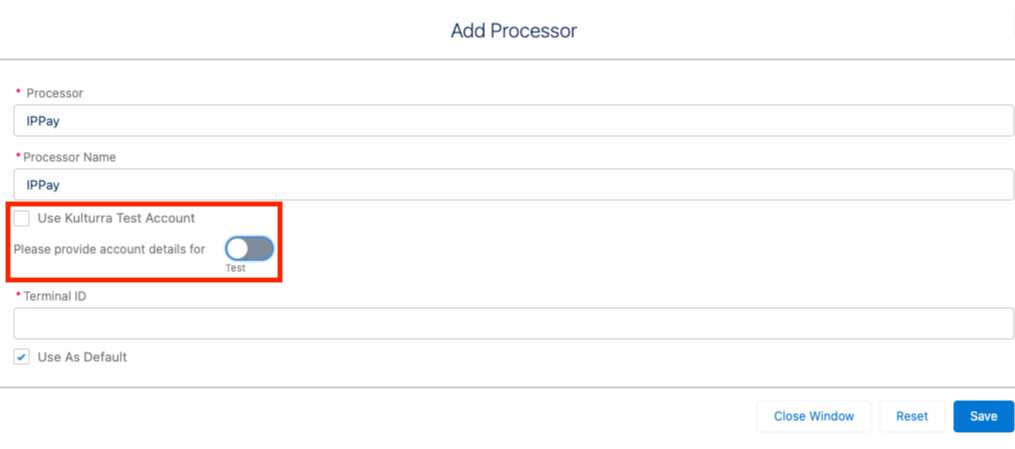
From Processor Settings switch to Test Mode.
Change the mode to "Test" to configure the integration for testing purposes.
Alternatively, you can use the Payment Center pre-installed IPPay test account. Ensure that the option 'Use Kulturra Test Account' is checked.
Check 'Use As Default': Your IPPay integration within Salesforce is now configured for testing.
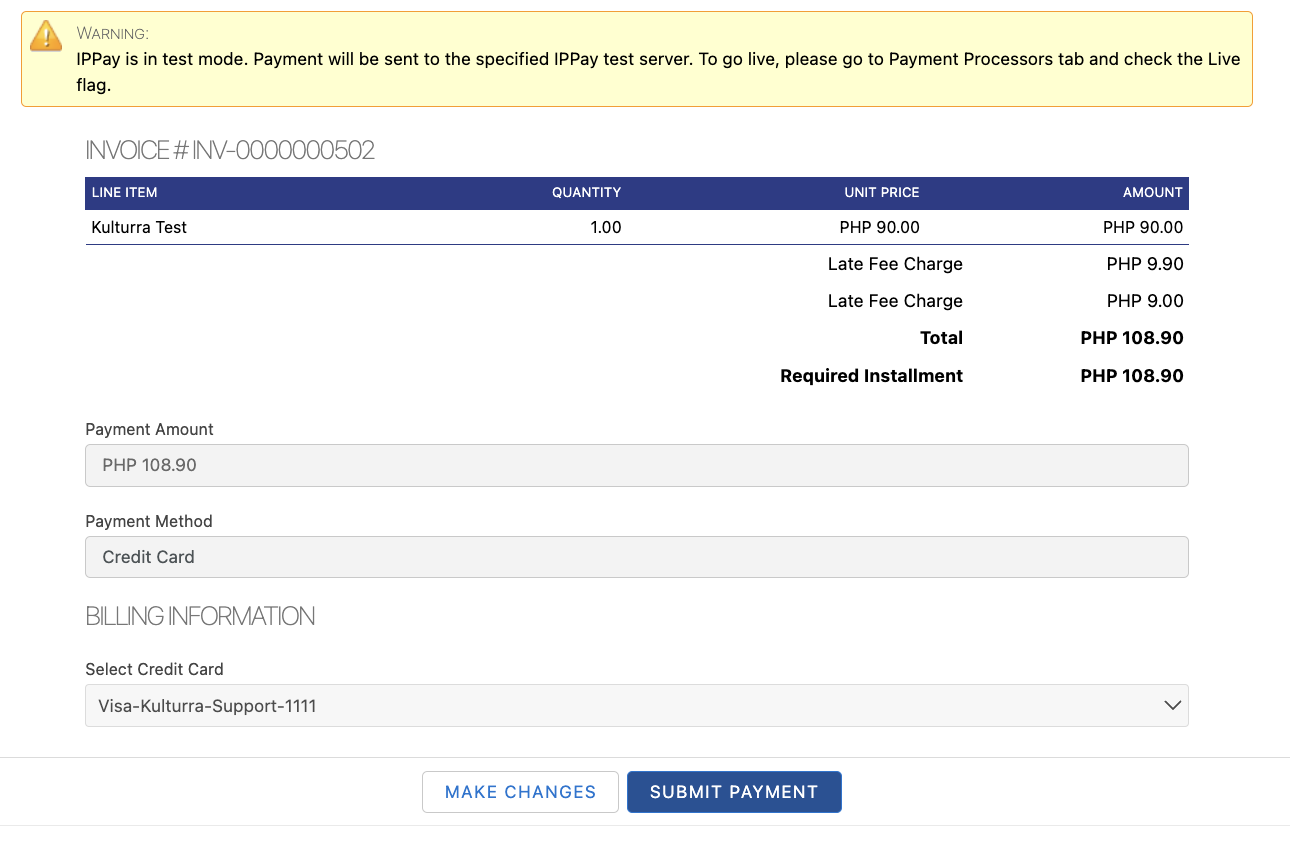
Live flag should be unchecked, as shown below:

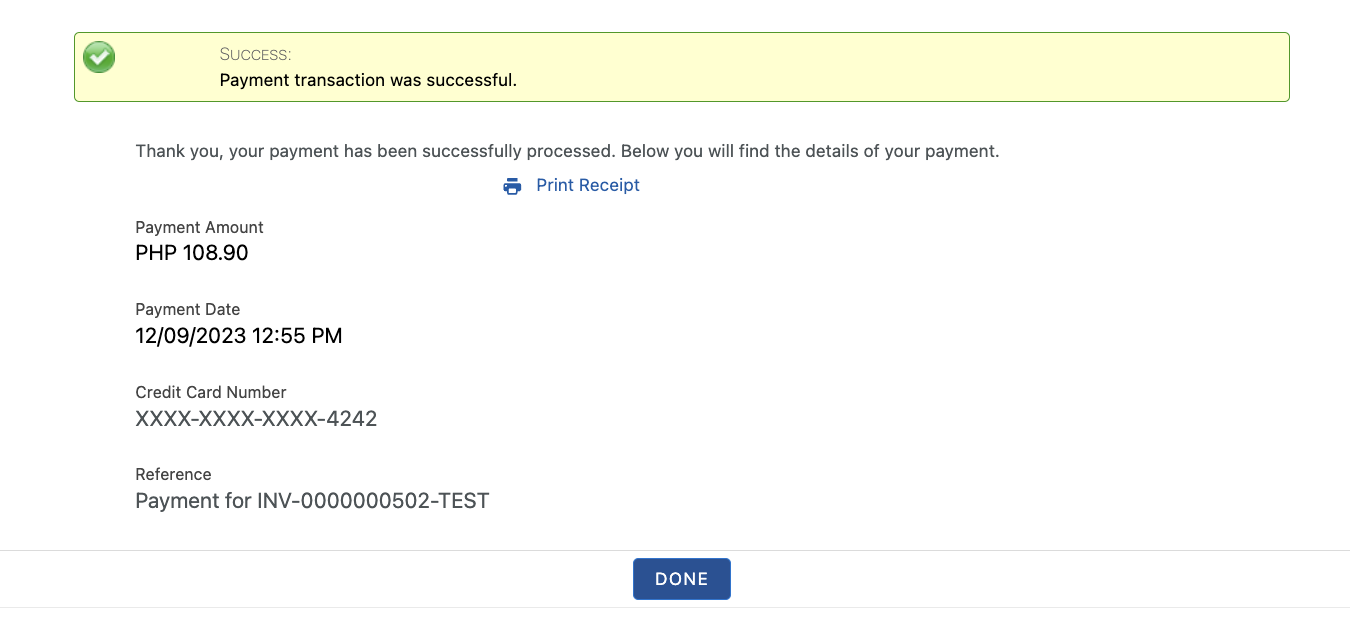
To do a test payment transaction, do the following:
Go to Payments tab then click New.
Select IPPAY as the Payment Processor.
Use the following credit card information:
Credit Card Type : Visa
Name on Card : Any name
Credit Card Number : 4111111111111111
Expiration : Any future date
Follow onscreen instructions until you successfully process the payment.
Additional Settings
Require CVV2 – check this box if you require the security code (CVV2) for every payment.
Enable eCheck – check this box to enable eCheck or ACH payments.
Default Business Checking – there is an option when paying by ACH asking whether the account is a business checking account or not, check this box to default the option to true.
Enable Tokenization
Require Billing Address – check this box to require the billing address when paying by credit card.
Require Billing Zip/Postal Code – check this box to require just the zip code.
Enable Card-Present Transactions – more information about this flag can be found here
Going Live
To go live, go to Payment Center Settings tab. Under Payment Processors related list, click IPPAY.
Check Live and Use As Default boxes, then click Save:
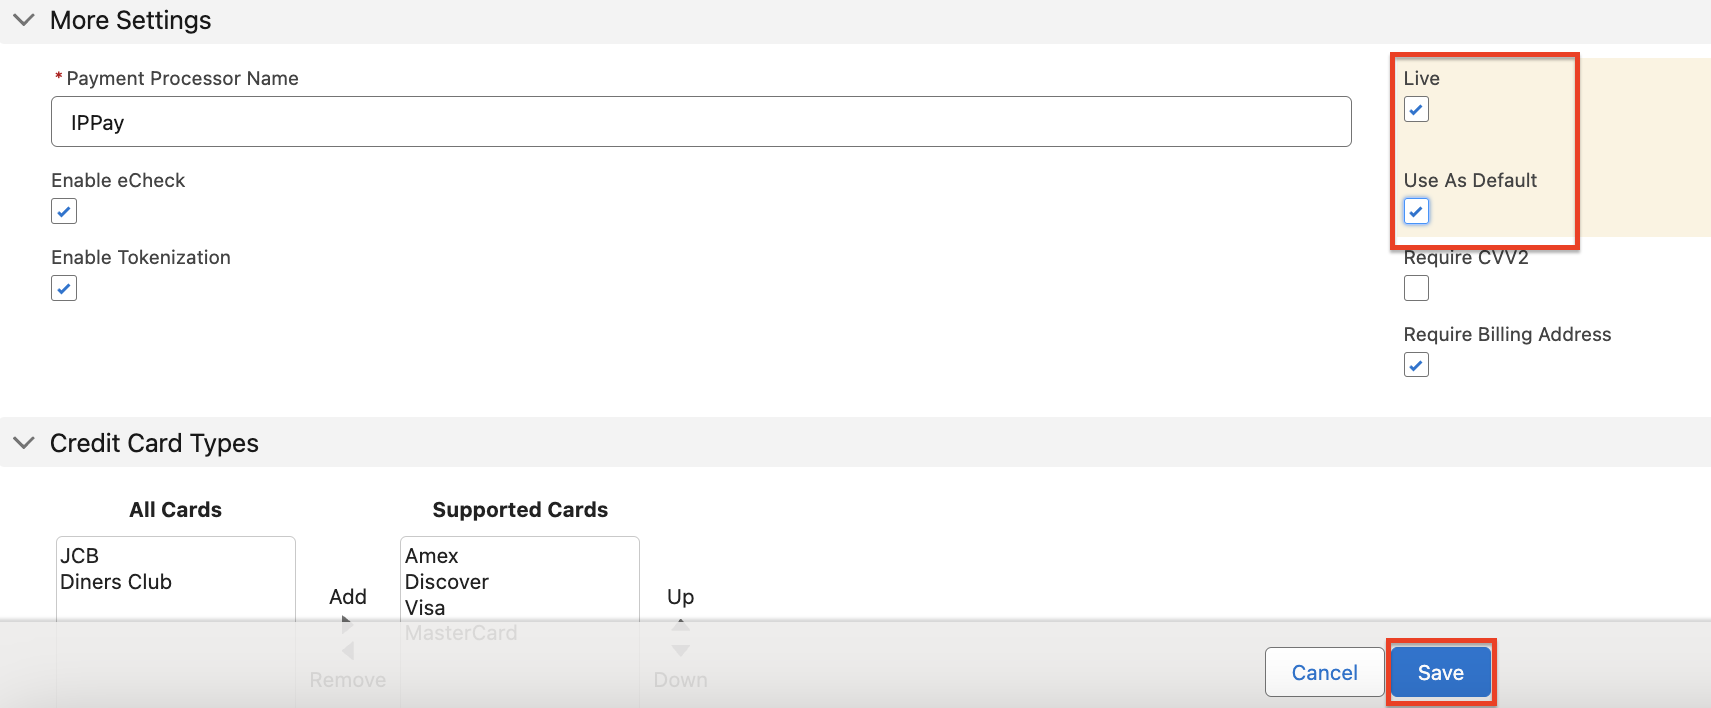
Also ensure that your IPPAY account is in live mode.
Availability: Winter '24