This article describes the necessary settings in order to integrate PayLeap with Payment Center.
PayLeap Account
Sign up for a PayLeap account (http://www.payleap.com/sign-up-for-payleap/)
Once signed up, get your Transaction API and plug them into Payment Center. Sign in to your PayLeap account and go to the Preferences | Create Transaction Key. Click Submit to generate an API transaction key.
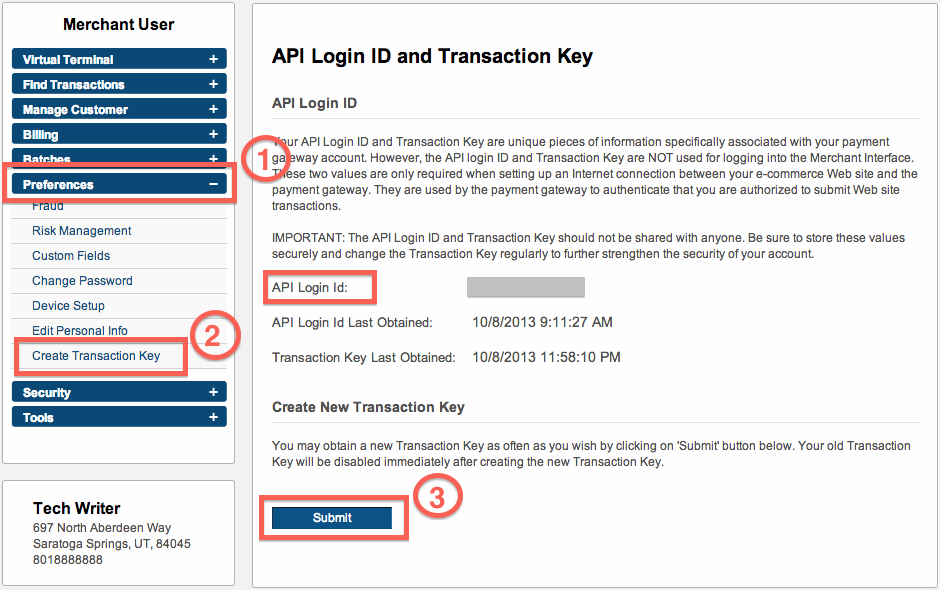
Make a note of your API transaction key and your API Login ID.
Payment Center Setup
Login to your Salesforce account and go to Payment Center Settings tab.
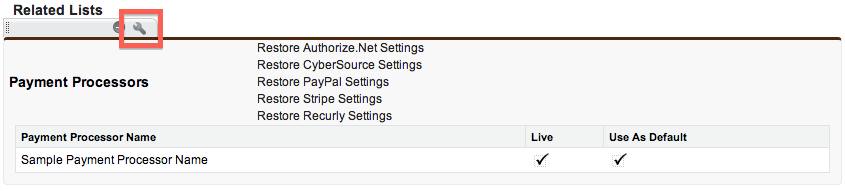
In the Payment Processors related list, click PayLeap.
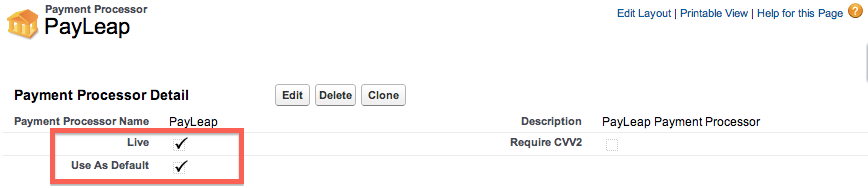
In the Live Settings section, enter your API Login ID in the API Live User field and your API transaction key in the API Live Transaction Key field:

When you are ready to go live, ensure to check the Live and Use As Default boxes, as shown below; also ensure that your account with PayLeap is live. Please contact your PayLeap account manager to switch to live mode.
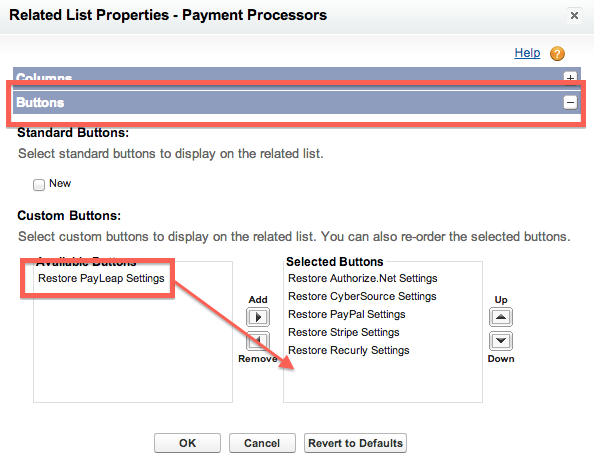
If you can’t find PayLeap in the list of payment processors, add Restore PayLeap Settings button in your layout. Edit your page layout and edit properties for Payment Processors related list:
Expand Buttons section and move Restore PayLeap Settings in the Selected Buttons section:
Once added on the layout, click the button to add PayLeap in your list of processors.