How can we help you?
Search our knowledge base to get answers to your questions, access video training & more!
Setup
Adding Your Logo to Your Payment Page
In the world of business, a strong brand identity is paramount. An essential component of this identity is your company's logo, which serves as a visual representation of your values and offerings. Invoices, being a fundamental touchpoint with customers, provide an excellent opportunity to reinforce your brand.
Updated 3 weeks ago
Here's how you can seamlessly integrate your logo into both your invoices and payment pages:
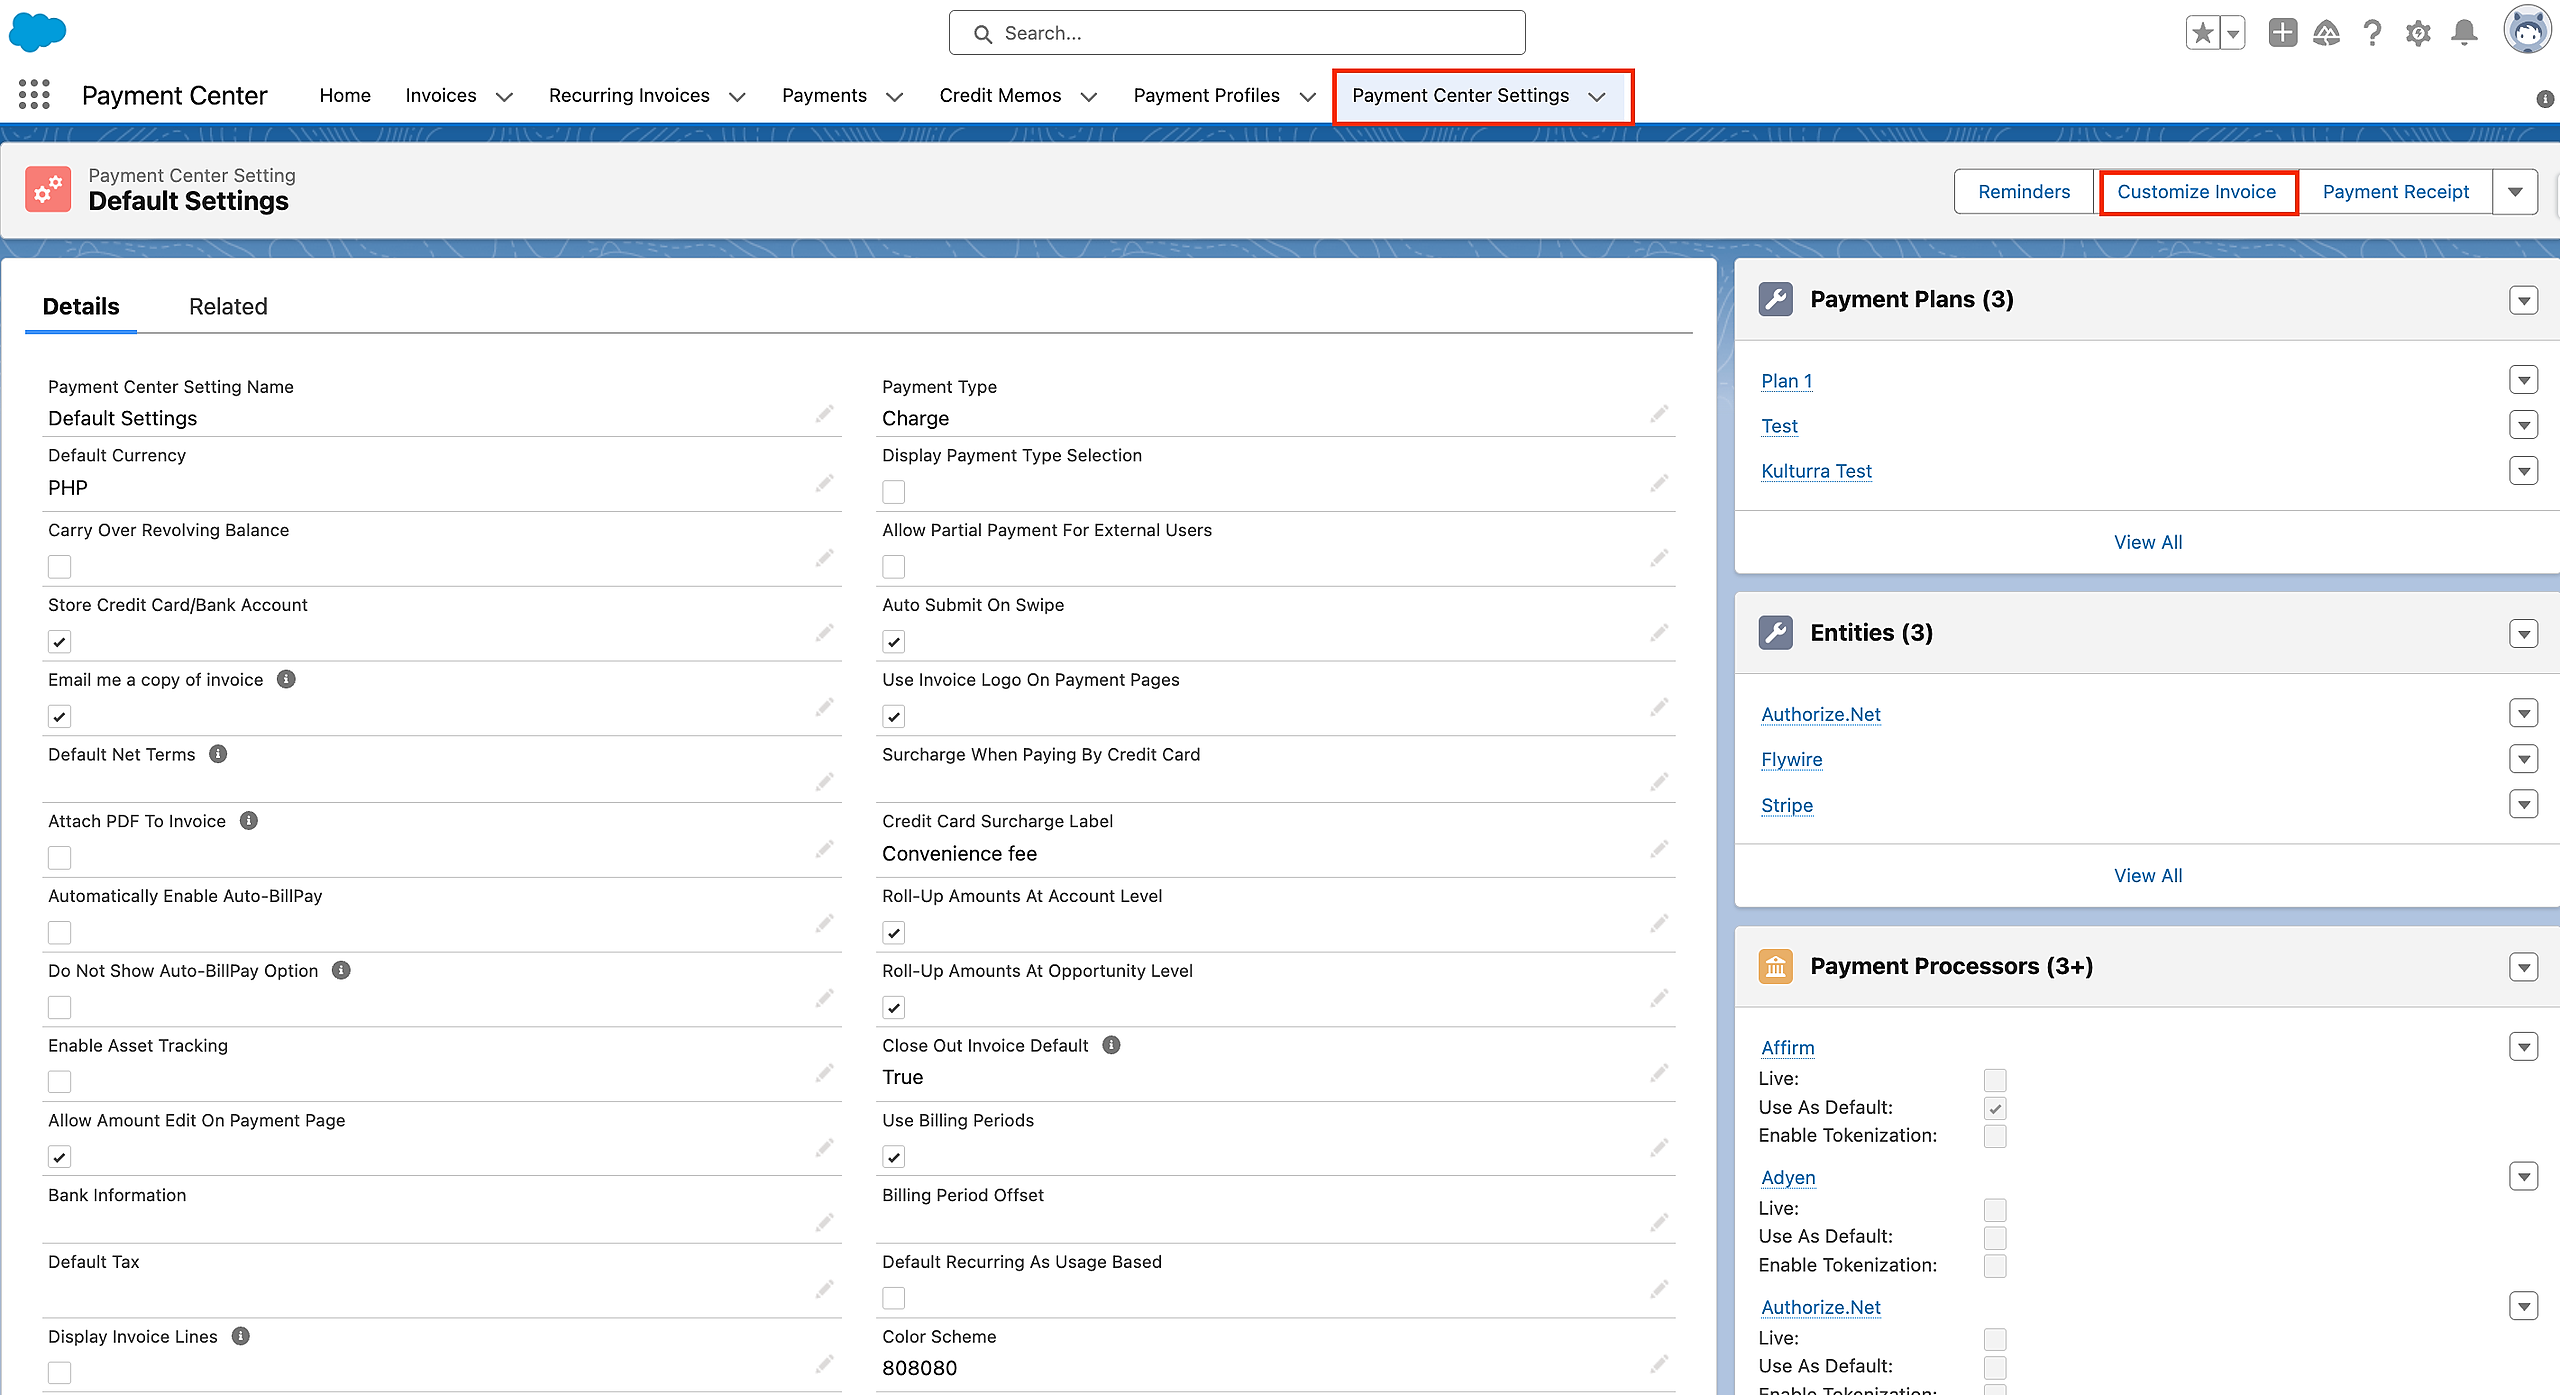
Access Payment Center Settings: Navigate to this tab, where you'll discover a range of options to tailor your payment processes.
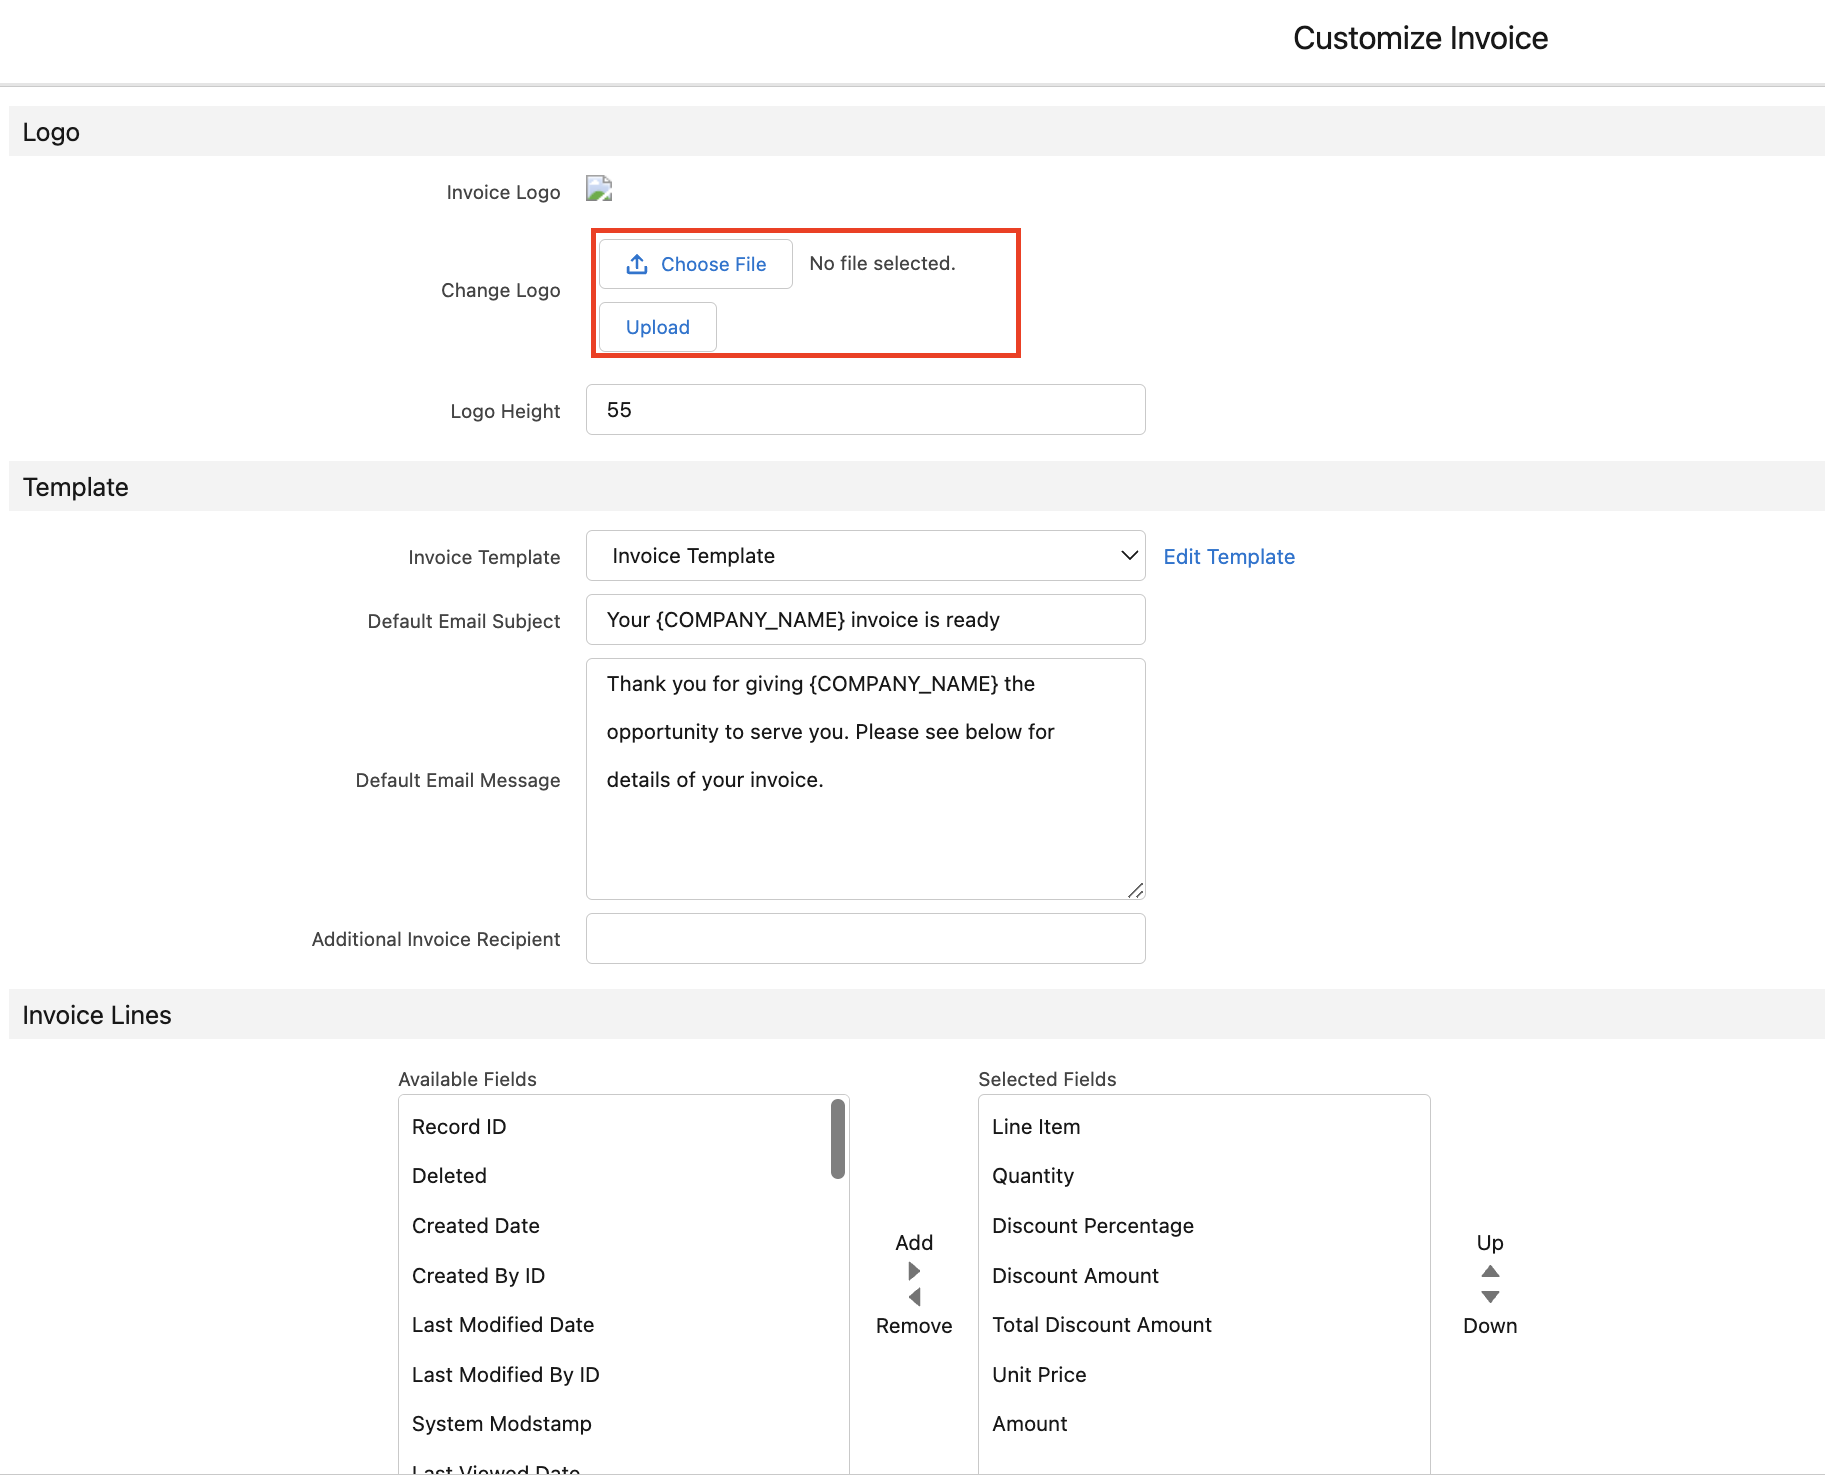
Customize Your Invoice: Within the Payment Center Settings, locate the "Customize Invoice" button. This is your gateway to personalizing the appearance of your invoices, and more importantly, adding your logo to them.
Click the 'Choose File' button to pick the logo from your computer, then proceed by clicking 'Upload'.
Extending the Brand to Payment Pages:
You can amplify your brand's impact by ensuring your logo graces the payment pages as well. Simply check the "Use Invoice Logo In Online Payment Page" option. If this field isn't already on your layout, make sure to add it.
You add your logo to your invoices by going to Payment Center Settings tab | Customize Invoice button. To use the same logo on your payment page, check Use Invoice Logo In Online Payment Page (please add the field to your layout if it’s not there):
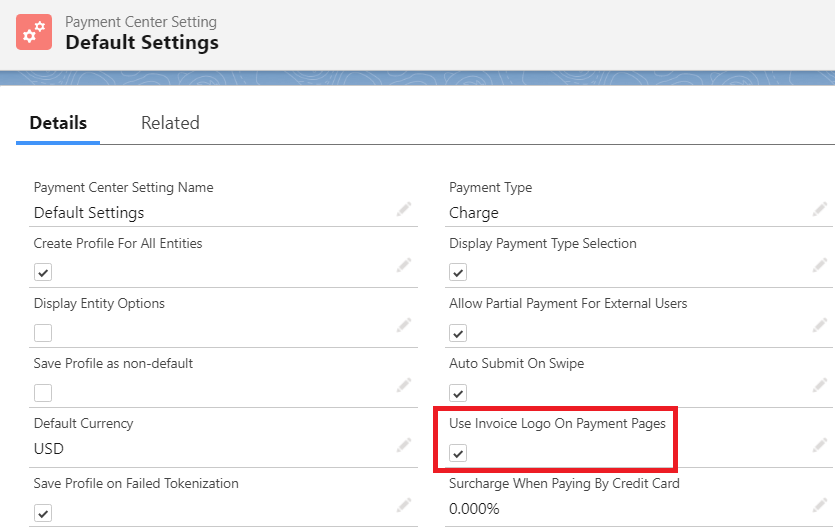
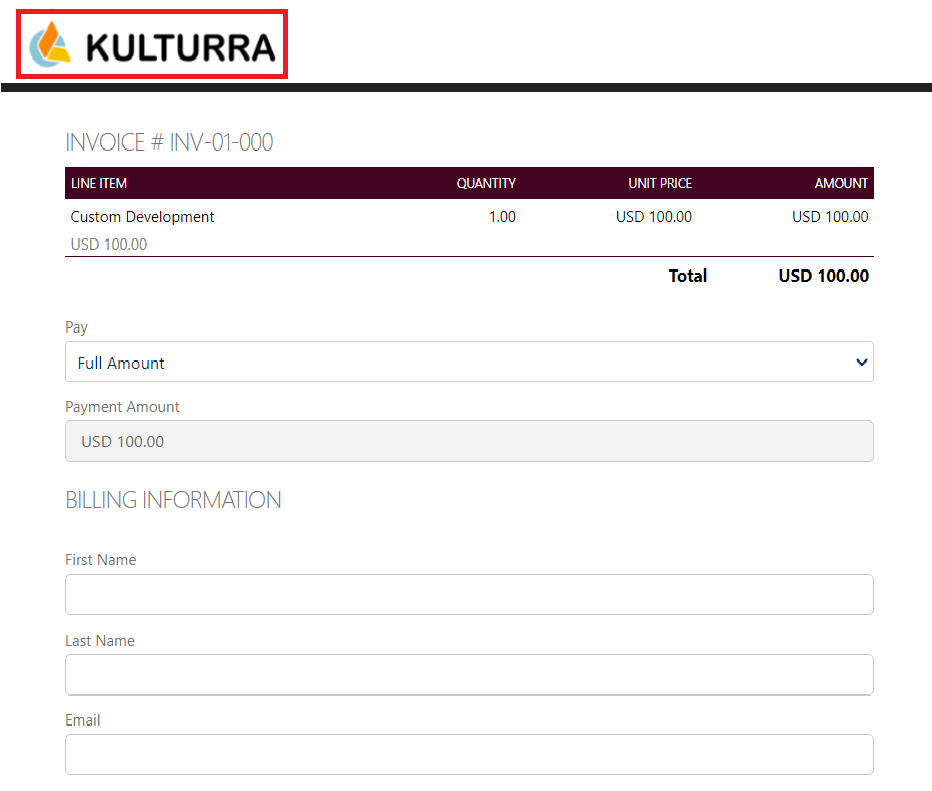
When the box is checked, your logo will appear in your online payment page, as shown in the screenshots below:
This feature is available in the November 2013 release.