How can we help you?
Search our knowledge base to get answers to your questions, access video training & more!
Setup
Fortis Integration
Updated 1 week ago
Kulturra is dedicated to integrating Payment Center with a variety of payment gateways. With each release, we strive to incorporate a new processor. The Spring 2024 Release brings forth a fresh integration option with Fortis.
This article will provide information on the necessary configurations to connect Payment Center with this new integration.
Sign-up
1. Register an account with Fortis
2. Once signed up, log in to your account and retrieve the necessary details required for input into the Payment Center
User ID: Go to Settings > Users > Click Username | Copy the User ID
API Key: Go to Profile Settings > Advanced | Generate and copy API Key
Location ID: Go to Settings > Location Info | Copy Location ID
Add your processor
Login to your Salesforce account and navigate to Payment Center Settings
Under Payment Processors related list, click on New
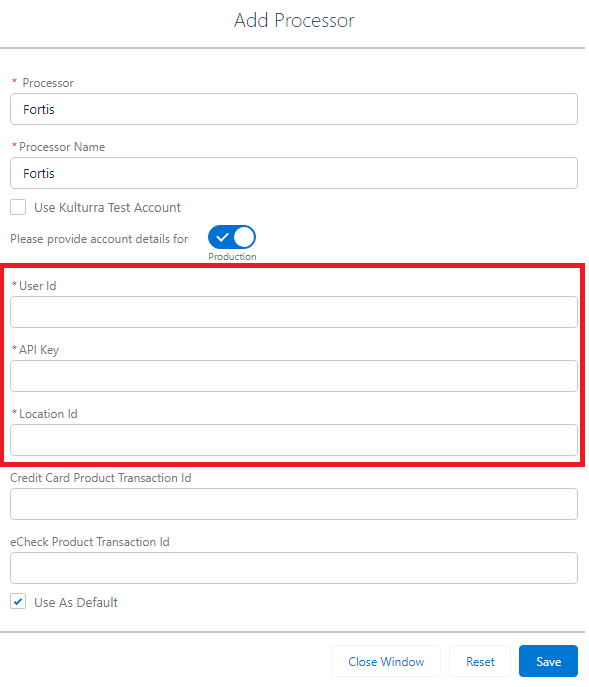
In the Processor dropdown list, select Fortis
Populate the User ID, API Key and the Location ID
Click Save
Additional setup
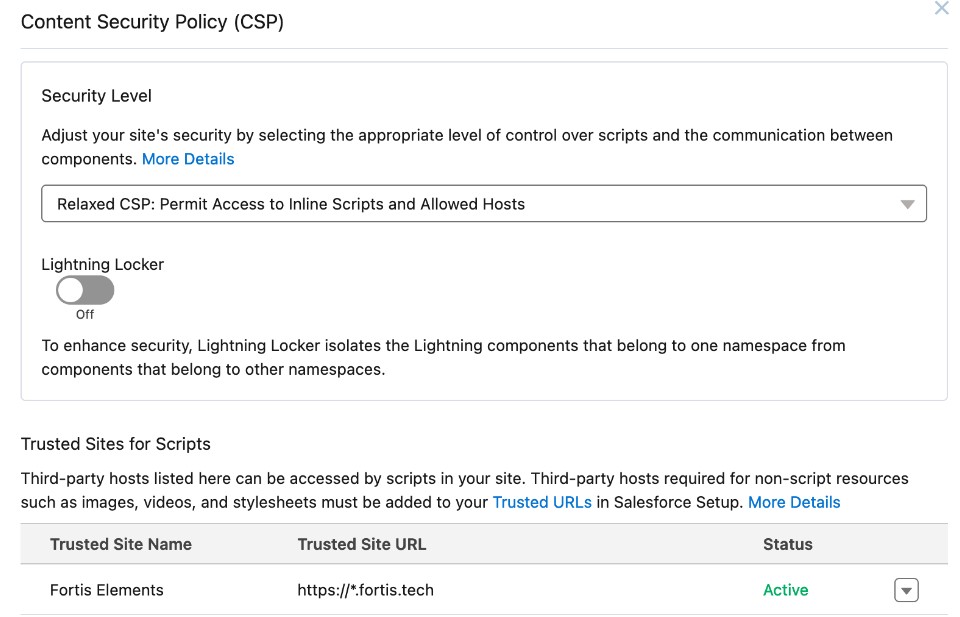
If you plan to use Account Billing - Aura component, additional step to add https://*fortis.tech in the Trusted sites in your Experience settings is required.
To do this, in Experience Builder, open the Settings menu (click gear icon). Click Security, and then click + Add Trusted Site. Enter the required information.
Testing
Payment Center comes with a pre-installed Fortis test account. You have the option to utilize this account to familiarize yourself with the payment process without the need for actual credit cards or bank accounts. To access the test account:
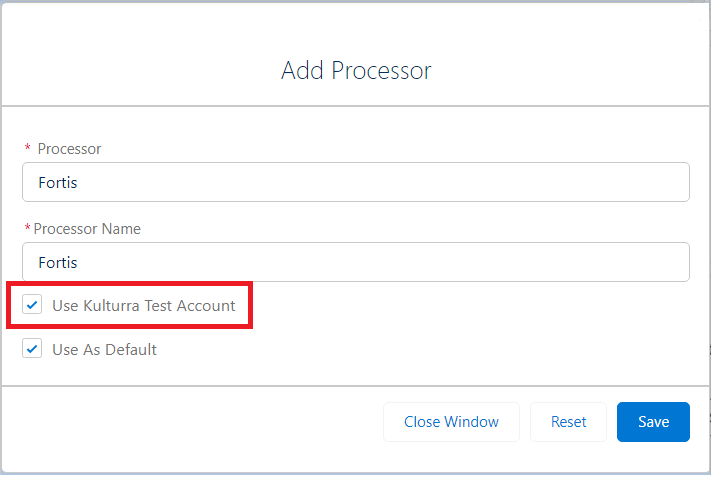
Go to Payment Center Settings tab | Payment Processors related list, click New
Select Fortis from the dropdown
Enter Processor Name
Check Use Kulturra Test Account
Hit Save
To do a test payment transaction, do the following:
Go to Payments tab then click New.
Select Fortis as the Payment Processor.
Use the following credit card information:
Credit Card Type : Visa
Name on Card : Any name
Credit Card Number : 4111111111111111
Expiration : 12/25
Follow onscreen instructions until you successfully process the payment.
For more information on test data that you can use, please refer to this Fortis developer guide: https://docs.fortispay.com/developers/api/test-data
Going Live
To go live, check Live and Use As Default boxes in your processor settings
Transactions
Users can perform below transactions in Payment Center app with Fortis as your processor:
Pay using credit card - Charge/Authorization
Pay using eCheck
Pay using profile
Capture payment
Void payment
Refund payment
Tokenize profile
Migration Steps
If you have been using Fortis and you wish to migrate data from Fortis to Salesforce, please follow the steps below:
1. Run below script in Developer console to import Fortis payment method to SF Payment Profile.
Database.executeBatch(new CreatePaymentProfileBatch('Fortis'),1);2. Create a dummy Account then update the imported Payment Profiles with a dummy account.
Account acc = new Account ( Name = 'DummyAccount');<br><br>insert acc;<br><br>List<fw1__PaymentProfile__c> profiles= [SELECT Id,fw1__Account__c FROM fw1__PaymentProfile__c WHERE fw1__Account__c = null];<br><br>for (fw1__PaymentProfile__c pp : profiles) {<br><br>pp.fw1__Account__c = acc.Id;<br><br>}<br><br>update profiles;3. Run below script in Developer console to import Fortis Recurring to SF Recurring Invoice.
Database.executeBatch(new CreateRecurringInvoiceBatch(DummyAccount Id),1);4. Update the Account/Contact of the imported Payment Profile by matching the email/phone/name details from the Account/Contact record.
5. Deactivate the Recurring Invoice then Update the Account/Contact of the imported Recurring Invoice with the profile Account/Contact. Re-activate the Recurring Invoice after the update of Account/Contact.
Availability: Spring '24