How can we help you?
Search our knowledge base to get answers to your questions, access video training & more!
Setup
reCAPTCHA v3 Guide
Updated 3 weeks ago
To enhance security and protect against bots and automated abuse, reCAPTCHA v3 has been added to the Payment Center. This ensures a smoother, more secure user experience on key payment pages without requiring user interaction.
reCAPTCHA v3 is now active on:
Payment.page
PaymentReview.page
CreatePaymentProfile.page
How to Enable reCAPTCHA v3
1. Create a Google reCAPTCHA Account
To begin using reCAPTCHA v3, you'll need to create an account through Google:
Log in to a Google Account (preferably your company’s account).
Fill out the new site registration form:
Label: Give your project a name.
reCAPTCHA type: Select reCAPTCHA v3.
Domains: Enter the domain(s) for your Experience Cloud site.
Submit the form
Note: If you use multiple sites or custom domains, you can include them all under the same reCAPTCHA project.
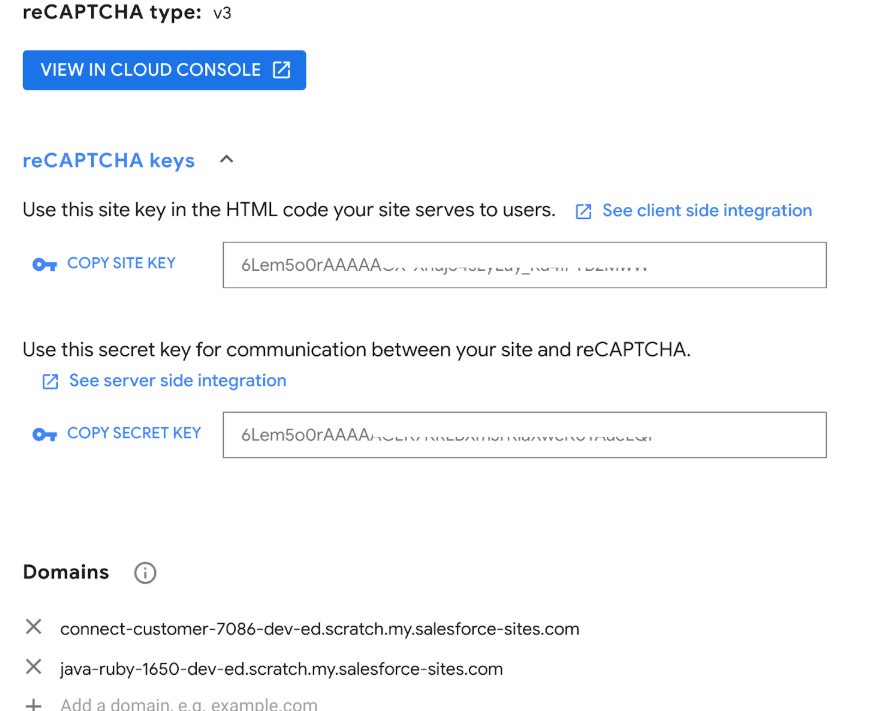
2. Retrieve your reCAPTCHA Keys
After registration, you'll be taken to a page with your reCAPTCHA credentials:
Site Key – Used on the client side (e.g., in HTML/JavaScript).
Secret Key – Used on the server side to verify the token with Google.
3. Store Your reCAPTCHA Keys in Salesforce
Once you've obtained your Site Key and Secret Key from Google, you need to store them securely in Salesforce so they can be used during reCAPTCHA verification.
Steps:
Log in to Salesforce
Navigate to: Setup → Custom Metadata Types → reCaptcha Setting → reCaptcha Keys
You’ll see two records:
Secret Key
Site Key
For each record:
Click Edit
Paste the corresponding value from your Google reCAPTCHA account
Click Save

Important: If you ever change Google accounts or re-generate your keys, make sure to update these values in Salesforce.
Why This Is Required
When reCAPTCHA is enabled, Salesforce sends a callout to Google’s API. Google returns a score based on the user’s behavior. This process requires your Site Key and Secret Key to authenticate the request and ensure the score is returned for the correct domain.
4. Enable reCAPTCHA in Payment Center Settings
After storing your reCAPTCHA keys in Custom Metadata, you need to enable reCAPTCHA in the Payment Center Settings.
Steps:
In Salesforce, navigate to your Payment Center Settings.
Look for the Enable reCAPTCHA option.
Check the box to enable it.
Save the settings.

5. reCAPTCHA is Now Active
Once enabled, reCAPTCHA v3 is now active on the following pages:
Payment.page
CreatePaymentProfile.page

With these steps done, reCAPTCHA v3 is now integrated into your Salesforce Payment Center, helping protect key pages from bots while keeping the user experience smooth.
Availability: Summer '25