After installing the app.hesive app and extension for Quickbooks connection, here's the complete checklist you need to set it up: from assigning the needed permission set, to creating mappings.
Kindly follow the steps below to complete the set up:
Assign permission set (Apphesive for Quickbooks All Access)
Create a new connection (QB Online)
Create mappings
How to create mappings? Follow these steps:
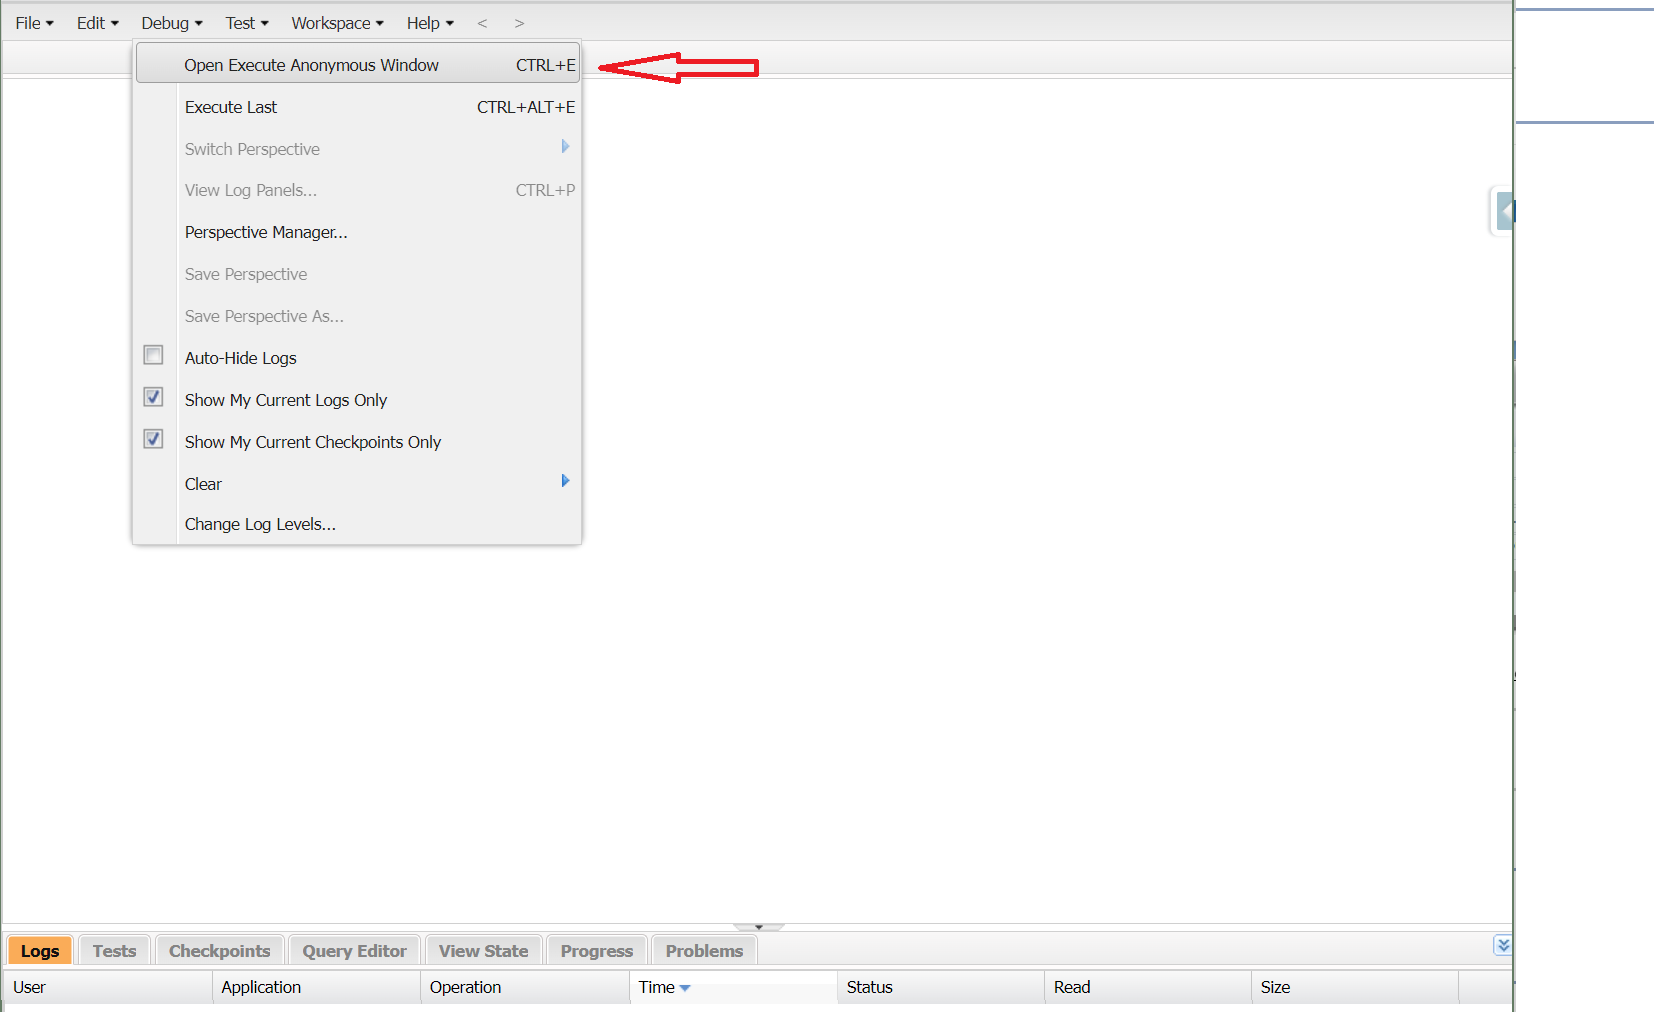
Open Developer Console
Execute the following:
fw8.ApphesiveMapping.use('Account_Customer_Mapping', 'QB Online');
fw8.ApphesiveMapping.use('Product_Item_Mapping', 'QB Online');
fw8.ApphesiveMapping.use('Invoice_Mapping', 'QB Online');
fw8.ApphesiveMapping.use('Payment_Mapping', 'QB Online');
fw8.ApphesiveMapping.use('Credit_Memo_Mapping', 'QB Online');
Edit layouts on each of these object to add QuickBooks section where the Quickbooks related fields will be added to:
Account
Invoice
Product
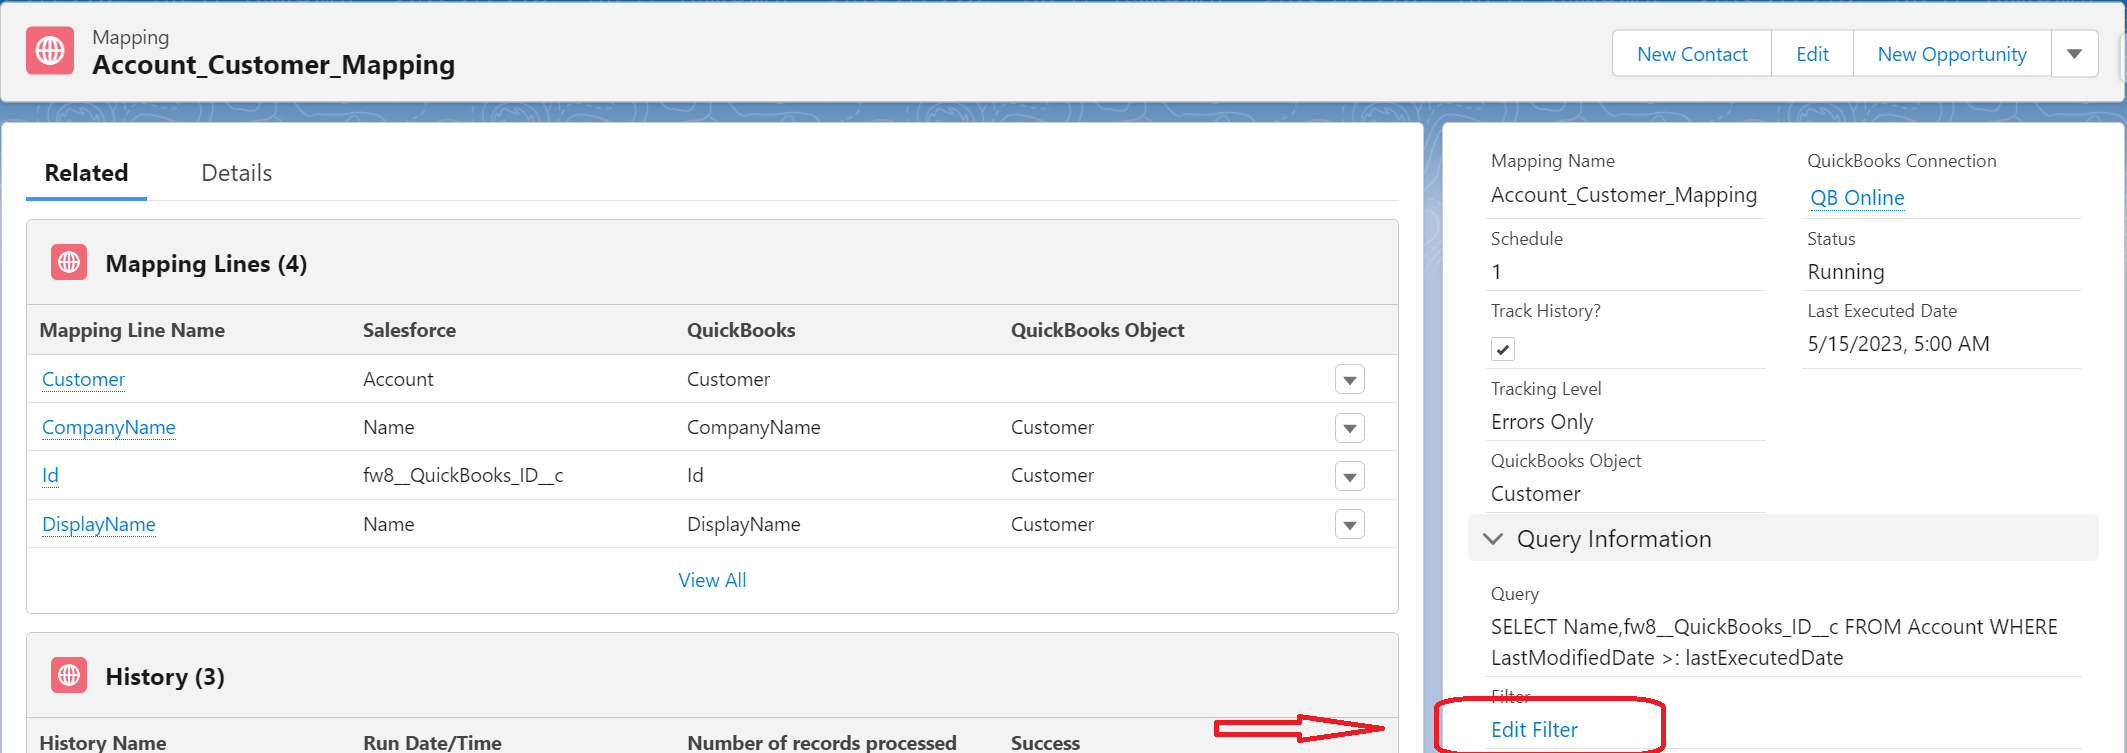
Add/edit filters to mappings (this applies to all object mappings)
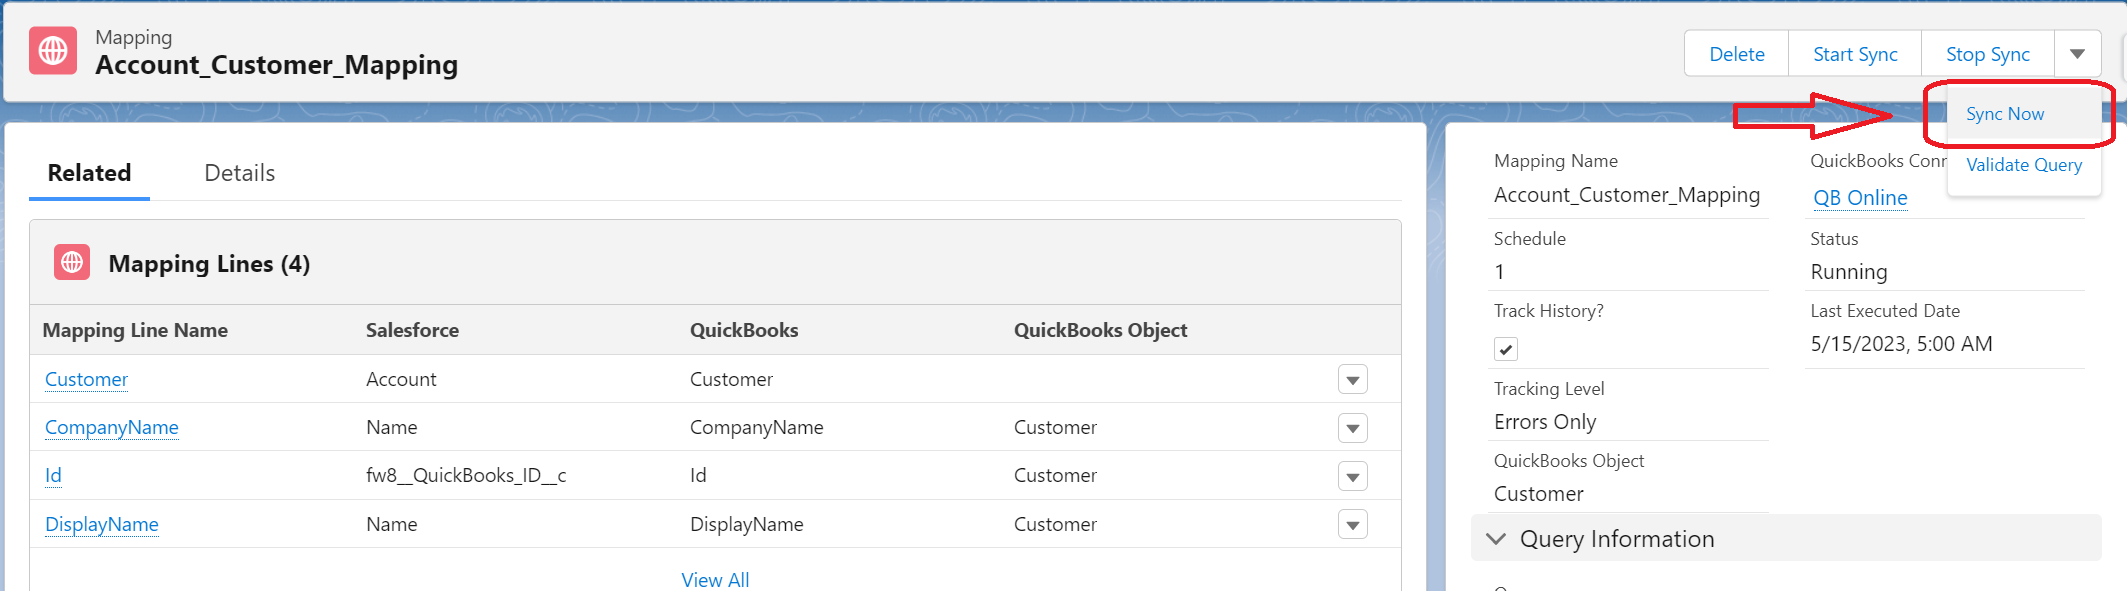
Open "Account_Customer_Mapping" under Quickbooks related list
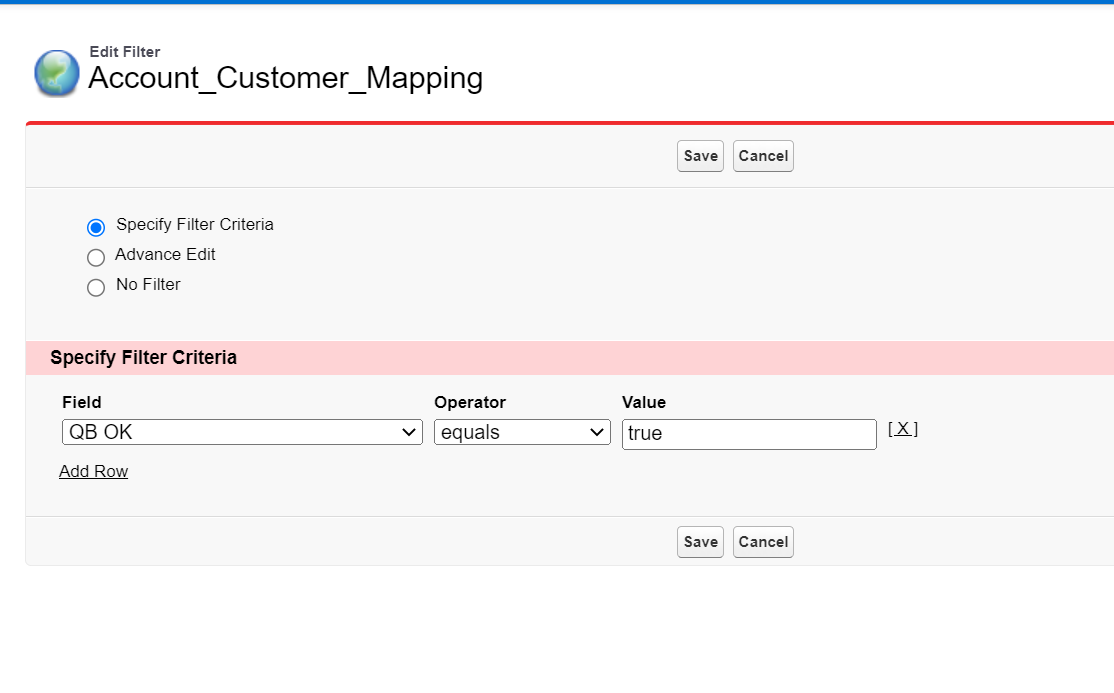
Click "Edit Filter" under Query Information section
Add the 'QB OK = True' filter
Establish your QBO connection, click this link for more information.
If existing records are available in both your Salesforce and Quickbooks online,
Gather all the Accounts that needed syncing, then mass update it to check the "QB OK" checkbox field.
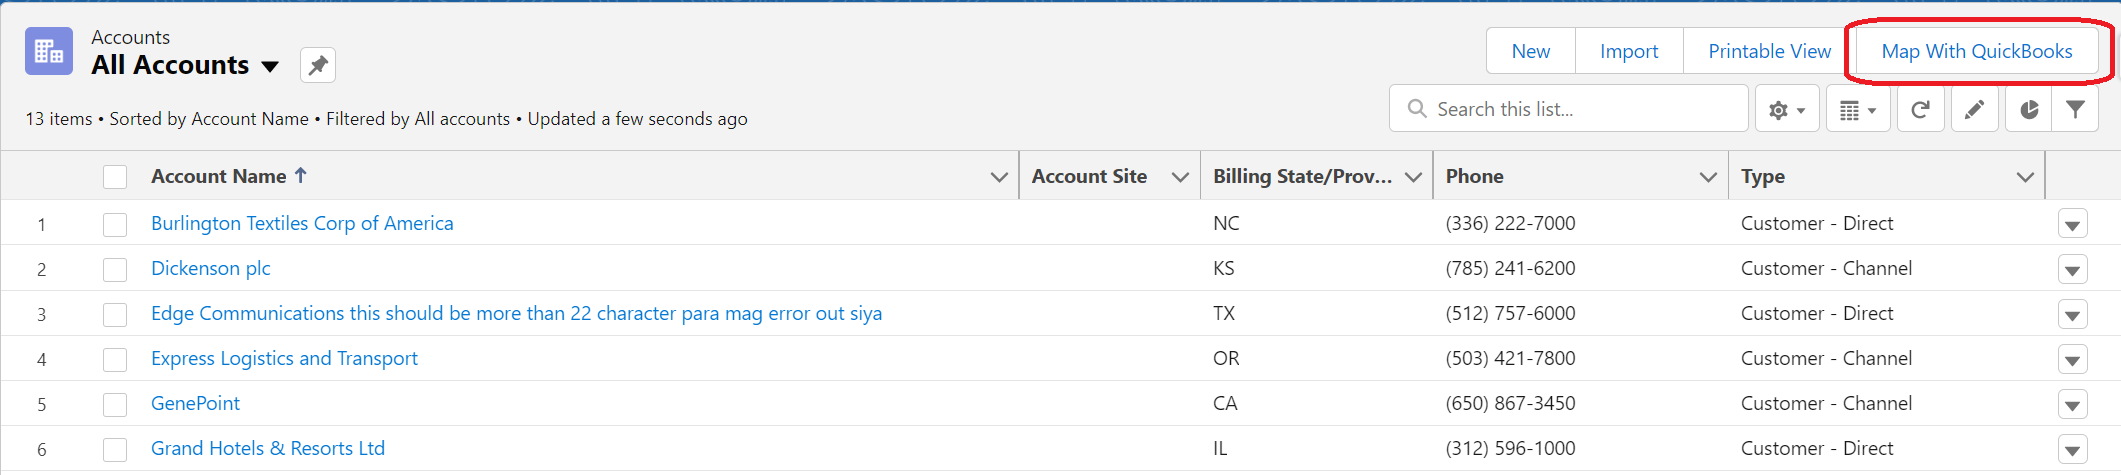
Create a list view on the Accounts tab, filtering it with "QB OK = True", and on the list view, use the "Map With Quickbooks" button to map existing Accounts between the 2 systems (this also applies to products).
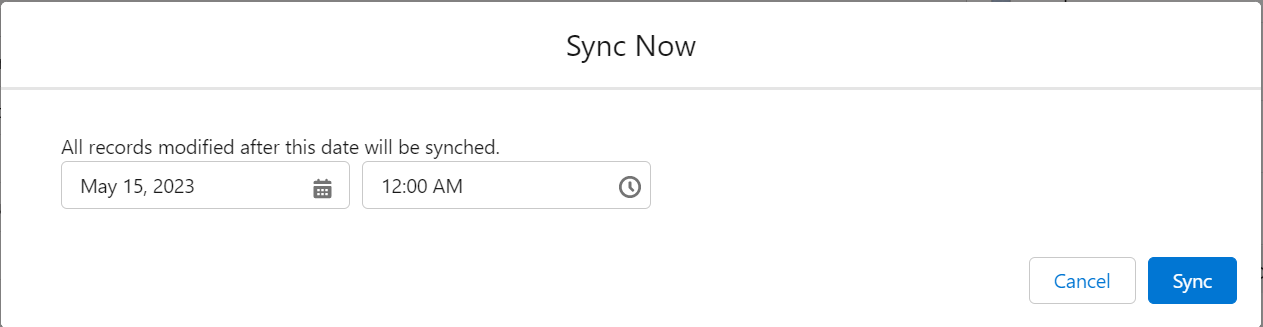
*Note: The Map With Quickbooks is used to map EXISTING records from both systems; to avoid record duplication.It's time to run an initial sync. Use the "Sync Now" button on the mapping page to initially sync all your existing records (this applies to Invoices and Products as well).
For new accounts to sync to your QBO online account from Salesforce moving forward, you need to create an automation (flow) that would check the QB OK checkbox field on the Account level if a new invoice is created.
Disable this setting:Automatically Apply Credits by following the steps outlined in this article.
Then, use the Start Sync to automatically run the sync moving forward.
The sync will run every hour.