Apphesive for QuickBooks Setup
Setting up Apphesive for QuickBooks involves two high-level steps:
Establish QuickBooks Online connection
Creation of object mappings
Establish QuickBooks Online connection
To establish connection, please follow the steps below.
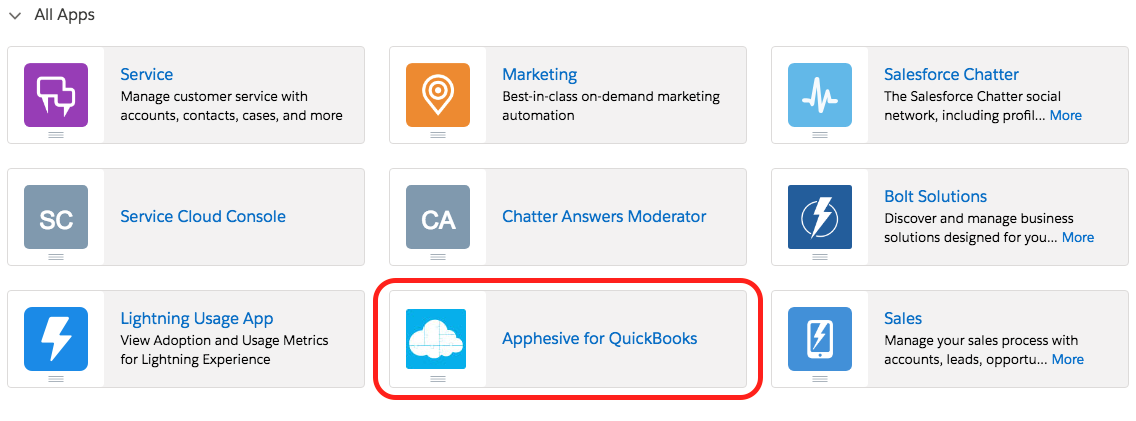
From the App Launcher, select Apphesive for QuickBooks:
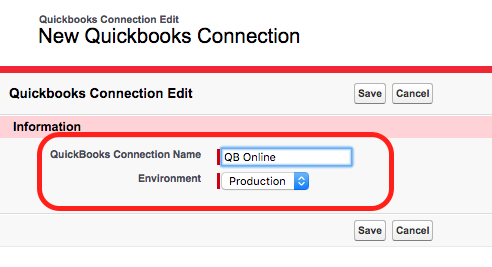
Go to the QuickBooks Connections tab and click New:

Enter a connection name and select Production for the Environment:
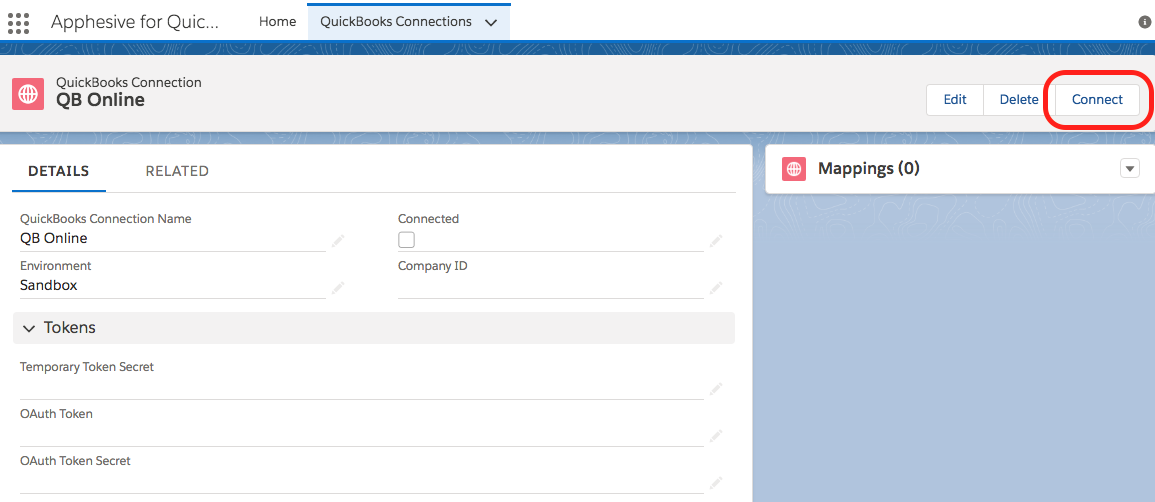
After you add your connection, click Connect:
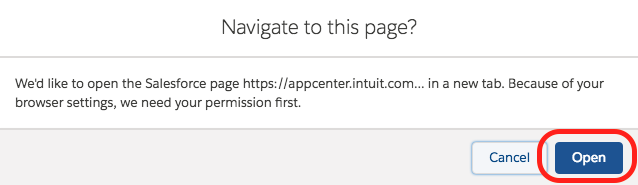
It will ask you to navigate to a certain page, click Open:
Sign in to QuickBooks using your QuickBooks credentials:

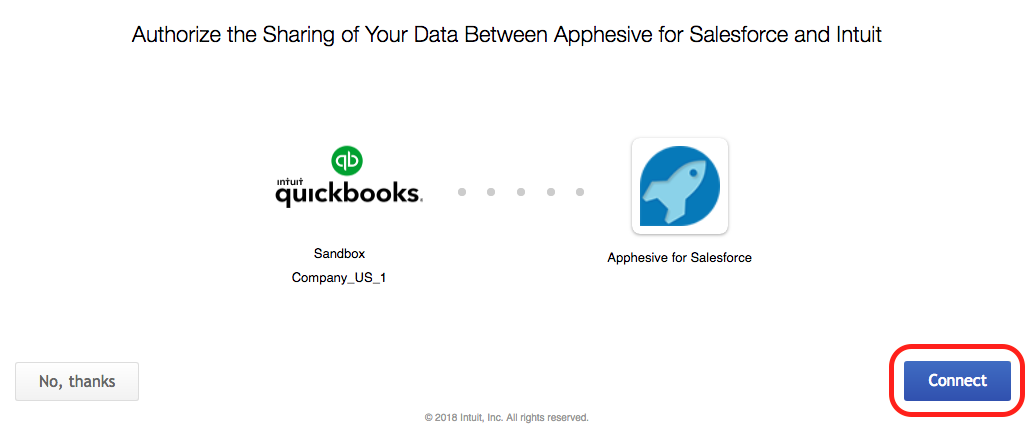
It will ask you to authorize data sharing, click Connect:
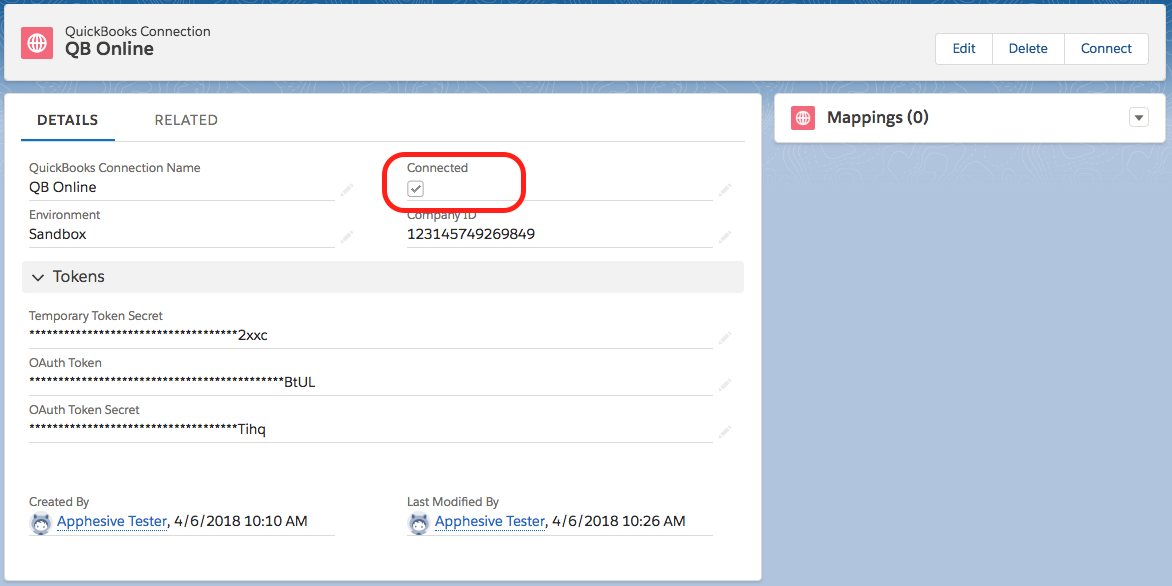
Once completed, it should now indicate that you are successfully connected to QuickBooks Online:
Creation of object mappings
Creation of object mappings involves deciding which objects in Salesforce to “map” with QuickBooks objects. For instance you may want to map Salesforce Accounts with QuickBooks Customers or Salesforce Products with QuickBooks Items. Since Apphesive is fully configurable, the possibilities are endless. As such we strongly recommend that you contact us so we can help you establish your mappings.
Please contact us at https://kulturra.com/contact/ so we can schedule a time to go over your workflow.
Mapping Payment Method
For improved efficiency in syncing payment method data between QuickBooks and QuickBooks Online (QBO), a recommended approach is to implement a flow that automatically populates the "QuickBooks Payment Method" field in Payment records based on the selected Payment Method. This automation will also ensure the "QuickBooks Payment Method ID" field is auto-populated. By utilizing these fields, payment methods will be accurately mapped to their corresponding fields in QBO, ensuring seamless and consistent synchronization moving forward.
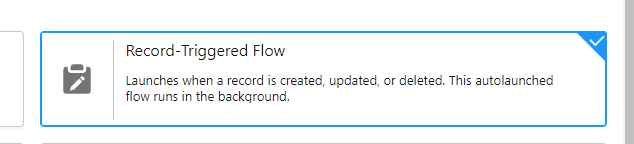
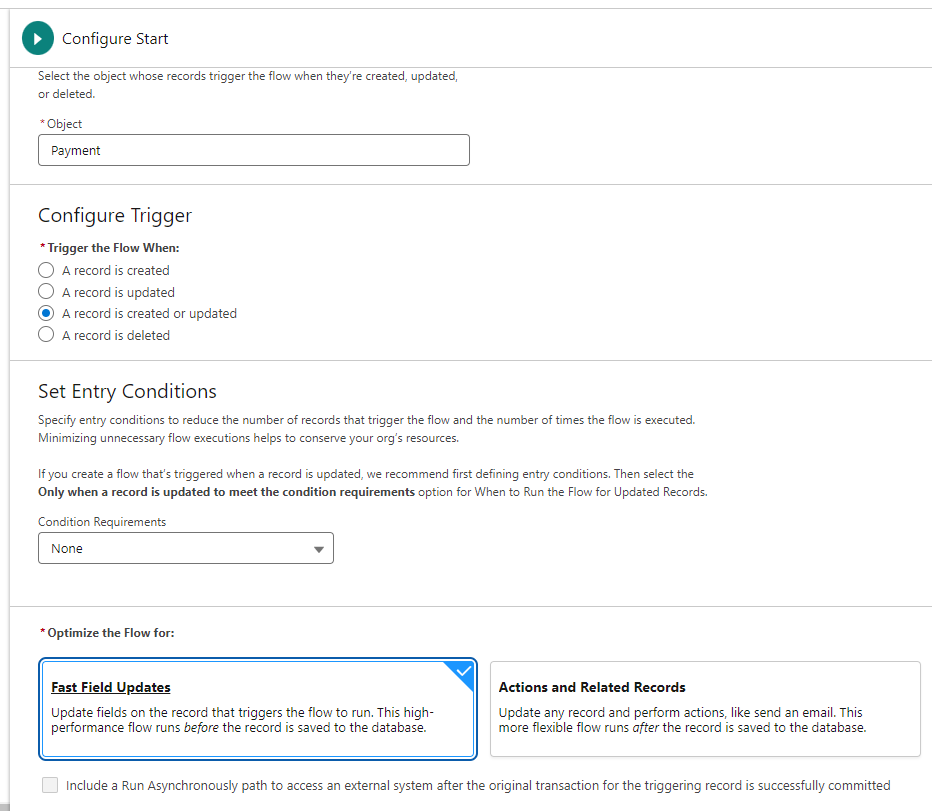
1. Go to Salesforce (Preferably Sandbox first and do some testing before Production) -> Setup -> Flow
2. New Flow -> Create Record Triggered Flow3. Select Payment as your Object -> Select "A record is created or updated" as your trigger -> Select "Fast Field Updates" for optimization.
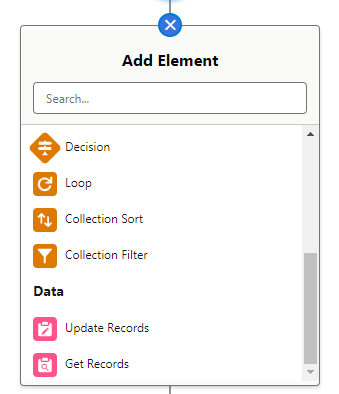
4. Add Element and select Update records under Data section.
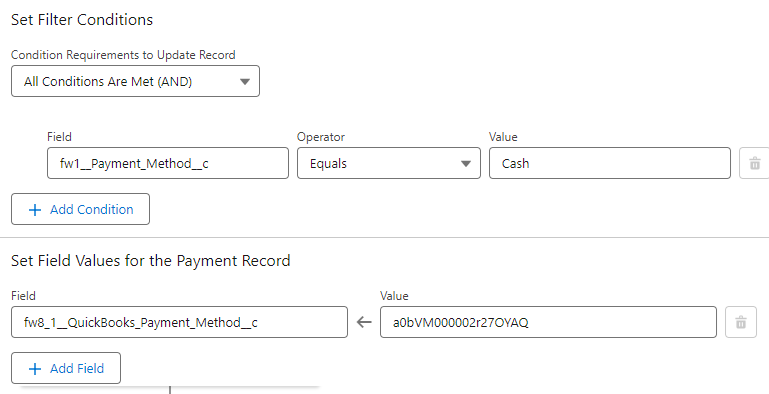
5. Add the Label for each payment method that you have in Quickbooks change the filter to the ff:
Ex payment Method = Cash
Conditions:
fw1__Payment_Method_c = Cash
Set the Field Values:
Quickbooks_Payment_Method VALUE = (the ID of your quickbooks payment method, please see below steps on how to get the id)
* NOTE: to Get the ID of your quickbooks payment Method, go to Apphesive for Quickbooks -> Quicbooks Connection -> QB Online -> Payment Methods -> Open the records of the corresponding ID.
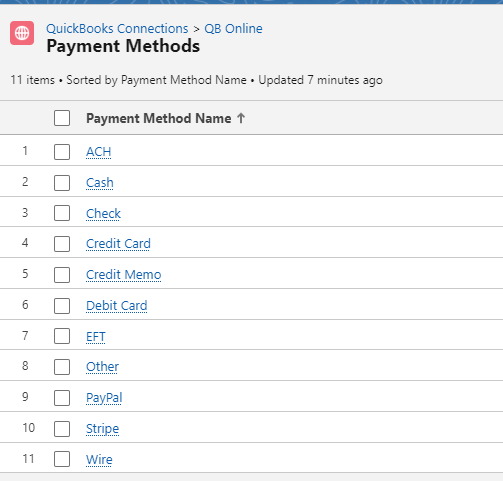
(18 Character ID is visible on the link section of your browser)

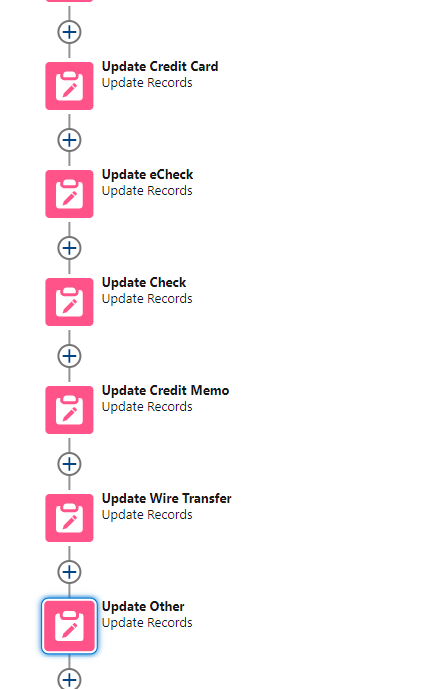
6. Create another Element in Flow builder based on your payment Method above. Repeat step 5
7. Save and Activate