Overview
Apphesive is updating its authentication structure to improve security, control, and scalability. Previously, Apphesive relied on a shared QuickBooks developer application across multiple customers. Moving forward, customers will be able to connect their own QuickBooks developer application directly to Salesforce. This enhancement provides greater control over authentication, improves long term scalability, and creates a more robust integration experience.
This article walks you through creating a QuickBooks app and connecting it to your Salesforce org using Apphesive.
Pre-requisites
An active QuickBooks Online account
Access to developer.intuit.com
Apphesive for Quickbooks All Access permission set
Step 1: Create or Access Your QuickBooks App
Go to https://developer.intuit.com.
Log in using your QuickBooks credentials.
Navigate to the Dashboard tab.
If you already have an existing app:
Select the App Name and proceed to the next step.
If you do not have an app:
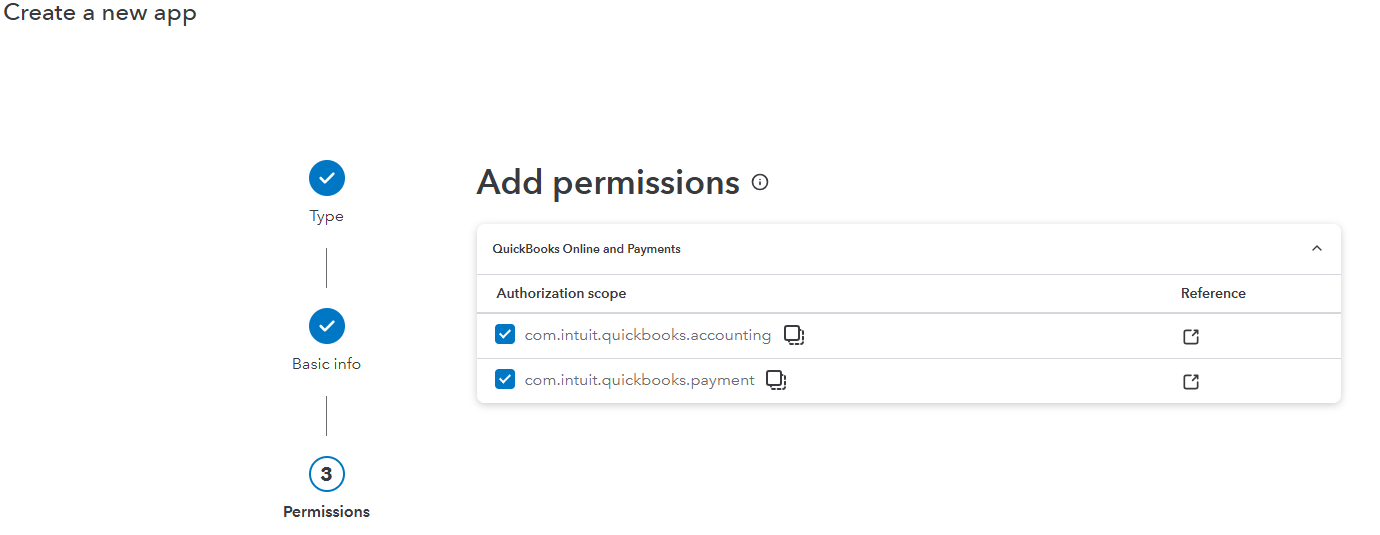
Click Create an app and follow the prompts to create a new QuickBooks Online app.
When prompted to grant permissions, please ensure that Accounting and Payment checkboxes are selected
Step 2: Retrieve Client ID and Client Secret
Go to developer.intuit.com and log in using your QuickBooks credentials.
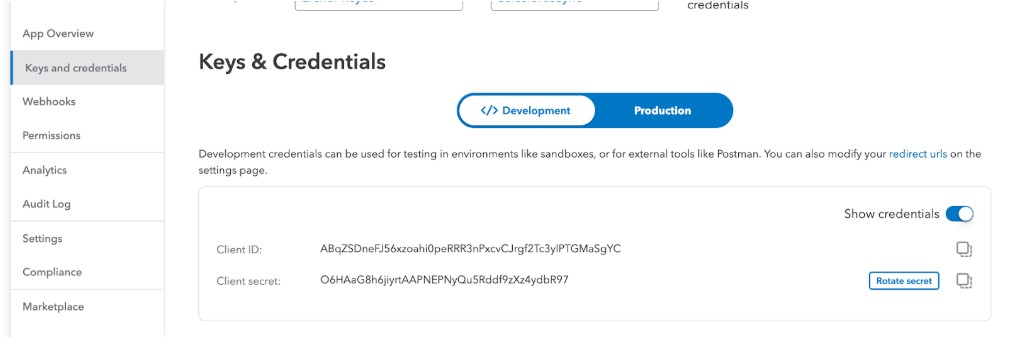
Navigate to Keys & Credentials.
If you already have an app created, you may use it. Otherwise, create a new app.
Once created, click your App Name, then go to Keys and Credentials.
Here, you will find your:Client ID
Client Secret
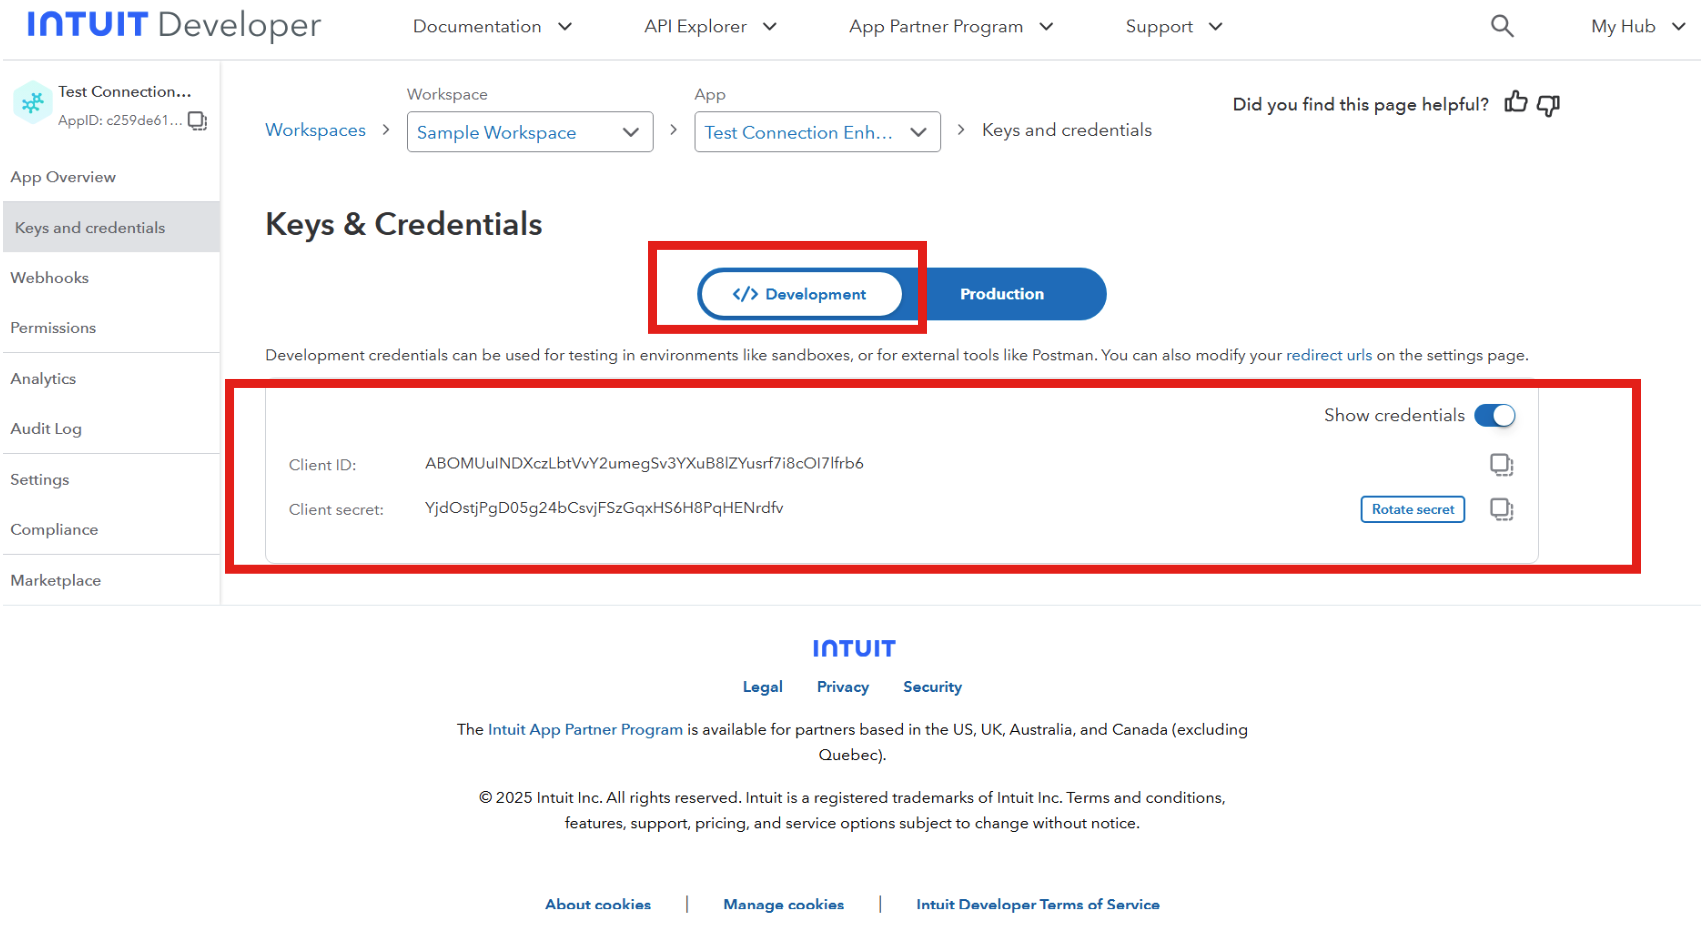
Getting Client Keys
Source: https://developer.intuit.com/app/developer/qbo/docs/get-started/get-client-id-and-client-secret
When generating Client ID and Client Secret in QuickBooks, follow the guidance below based on your environment:
1. Sandbox Environment
If you are connecting to a sandbox (test) QuickBooks account:
Navigate to the Developer tab in your Intuit Developer account
Retrieve your Client ID and Client Secret directly from this section
2. Production Environment
If you are connecting to a live (production) QuickBooks account:
Navigate to the Production tab
Client keys will not be immediately available
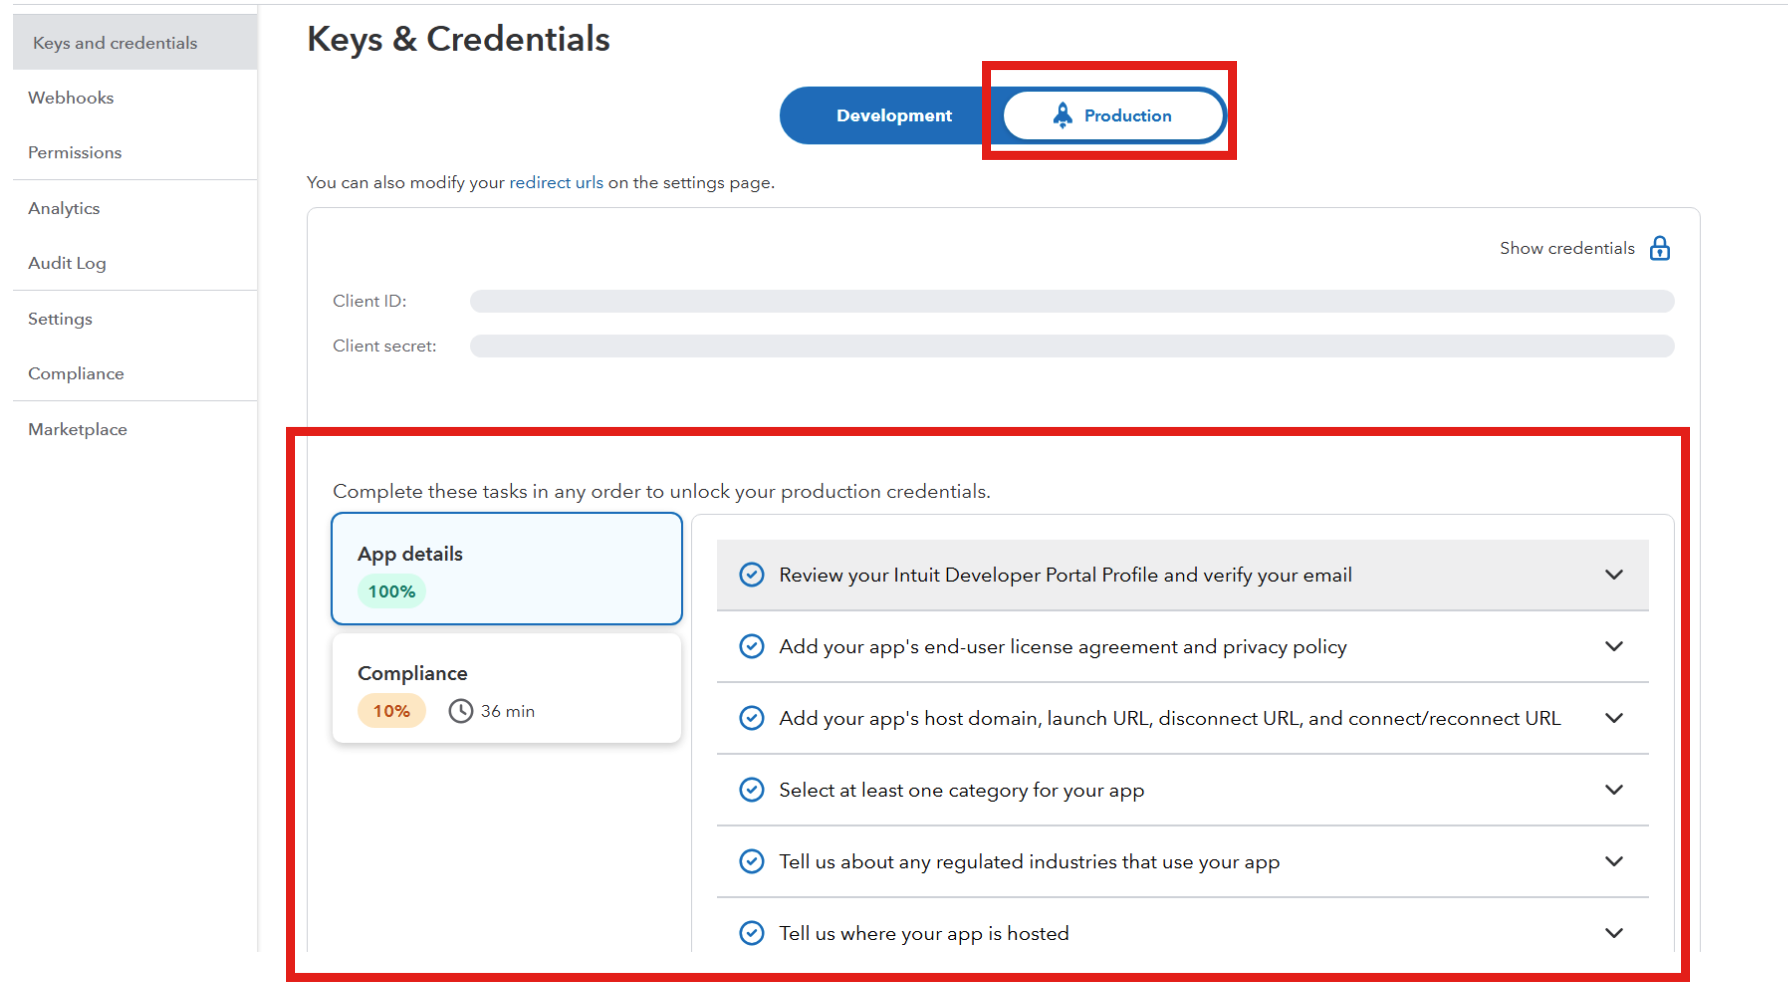
To access Production keys, you must first complete:
App Details configuration
Compliance questionnaire
(If you need help with answering the questions, please feel free to contact us.)
Once these steps are completed and approved, your Client ID and Client Secret will be generated and available.
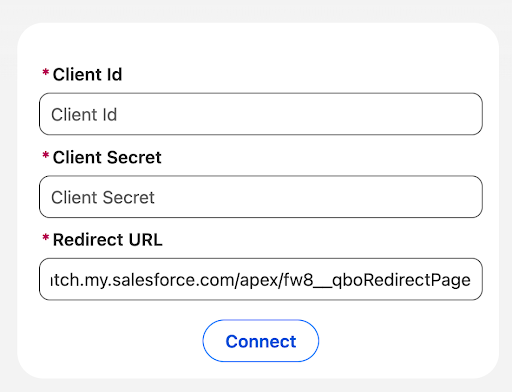
Step 3: Enter Credentials in Salesforce
In Salesforce, navigate to the QB Configuration component.
Paste:
Client ID into the Client ID field
Client Secret into the Client Secret field
Save your changes.
Step 4: Configure Redirect URL in QuickBooks
In Salesforce, locate the auto-populated Redirect URL in the QB Configuration component.
Copy this Redirect URL.
Return to developer.intuit.com > your app > Keys & Credentials.
Paste the Redirect URL into the Redirect URLs field.
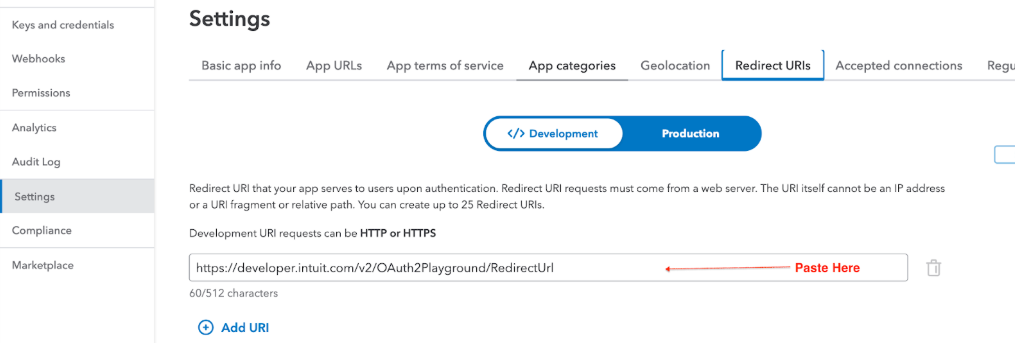
Click Save.
Step 5: Connect Salesforce to QuickBooks
In Salesforce, click the Connect with QuickBooks button.
A popup window will open.
Log in using your QuickBooks credentials.
After successful authentication, you will be redirected back to the same Salesforce connection tab.
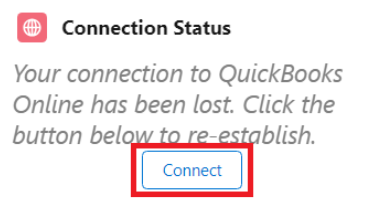
And that's it! Your Salesforce org is now successfully authorized to connect with QuickBooks using your own QuickBooks app.