You may notice the following symptoms:
Symptoms: Recurring invoices are designated for Auto-BillPay, yet despite being generated, payments are not automatically processed, resulting in invoices remaining unpaid and open.
Solution: Go to Setup | Jobs | Apex Jobs (or search for Apex Jobs in the Quick Find box). If you see this error – First error: Job does not exist or is already aborted:
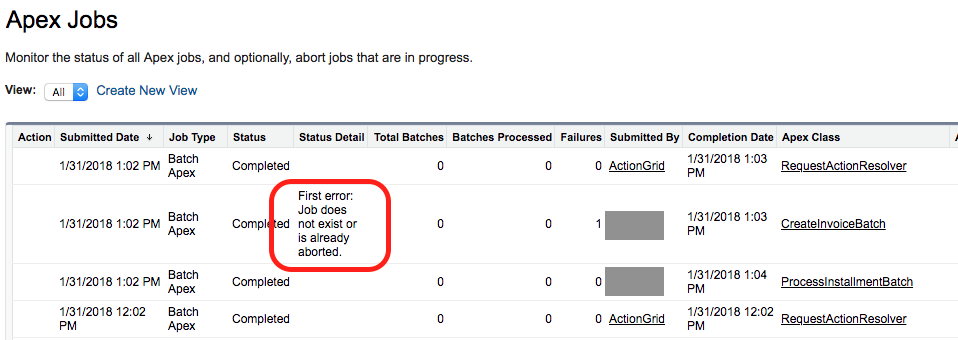
It’s possible that the Auto-BillPay process hang up for some reason, holding up succeeding processing. To fix the issue, go to Payment Center Settings tab, edit your layout and display the field called Auto Bill Pay Schedule Id. Chances are there is some data in there. Clear the field then save, this will clear up the hanged process and normal processing should resume (you don’t have to do anything after clearing up the field, the open invoices will be paid on the next run).
Auto-BillPay can significantly streamline the payment process, but what happens when you need to apply it to existing invoices generated from Recurring?
Symptoms: Invoices Generated Before Auto-BillPay Activation.
Invoices created from Recurring plans before the activation of Auto-BillPay. Changes made to the Recurring Invoice plan are expected to affect future invoices generated from it, while leaving the existing invoices unaffected. The symptoms indicate a common challenge: the desire to apply Auto-BillPay to existing invoices without affecting their payment status or payment profile.
Solutions: To ensure that autopay processing occurs, even for invoices generated before autopay enrollment, follow these steps:
1. Enable Auto-BillPay and configure the Payment Profile for Recurring Invoices.
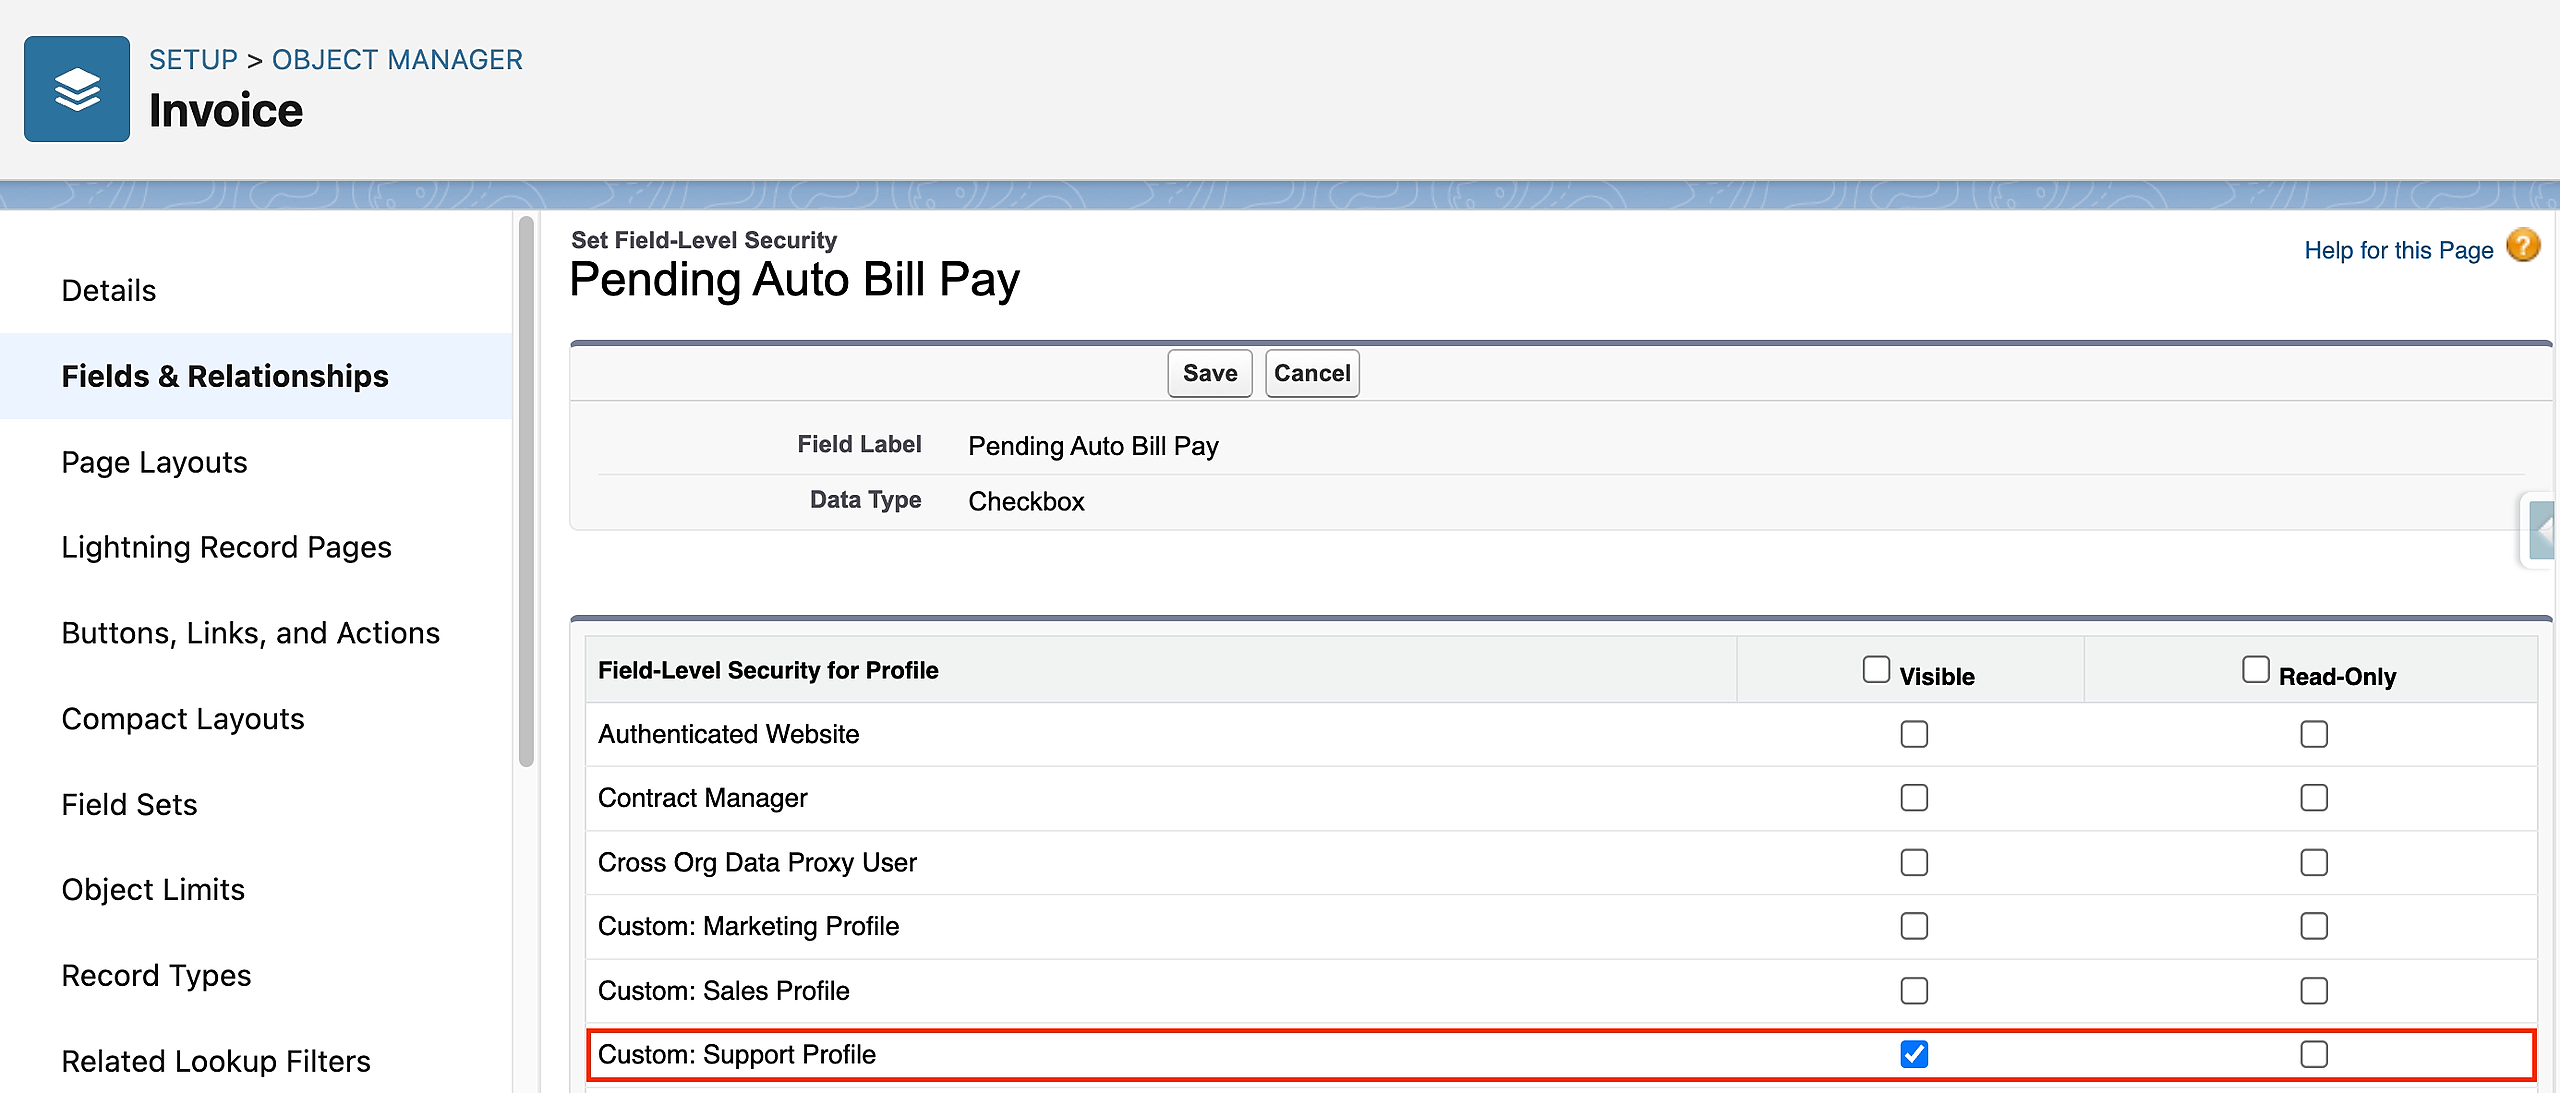
2. Please go to the related Invoice record and set the "fw1__Pending_Auto_Bill_Pay__c" field to true. Keep in mind that this field is not shown on the layout. To update this field, you need to change its field accessibility to 'Visible' because it's initially hidden. Once it's visible, you can add this field to the layout.
Navigate to the Object Manager in your Salesforce setup.
Click on "Fields & Relationships".
Select the "Pending Auto Bill Pay" field.
Click on "Set Field-Level Security".
Choose the profile to which you want to make the field visible.
Save your changes.
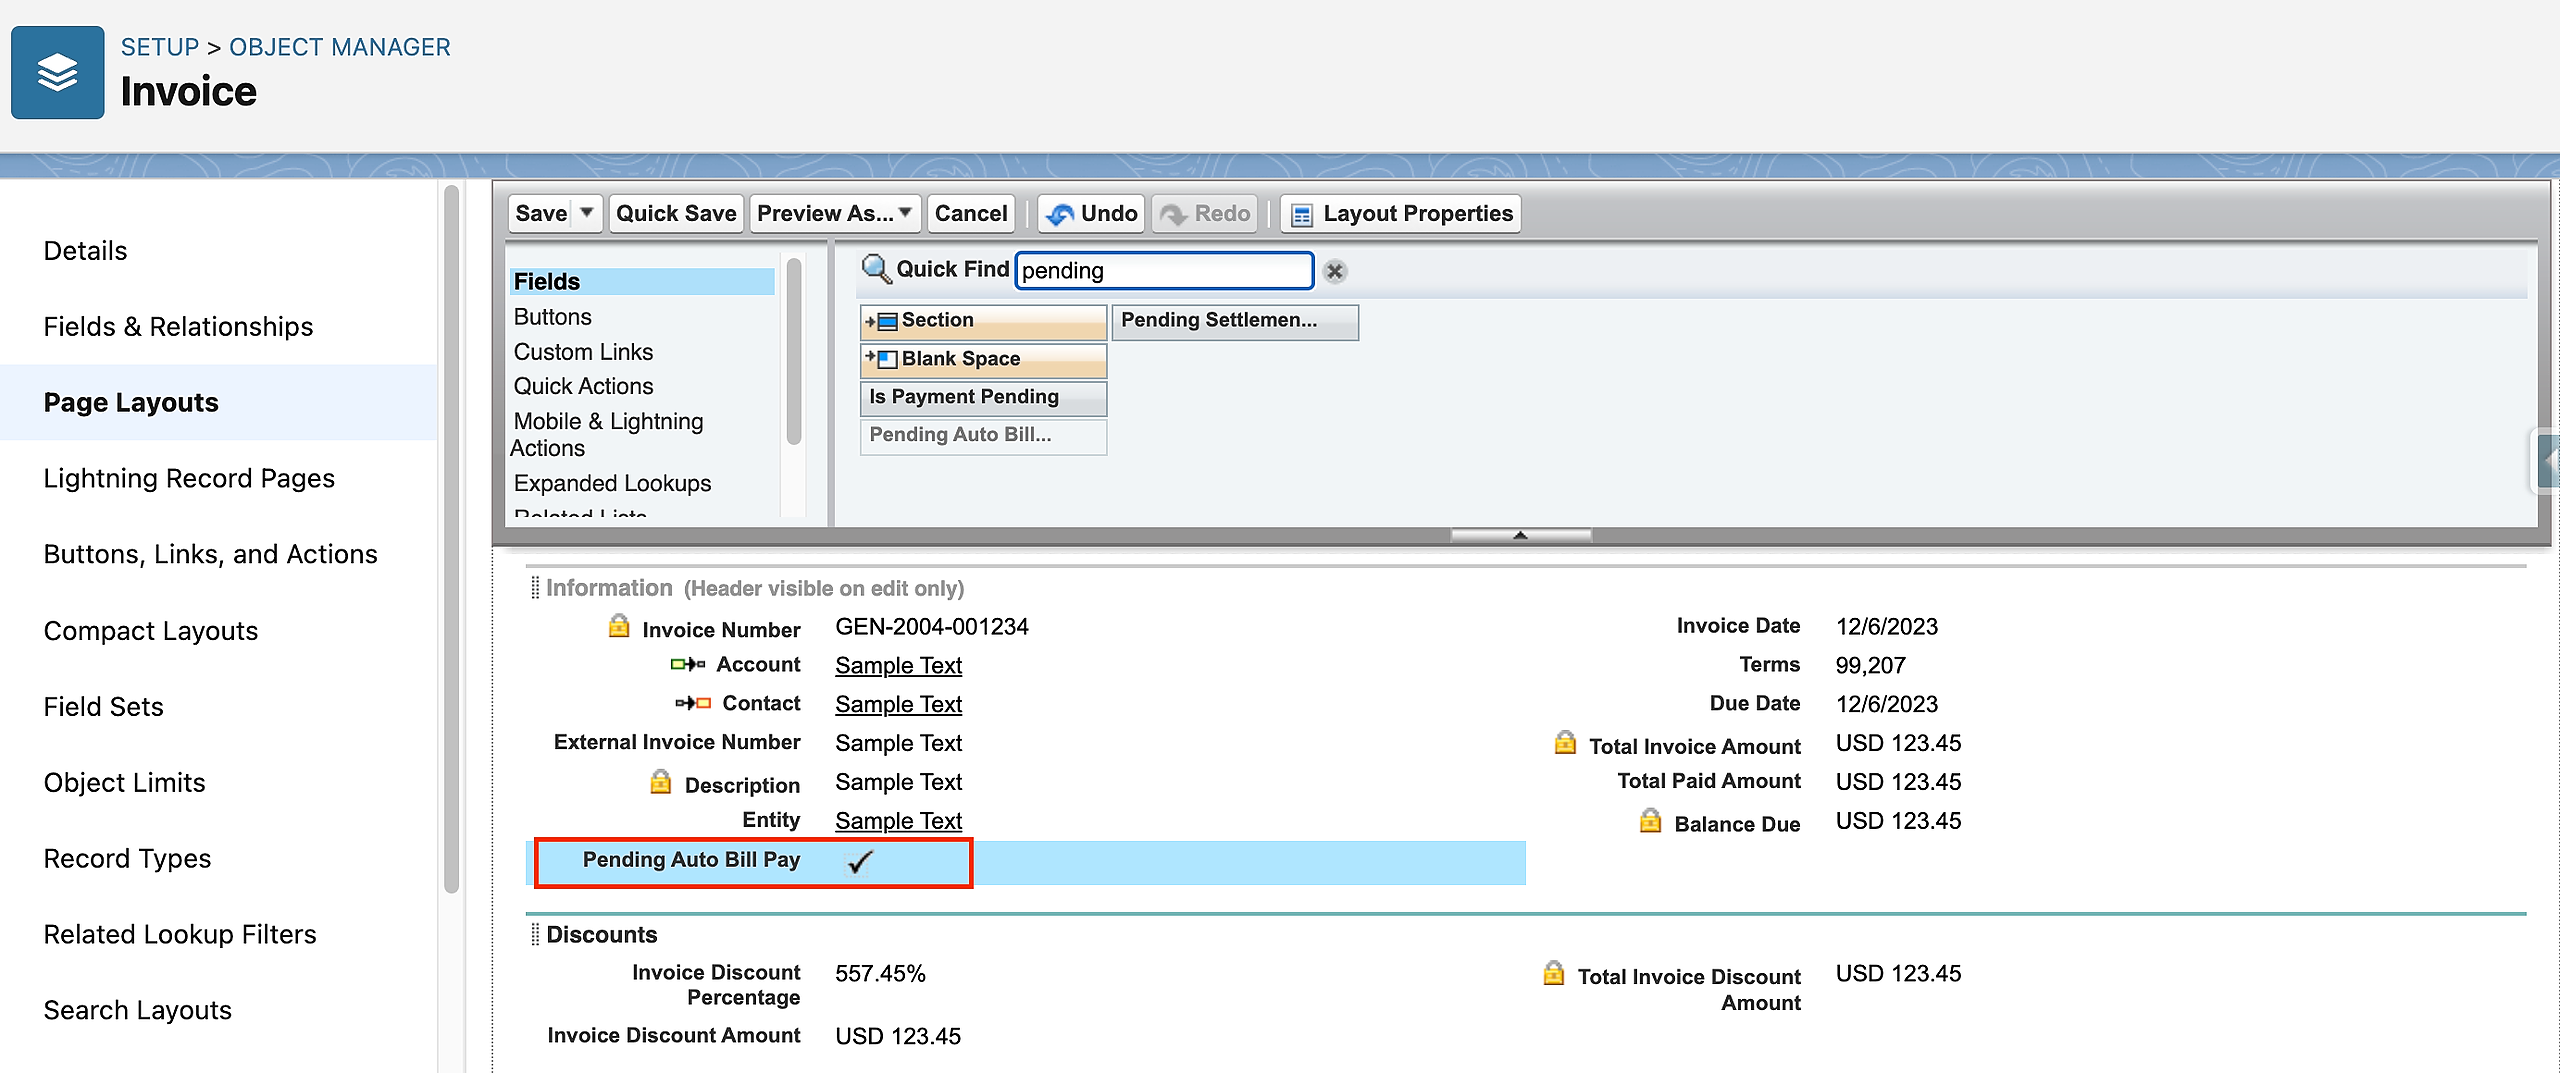
Click on "Page Layouts".
Choose the appropriate layout you want to modify.
Click on "Fields" within the selected layout.
Drag the "Pending Auto Bill Pay" field from the available fields and place it where you want it to be displayed on the layout.
Save the layout to apply the changes.
Note: Setting the "fw1__Pending_Auto_Bill_Pay__c" to false effectively marks the invoice as processed or no longer eligible for automatic bill payment.
3. Adjust the Invoice "Retry Date" to the date you want the autopay to trigger. This means that the invoices will be automatically processed on the selected Retry Date, regardless of the original Due Date.

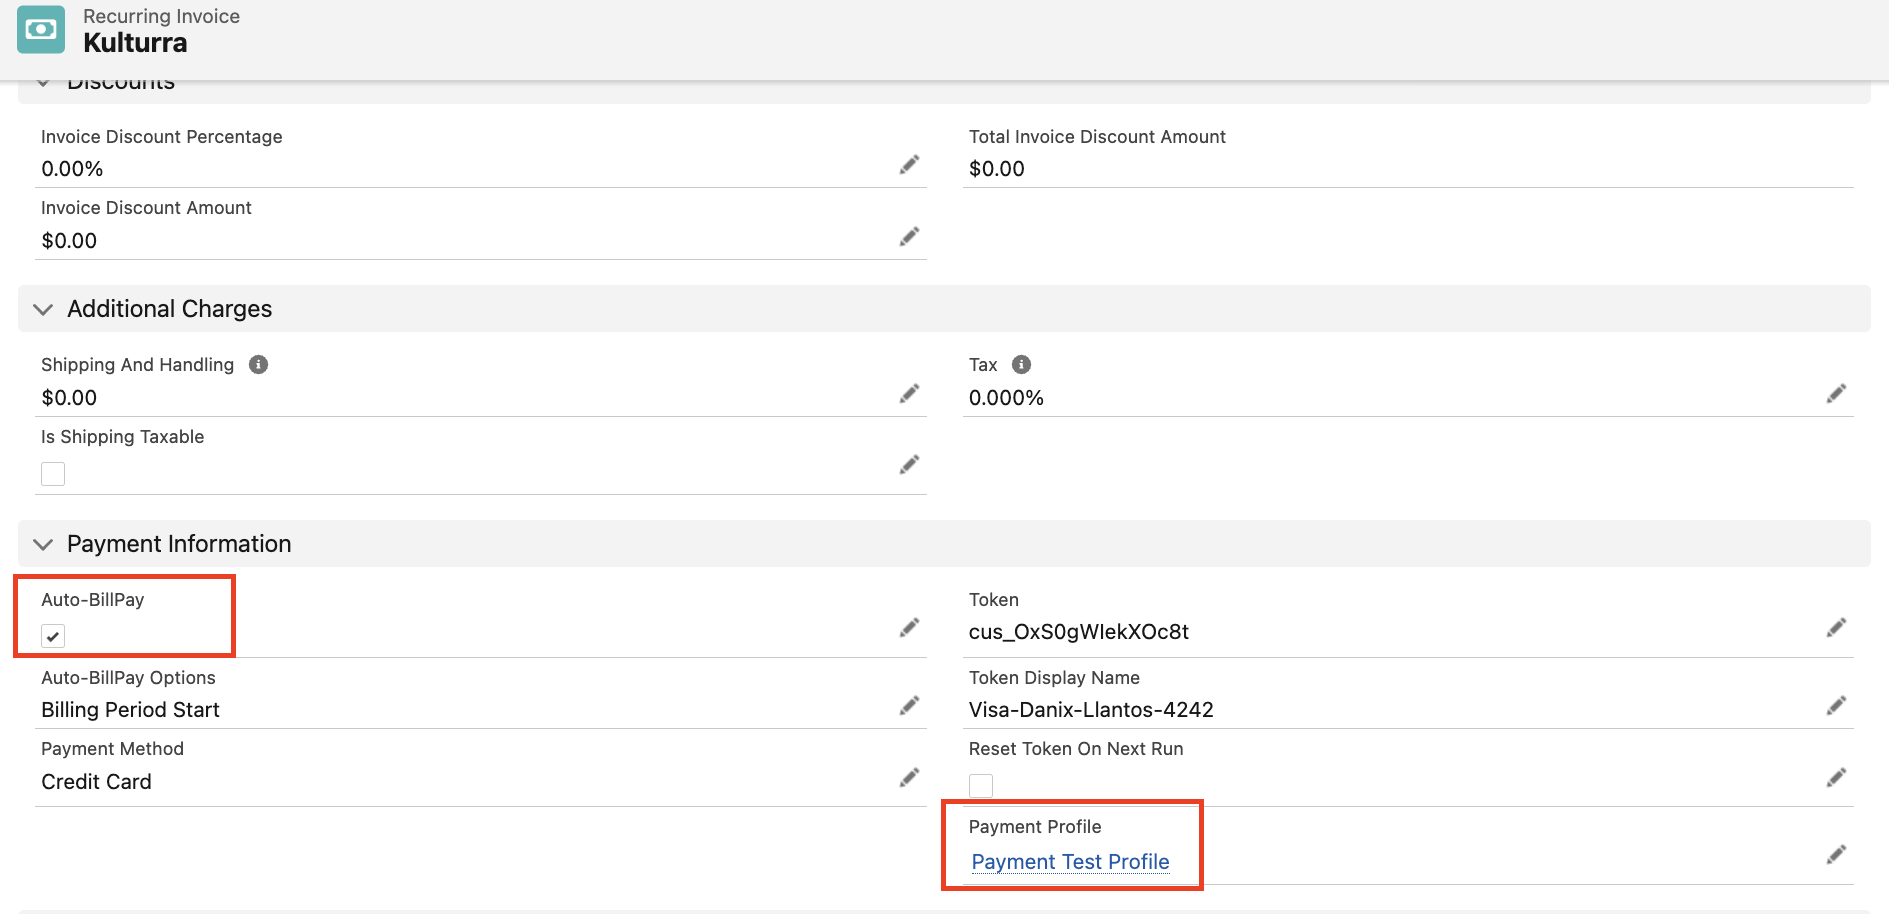
Note: Auto-BillPay will be executed through the Recurring Scheduler. There's no need to manually populate the Payment Profile from the Invoice record since it will automatically utilize the Payment Information established in the associated Recurring Invoice.