This article describes the necessary steps to connect Bluepay with Payment Center.
Sign up for a Bluepay merchant account.
Once signed up, login to your account and take note of your Gateway Account ID and Secret Key.
To get your Secret Key, navigate to Admin | Accounts | List. There, you'll see a list of accounts that you have access to. Simply click on your Account Name and you will be directed to the Account Admin page - your Secret Key and Gateway Account ID are housed on the right-hand column of the page.
Payment Center Settings
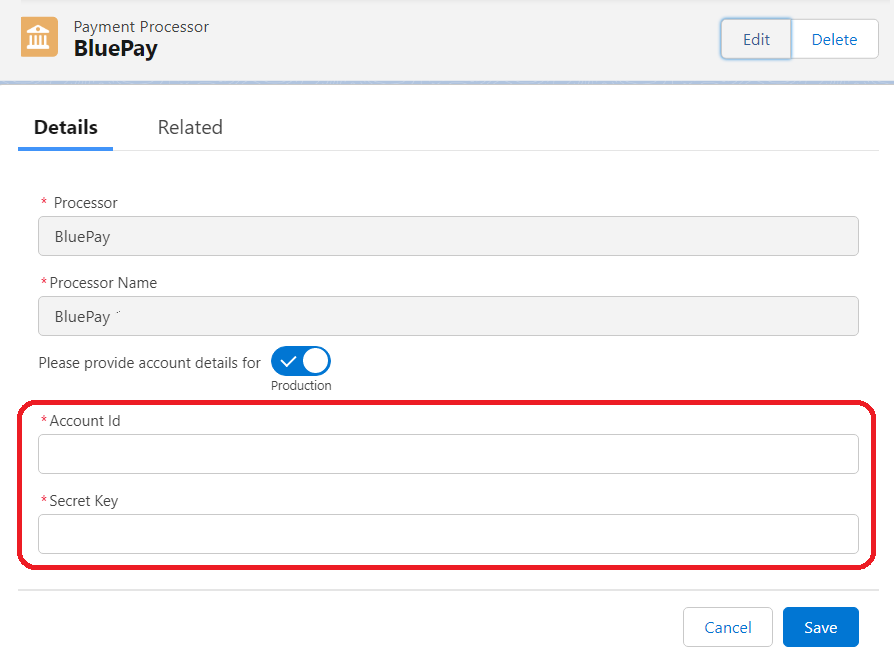
Login to Salesforce, go to Payment Center Settings | Payment Processors | Bluepay.
Toggle the account details switch to Production, enter your Account ID and Secret Key then hit Save.
Payment Center comes pre-installed with a test Bluepay account. You may use this test account for testing. Just ensure that account details toggle is switched to Test.
Testing
To do a test payment, do the following:
Go to Payments tab then click New.
Select Bluepay as the Payment Processor.
Use the following credit card information:
Credit Card Type: Visa
Credit Card Number: 4111111111111111
Expiration: Any future date
Name on Card: Any name
To receive a success response from BluePay, the whole amount must be an odd number. Cents are ignored. Example, for the amount $33.42, only the $33 is checked and the cents $0.42 is ignored.
Here are a few more samples:
Amounts that will return APPROVED:
$23.00
$481.90
$1025.52
Amounts that will return DECLINED:
$100.00
$12.99
$56.35
4. Follow onscreen instructions until you successfully process the payment.
Going Live
If you haven't setup yet, follow the steps under Payment Center Settings section in this article.
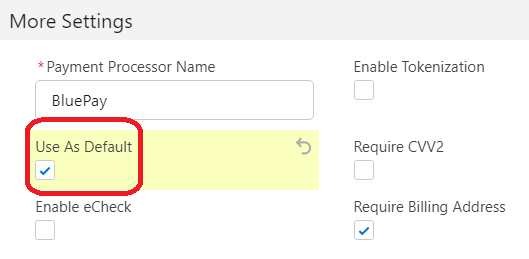
Click Edit, under More Settings section, set Use as Default to True then hit Save.