In today's fast-paced business environment, efficiency is key. Managing finances and invoicing can be a time-consuming task, especially when you have to send invoices regularly and track payments diligently. This is where Recurring Invoices and Auto-BillPay come into play, making life easier for both businesses and their clients.
Recurring invoices are a smart solution for businesses that provide services or products on a routine basis. Instead of manually creating invoices every time a service is performed or a product is delivered, you can set up a recurring invoice schedule.
Follow the steps below to create a recurring invoice:
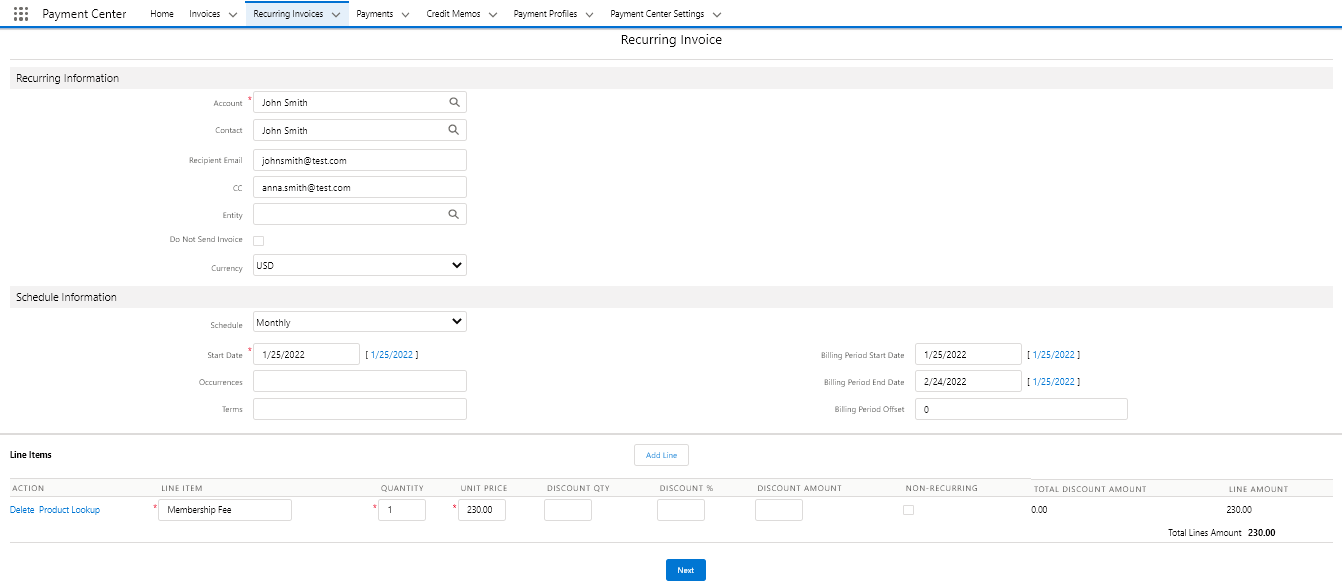
Go to Recurring Invoices tab then click New.
Enter the appropriate Account, Contact, Schedule Information and your Products, as shown below:
Click Next to go to the next screen. Enter Discounts, Tax, or Shipping and Handling, if any. If your purpose is to bill your customer’s credit card regularly, check Auto-BillPay and enter your customer’s credit card information (including billing address):
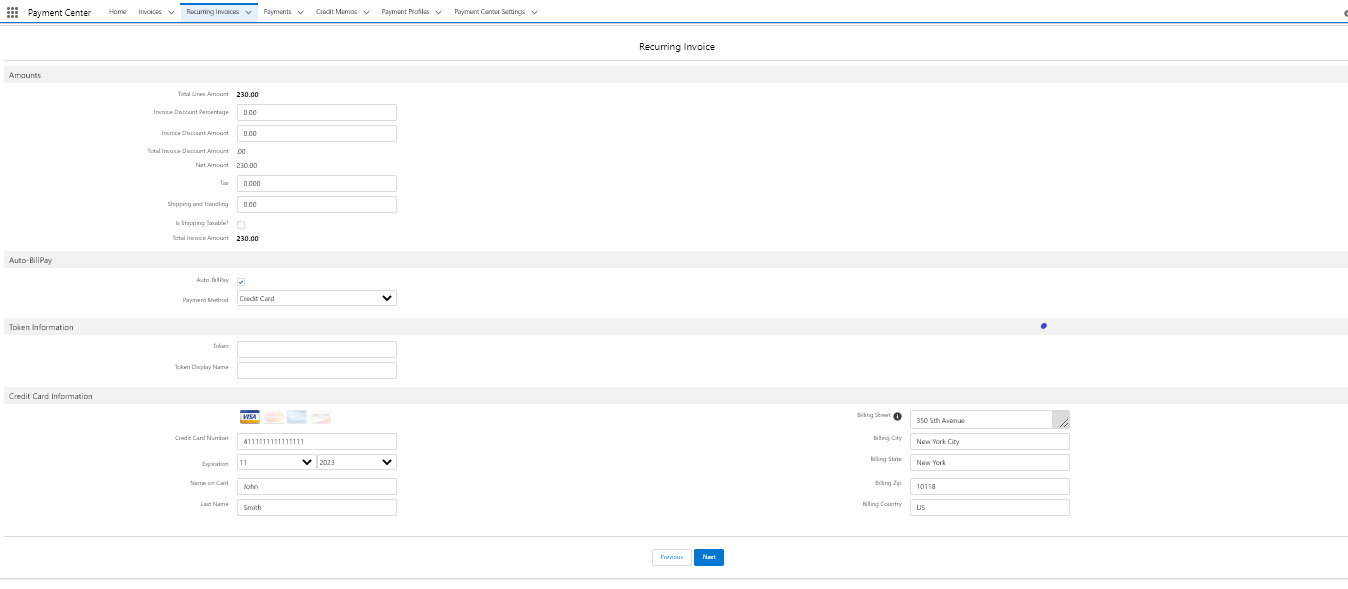
If you don’t have your customer’s credit card information, you can leave Auto-BillPay unchecked. The system will simply send invoices to your customer on a regular basis. Your customer will have the option to sign up for Auto-BillPay when paying for the invoice online.
Click Next to go to the next screen.
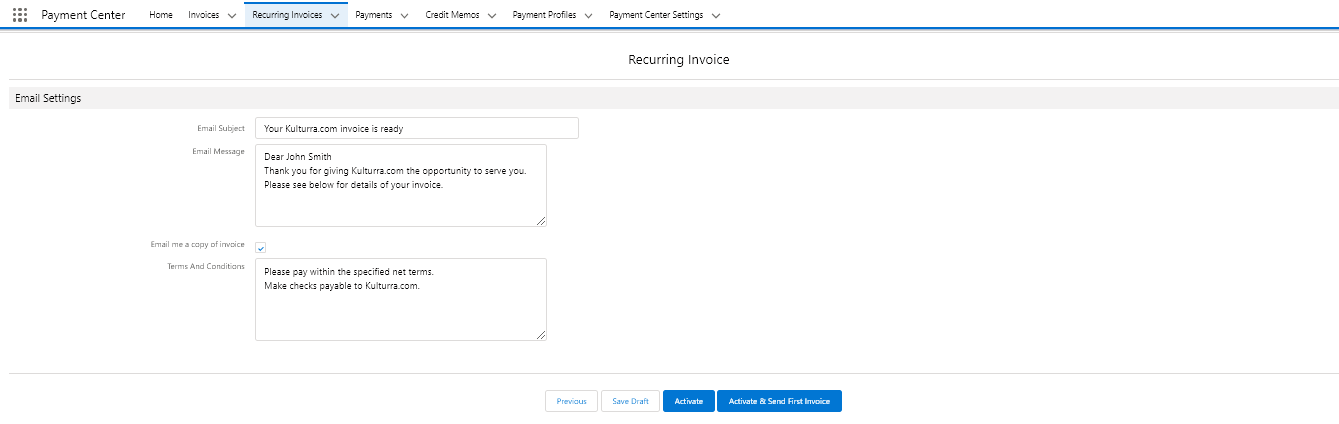
Click the appropriate button to finish setting up your recurring invoice.
Save Draft – this will simply save the recurring invoice and won’t be processed by the system.
Activate – this will save and activate the recurring invoice so that it will be processed by the system
Activate & Send First Invoice – this will save, activate and send the first invoice to your customer. If your recurring invoice is Auto-BillPay, it will create the first invoice and charge your customer’s credit card automatically.
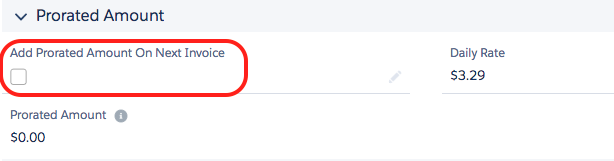
Prorated Amount
When your recurring invoices all start on a certain date, i.e. start of the month, and your customer signs up in the middle of the month, you may want to charge a prorated amount from the date they signed up to the start of the month. To do that, simply check the box called Add Prorated Amount On Next Invoice. When the box is checked and the first invoice is generated, a line item will be added to the invoice containing the prorated amount.
Miscellaneous Settings
Do Not Send Invoice – invoice will be created, but won’t be emailed
Invoice Now
Recurring invoices are processed on their set schedule. Processing is performed by the scheduler (see scheduler for more info). If, however, you wanted to create an invoice (from a recurring invoice) without waiting for the scheduler, you may do so by following the steps below:
Go to the Recurring Invoices tab and select the recurring invoice.
On the recurring invoice detail, click Invoice Now:
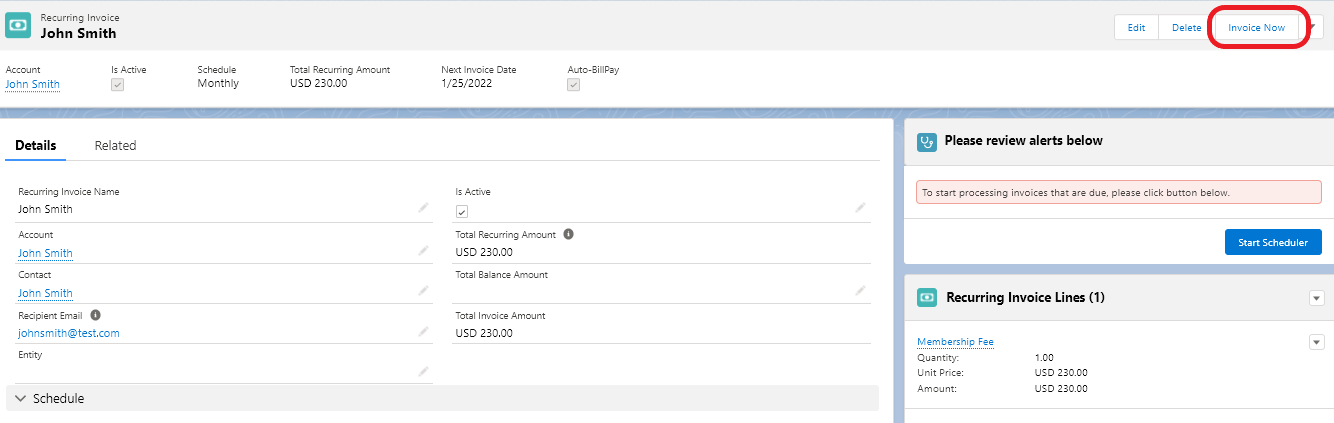
Follow onscreen instructions to create the invoice. If the recurring invoice is set for Auto-BillPay, a payment will also be processed against that invoice.
Activating/Deactivating a Recurring Invoice
At a later time when you wish to activate or deactivate your recurring invoice, check or uncheck Is Active box in the recurring invoice detail:

Auto-BillPay Sign Up
Your customers can sign up for Auto-BillPay when making a payment online. On the online payment page there is a box they can check to sign up for Auto-BillPay, as shown below:

Recurring Invoice Processor/Scheduler
Recurring Invoices are processed by a scheduler that runs on specified intervals. Please follow this link for more info: Recurring Invoice Processor