In Salesforce (Summer '20 / Winter '21), there is a default setting called "Secure guest user record access." By default, this setting is enabled, but when it is enabled, the online payment link ceases to function.
To ensure uninterrupted functionality of the online payment link, we have upgraded your version of Payment Center. The upgraded version has been deployed to your Salesforce organization.
However, there are additional settings that you must perform or verify to ensure smooth operation. Please refer to the guidelines provided below for a detailed review.
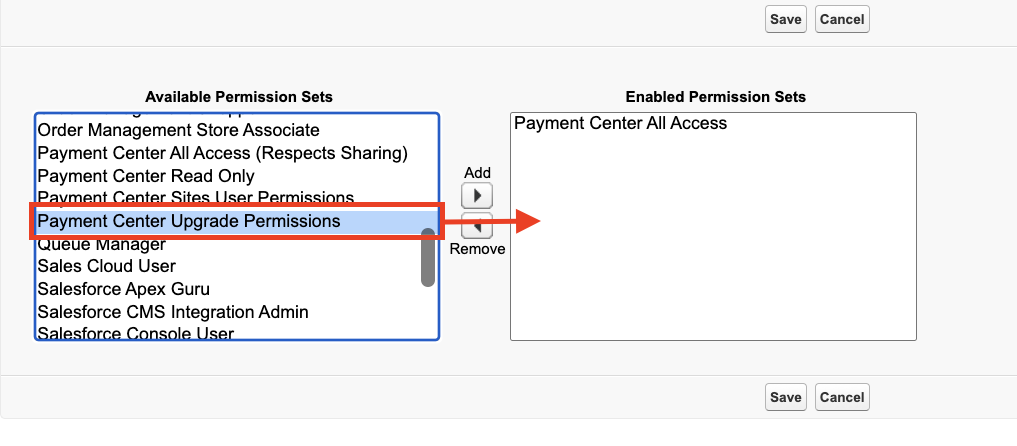
1. Assign Permission Sets
1.1. Ensure that your users are assigned this permission set ( or at the very least, they should have the Payment Center Upgrade Permissions).
1.2.If you are utilizing Payment Center in conjunction with Accounting Seed, it is important to ensure that the Site Guest User is assigned the permission set titled "Payment Center + Accounting Seed Permissions." This will enable smooth integration and functionality between Payment Center and Accounting Seed for the Site Guest User. More info here.
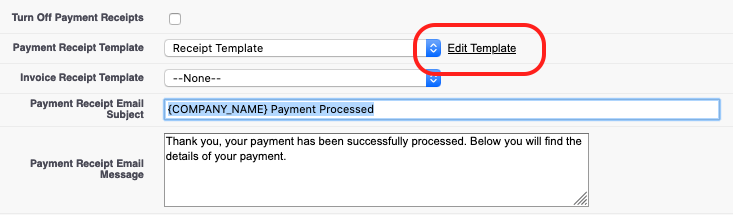
2. Edit Receipt Template
Click on the App Launcher and search for Payment Center Settings. Go to Payment Center Settings | Payment Receipt button:

On the page that comes up, click Edit Template:
Scroll all the way to the first line of the template and add the following:
renderUsingSystemContextWithoutSharing="true"
For example:
<messaging:emailTemplate subject="{!Relatedto.fw1__Payment_Receipt_Email_Subject__c}" recipientType="Contact" relatedToType="fw1__Payment__c" renderUsingSystemContextWithoutSharing="true">
Save your template.
If you have two templates, please edit both of them.
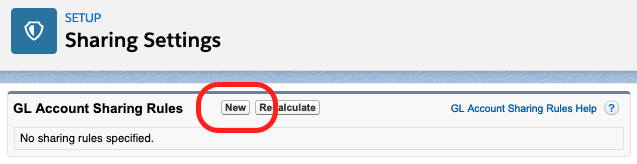
3. Add Sharing Rule/s
If you have custom automation that is triggered after a payment is made, especially if it is written in Apex Classes or Flows, you will need to perform the following step.
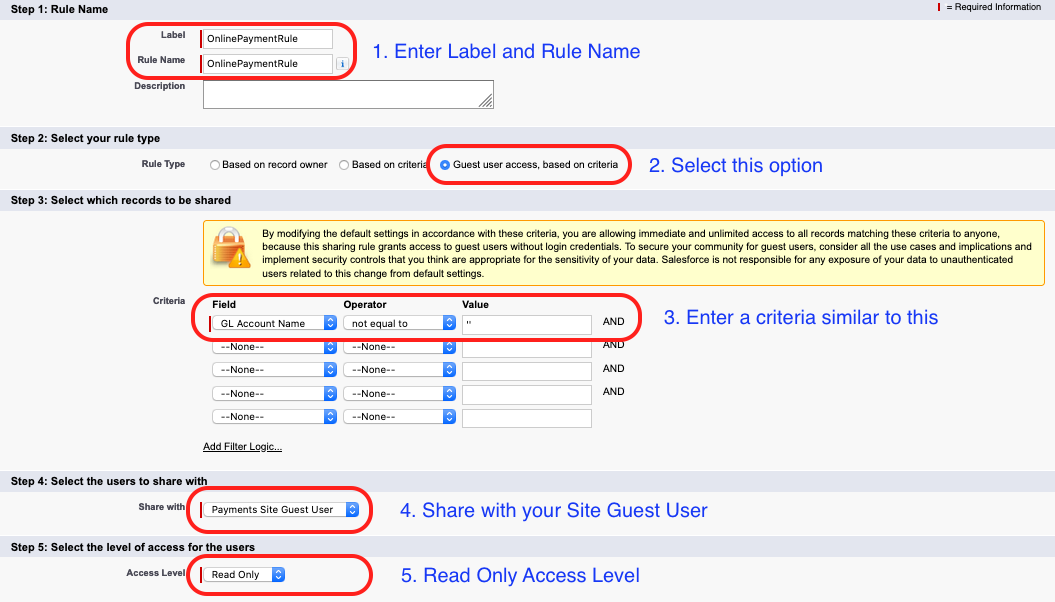
For instance, let's consider an automation that reads GL Account records to generate journal entries after a payment is made. In order for the automation to access and read these records, you will need to create a Sharing Rule on GL Accounts.
To create a Sharing Rule, follow these steps:
Go to Setup.
Navigate to Security.
Click on Sharing Settings.
Under your object's Sharing Rule, locate and click on "New."
Save your Sharing Rule.
Populate the appropriate fields as follows:
Depending on the requirements of your automation, it is possible that you may need to add sharing rules to multiple objects. Assess the specific needs of your automation and determine if additional sharing rules are necessary for other relevant objects in order to ensure proper access and functionality.
NOTE: If your automation was designed to run in "system mode", it is possible that you may not need to perform this step of creating sharing rules. In such cases, it is recommended to consult with the author of the automation to review whether this step is necessary for your specific scenario. They will be able to provide guidance on whether sharing rules need to be created based on the design and behavior of the automation.
If you require additional time to review and assess the impact of the automation on guest user record access, you have the option to temporarily disable the "Secure guest user record access" setting. By disabling this setting, you can continue accepting online payments while conducting your evaluation. This will ensure uninterrupted payment processing while you investigate and address any potential issues with the automation.
To disable the "Secure guest user record access" setting, follow these steps:
Go to Setup.
Navigate to Security.
Click on Sharing Settings.
Locate the "Secure guest user record access" option and select "Edit."
Uncheck the checkbox next to "Secure guest user record access". (If you had previously created a sharing rule, you may need to delete it in order to disable the setting effectively.)
By following these steps, you will be able to disable the "Secure guest user record access" setting and allow continued online payment acceptance without the restrictions imposed by the setting.
4. AscentERP Extension
If you are using Payment Center in conjunction with AscentERP, it is recommended to upgrade the extension package called "Ascent2Kult" if you already have it installed in your Salesforce organization. To install the upgraded version, please use the following link:
https://login.salesforce.com/packaging/installPackage.apexp?p0=04t2S000000VrWY
By installing the upgraded version of Ascent2Kult, you can ensure compatibility and take advantage of any improvements or enhancements that have been made to enhance the integration between Payment Center and AscentERP.