For users who are coming from an external system, you can upload your existing payment data into Payment Center. We have created a template where you can enter your existing payment data. This template, when used in conjunction with Data Loader, will map your data to the appropriate fields in Payment Center.
What You Need
Excel or Google Spreadsheet – you need this to enter your payment data
Our pre-defined template – you can get it here: Payment Upload Template
Data Loader (and knowledge thereof) – you need this to upload your data into Payment Center. More info here: http://wiki.developerforce.com/page/Data_Loader
Steps
Export your payment data from your existing system. You will use this data to populate the template, and later on upload into Payment Center.
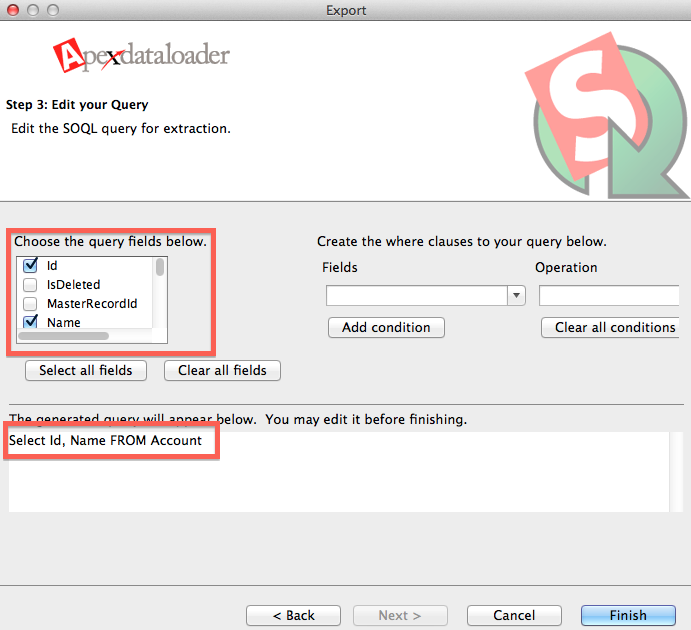
If you want your payment data to be associated with their corresponding Account in Salesforce, you first have to download your Salesforce accounts and enter them in the template. You can download your existing accounts into a CSV file using Data Loader. You only need the ID and the name of the account:
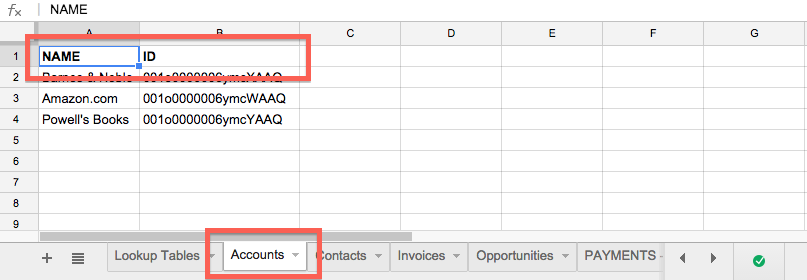
Open the template and populate the Accounts worksheet with the exported accounts. Note that the Name has to be the first column:
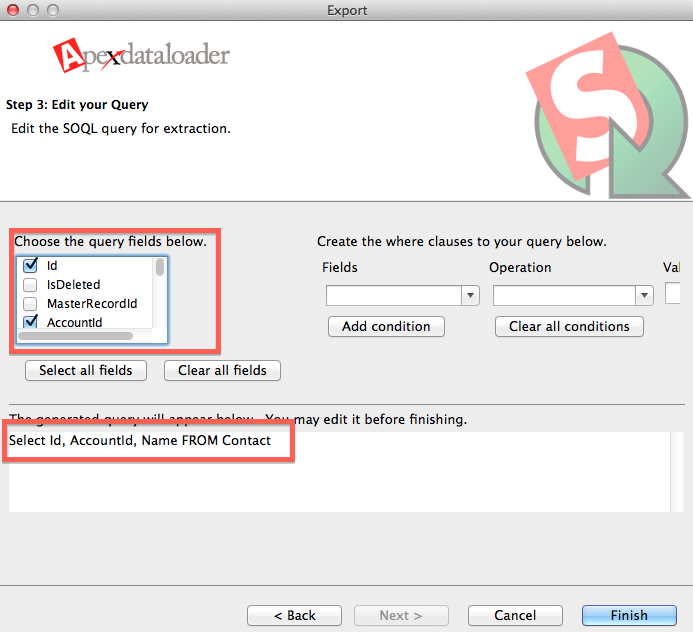
If you use Contacts and you want your payment data associated with their corresponding contact, download your existing contacts into a CSV file using Data Loader. You will only need to export the ID, Name and AccountID:
Populate the Contacts worksheet with the exported contacts. Note that the Name should be the first column, ID the second and AccountID the third:

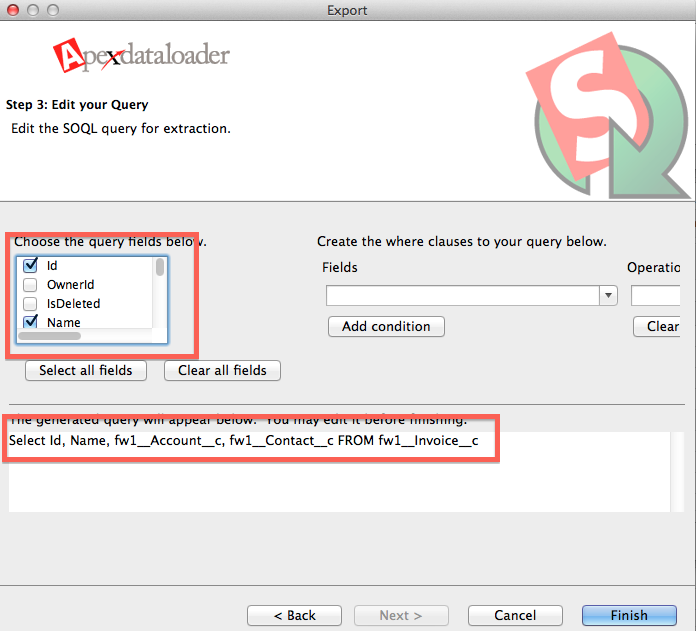
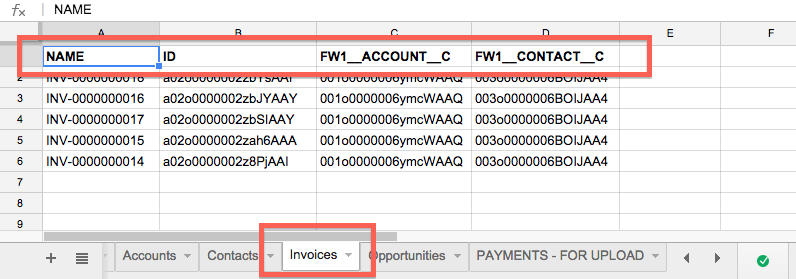
If you use Payment Center invoices and you want your payment data associated with their corresponding invoices, download your existing invoices into a CSV file using Data Loader. You will only need to export the Name, ID, Account and Contact:
Populate the Invoices worksheet with the exported invoices:
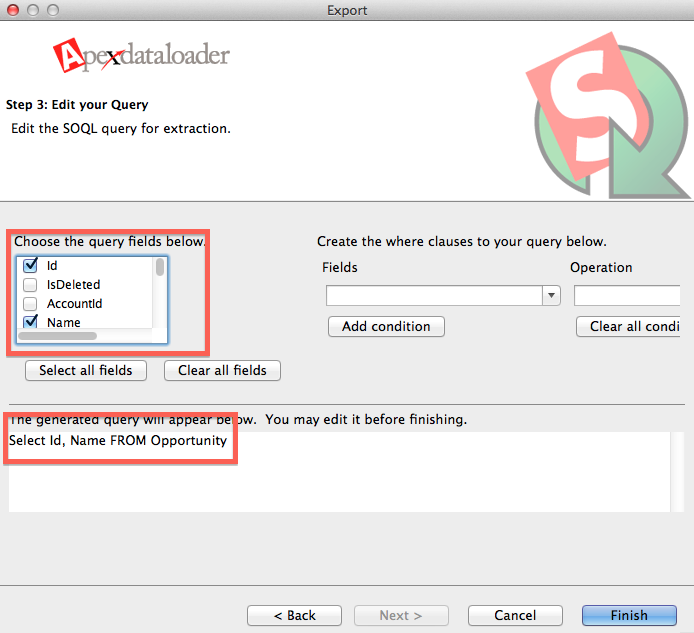
If you use Opportunities and you want them associated with their corresponding payment data, download your existing opportunities into a CSV file using Data Loader. You will only need to export the ID and the name of the opportunity:
Populate the Opportunities worksheet with the exported data.
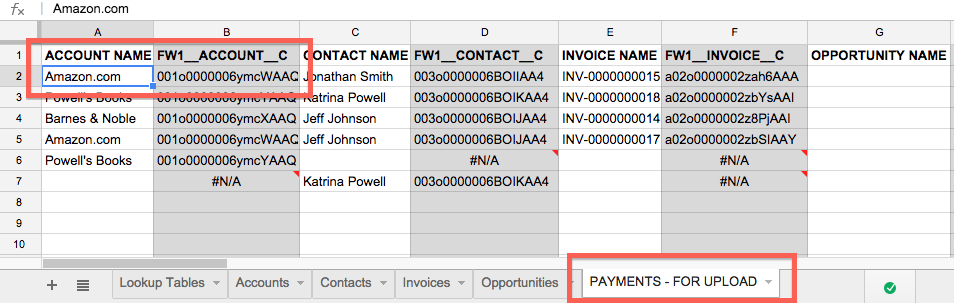
Now that you have all your lookup tables in place, go to PAYMENTS – FOR UPLOAD worksheet and enter your data.
Enter the account name. The ID should be automatically pulled from the Accounts worksheet:
Enter the contact name, invoice name, or opportunity name (if you use them). Their corresponding IDs should be automatically pulled from their corresponding worksheets.
Populate the remaining columns.
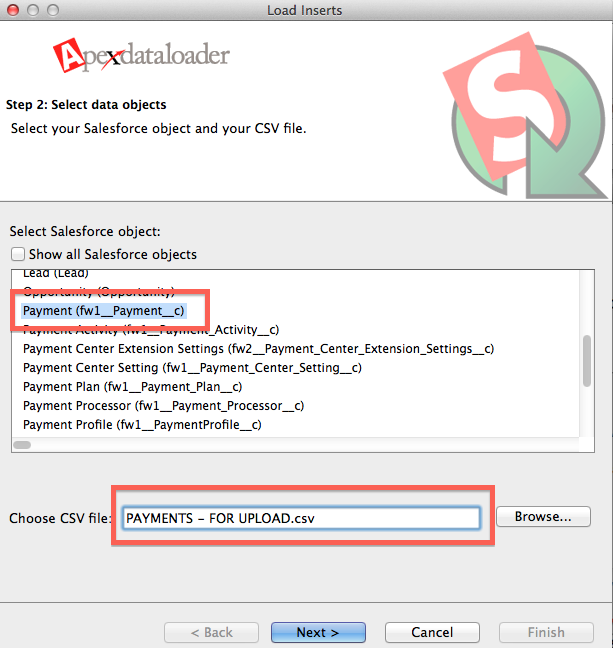
When finished populating the PAYMENTS – FOR UPLOAD worksheet, save it to a CSV file. Using Data Loader, upload the data into Payment Center, as shown by the succeeding screenshots:
Choose Insert:
Select Payment and enter the CSV file:
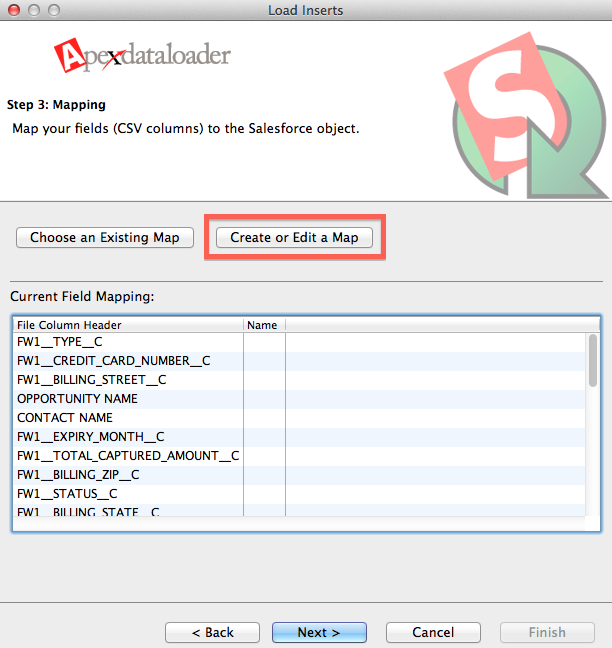
Click Create or Edit a Map:
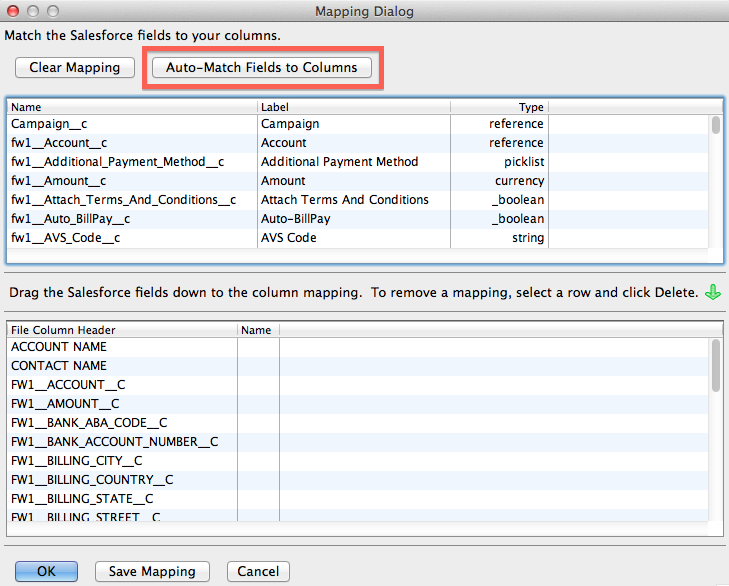
Click Auto-Match Fields to Columns:
Follow onscreen instructions until the upload is finished.

At this point your payment data should now be uploaded into Payment Center.