How can we help you?
Search our knowledge base to get answers to your questions, access video training & more!
Setup
Elavon Cloud Payments Interface (CPI)
Updated 3 weeks ago
Elavon, a global leader in payment processing, has launched the Elavon Cloud Payments Interface (CPI), a cutting-edge API designed to streamline digital and in-person payment management.
Thinking of Using Elavon CPI? Here's What You Need to Know
If you're considering integrating Elavon CPI as your payment processor, this guide will walk you through the necessary steps to set up the system and start accepting payments through its device component.
Access Payment Center Settings
First, log in to your Salesforce account and navigate to the Payment Center Settings tab.
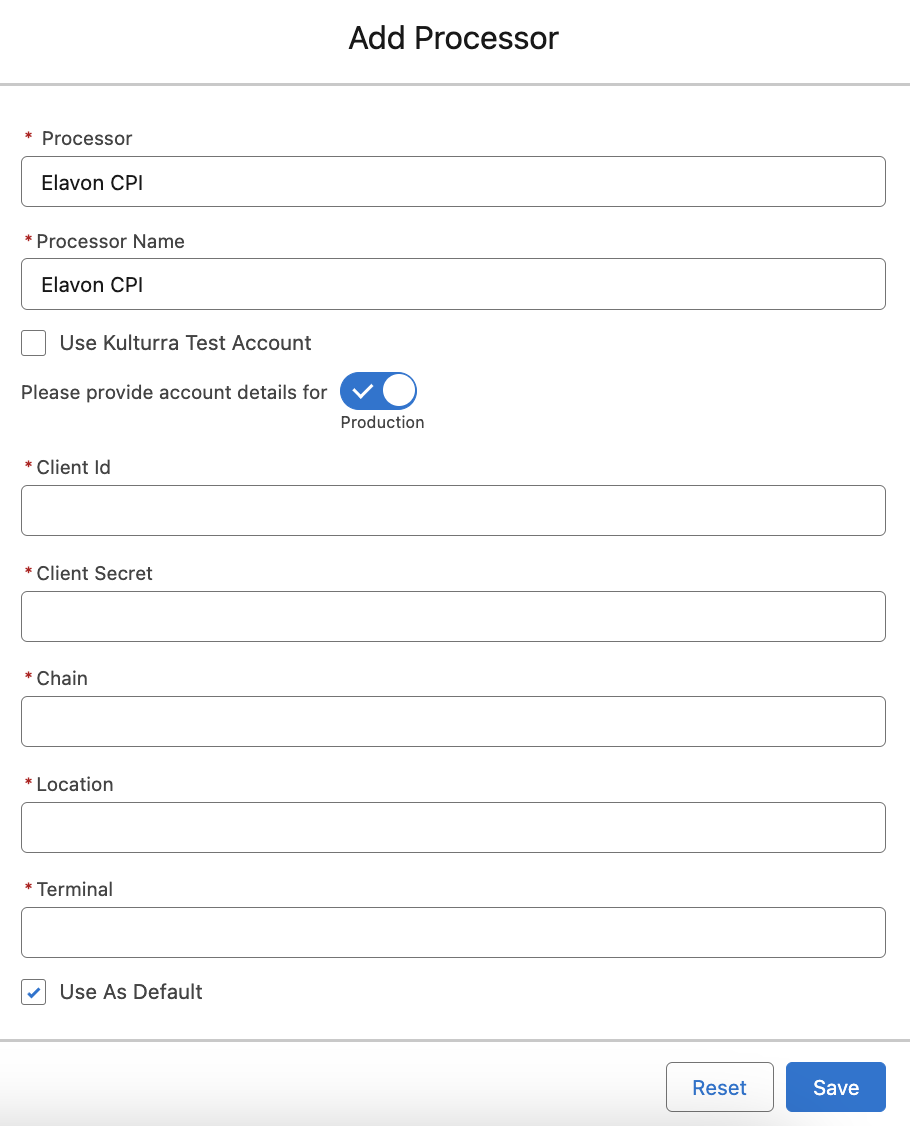
Once you're in the Payment Center Settings, locate the Add Processor option or create 'New' from Payment Processors related list.

3. Select Elavon CPI from the payment processors dropdown menu.
4. Enter the Client ID, Client Secret, Chain, Location, and Terminal information.
5. Click Save.
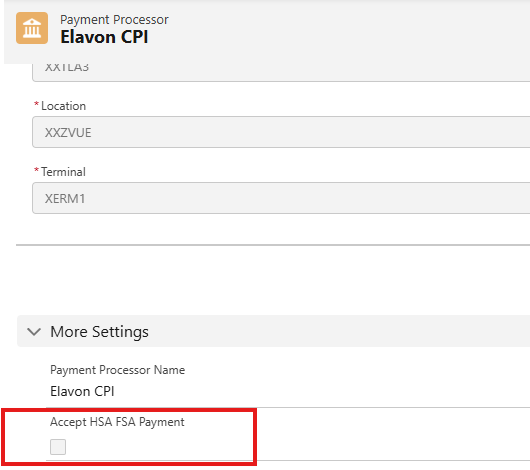
4. Once saved, a batch job will automatically generate an access token from Elavon, saving it to the CPI processor record. On the record page, you’ll find a checkbox titled Accept HSA/FSA Payment—when checked, it will include HSA/FSA data in the Elavon API request, ensuring a more tailored experience.
Note: Kulturra Test Account for Elavon CPI is not automatically created when customers initially install Payment Center. The reason being is that a physical device is needed for the processor to be functional.
Device Setup: Pairing Made Easy:
Upon powering up your device, you’ll be greeted with a registration code displayed on the screen. Follow these simple steps to pair your device:
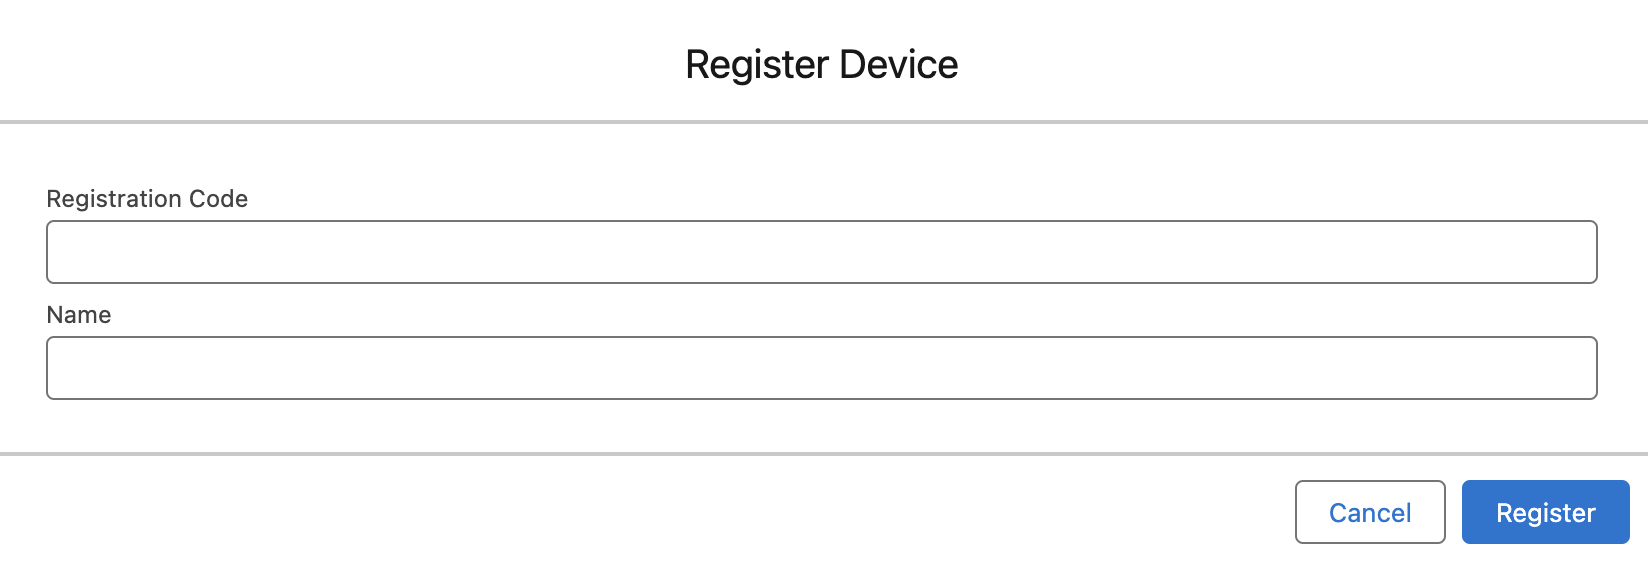
1. Navigate to the Elavon CPI Processor and click Register Device. If this option isn’t visible, simply add it to the Payment Processor Page Layout.

2. Enter the registration code and Name as displayed on the idle screen of the device. Click Register.
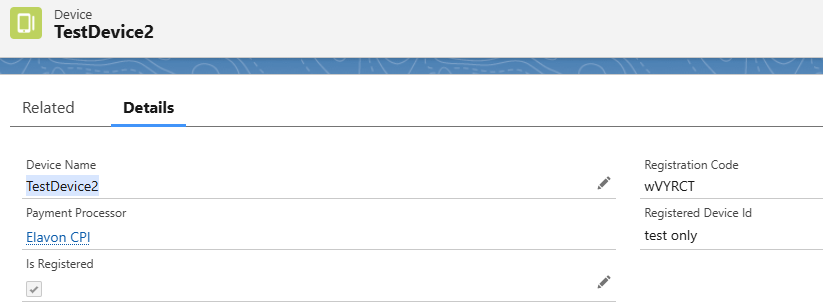
3. If successful, a Device record will be created, complete with a unique device identifier. The device will stop displaying the pairing code, show a success message, and switch to the Welcome/Idle screen.
4. If registration fails, the device will display an error message. Simply restart the pairing process to resolve the issue.
5. To deregister a device, go to the Device record and click the Deregister button.

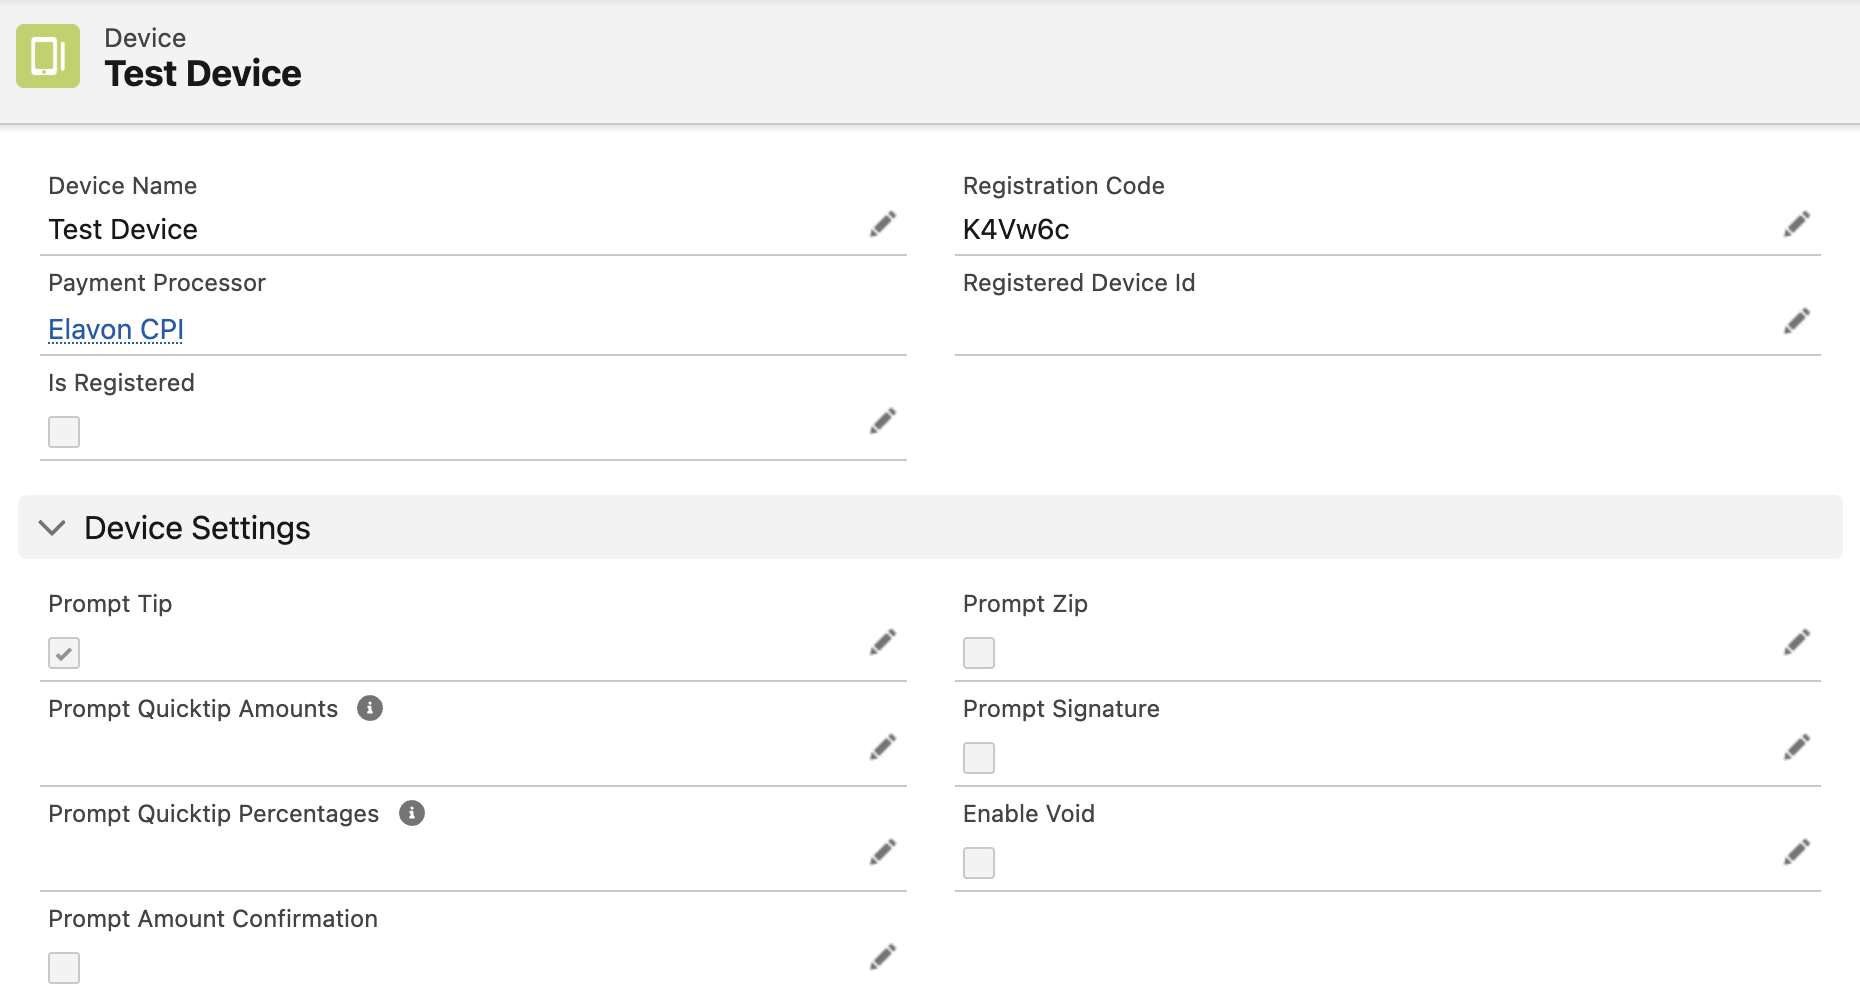
Customizing Your Elavon CPI Experience
Once your device is set up, you can customize the behavior of the Elavon CPI directly from the Device record. Here are some options you can configure:
Prompt Tips
Tip Amounts
Tip Percentages
Store Credit Card Information
These settings allow you to tailor the payment experience to your specific needs and provide additional convenience for your customers.
Taking Payments with the Device Payment Component
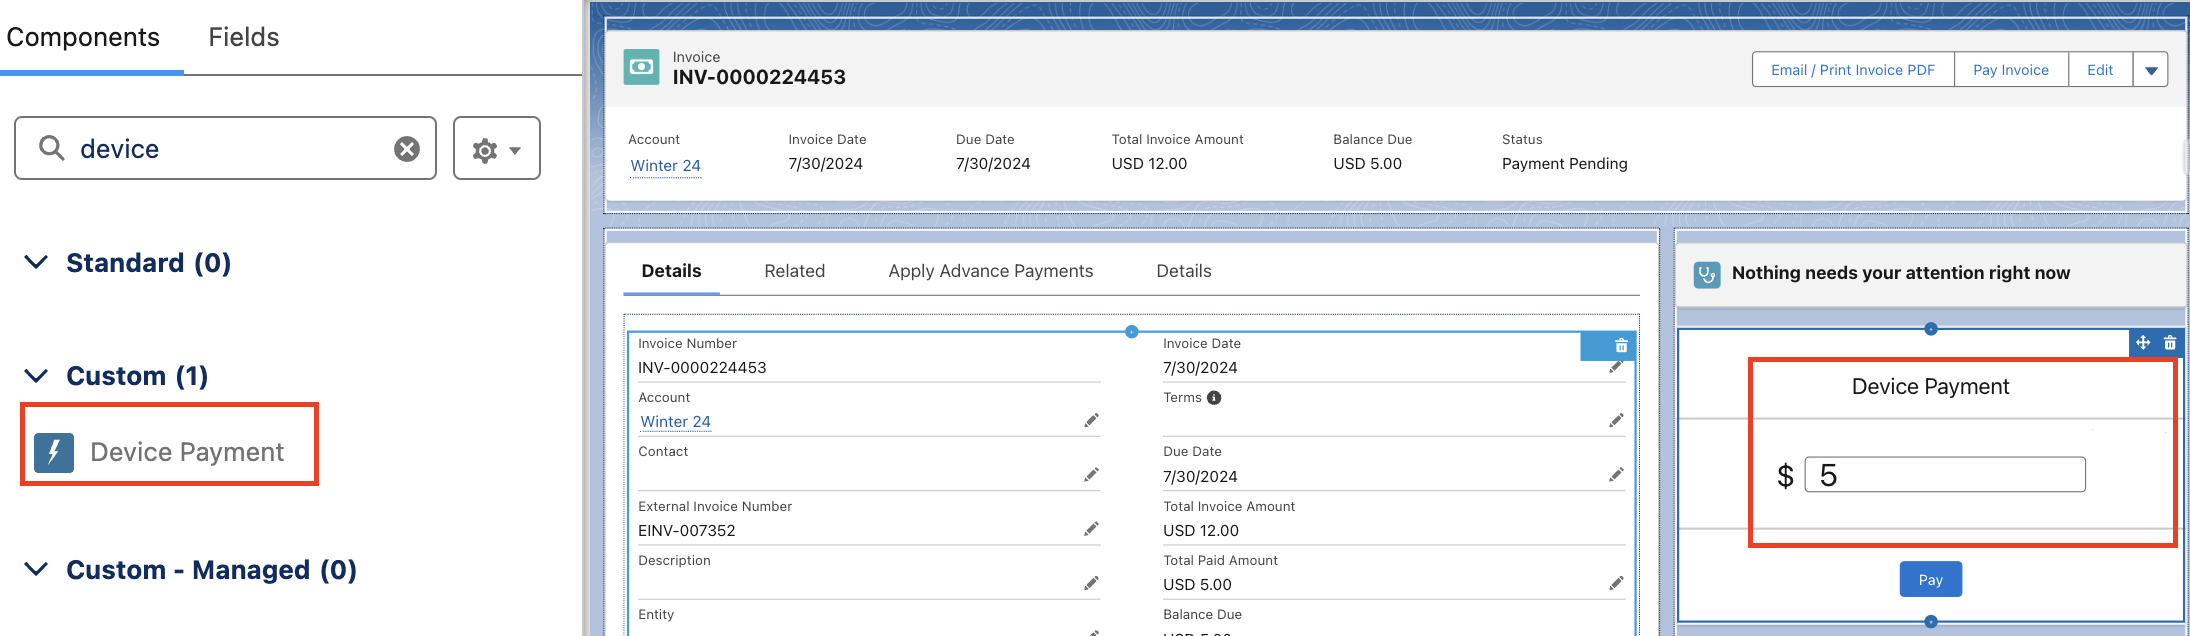
Ready to start processing payments? Here’s how to quickly integrate the Device Payment component into your Salesforce pages:
From your record page (such as the Invoice record page), go to Setup and select Edit Page.
Choose where you’d like to insert the device payment component. Select Device Payment from the Custom Component section and drag it into place.
Here is the list of parameters that the DevicePayment Component accepts:
Device - You can pass the ID or field in the User object. If blank the device registered on the default processor will be used.
Amount - You can pass the ID or field name of the amount in your object that holds the amount to be charged (i.e Amount__c)
Account - You can pass the ID or field name of the Account lookup field defined in the custom object (i.e. Account__c)
Contact - You can pass the ID or field name of the Contact lookup field defined in the custom object (i.e. Contact__c)
Entity - You can pass the ID or field name of the entity. If passed, the device registered on the processor linked to the entity will be used.
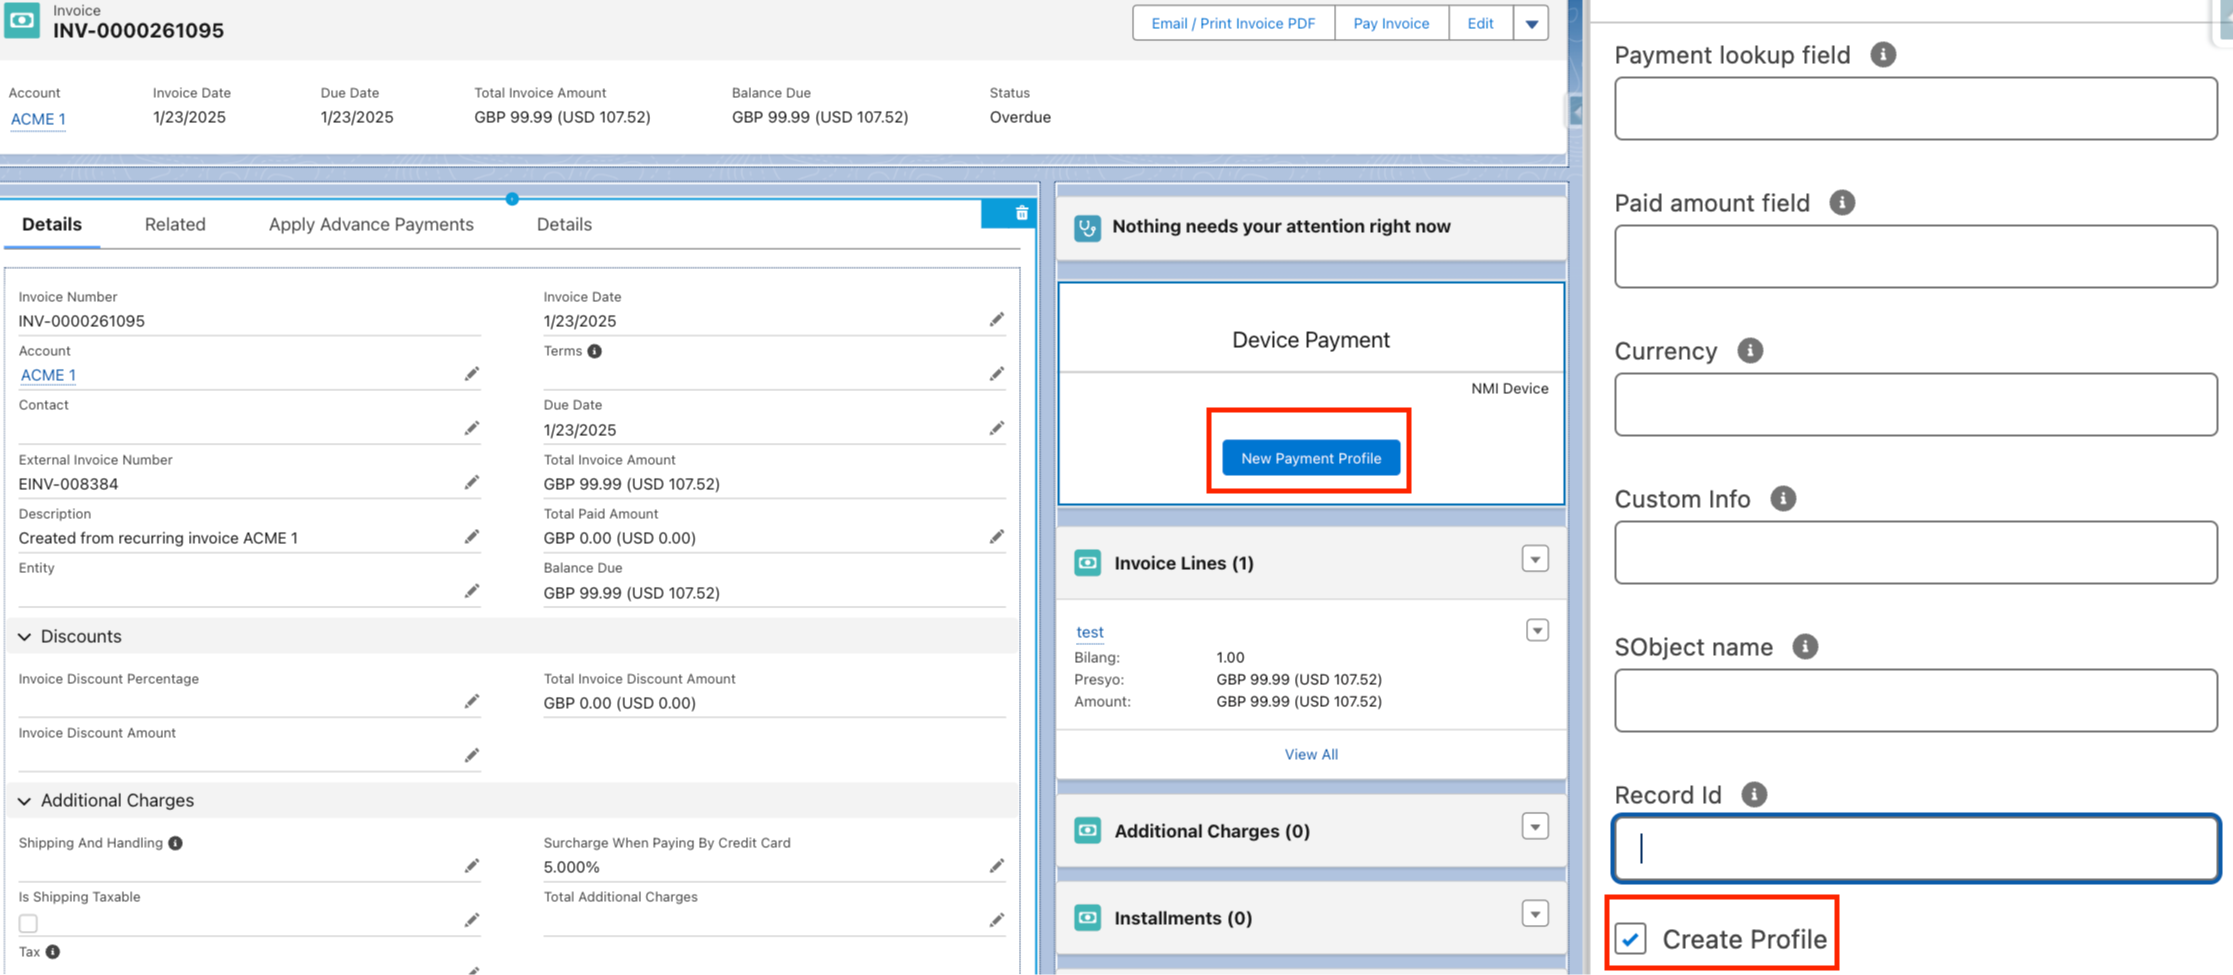
Payment lookup field - The name (API name) of the lookup field defined in the Payment object (i.e. Case__c)
Paid amount field - The name of the field in your object that holds the paid amount (i.e. Total_Paid_Amount__c)
Currency - If you use different currencies, you can pass the name of the field currency or currency value (i.e. Currency__c, {!currency}, USD)
Custom Info - Any information you want saved in the Payment record (i.e. {!any_text}, payment from sample account)
SObject Name* - The name (API name) of your object
Record ID* - The ID of the current record in your object
Create Profile (checkbox) - if checked, Payment Terminal will be used to create Payment profile
Output
Is Successful (checkbox, Output parameter) - Payment transaction is successful
Payment ID (Output parameter) - The ID of the payment record created
Error Message (Output parameter) - error message
Profile ID (Output parameter) - The ID of the profile record created
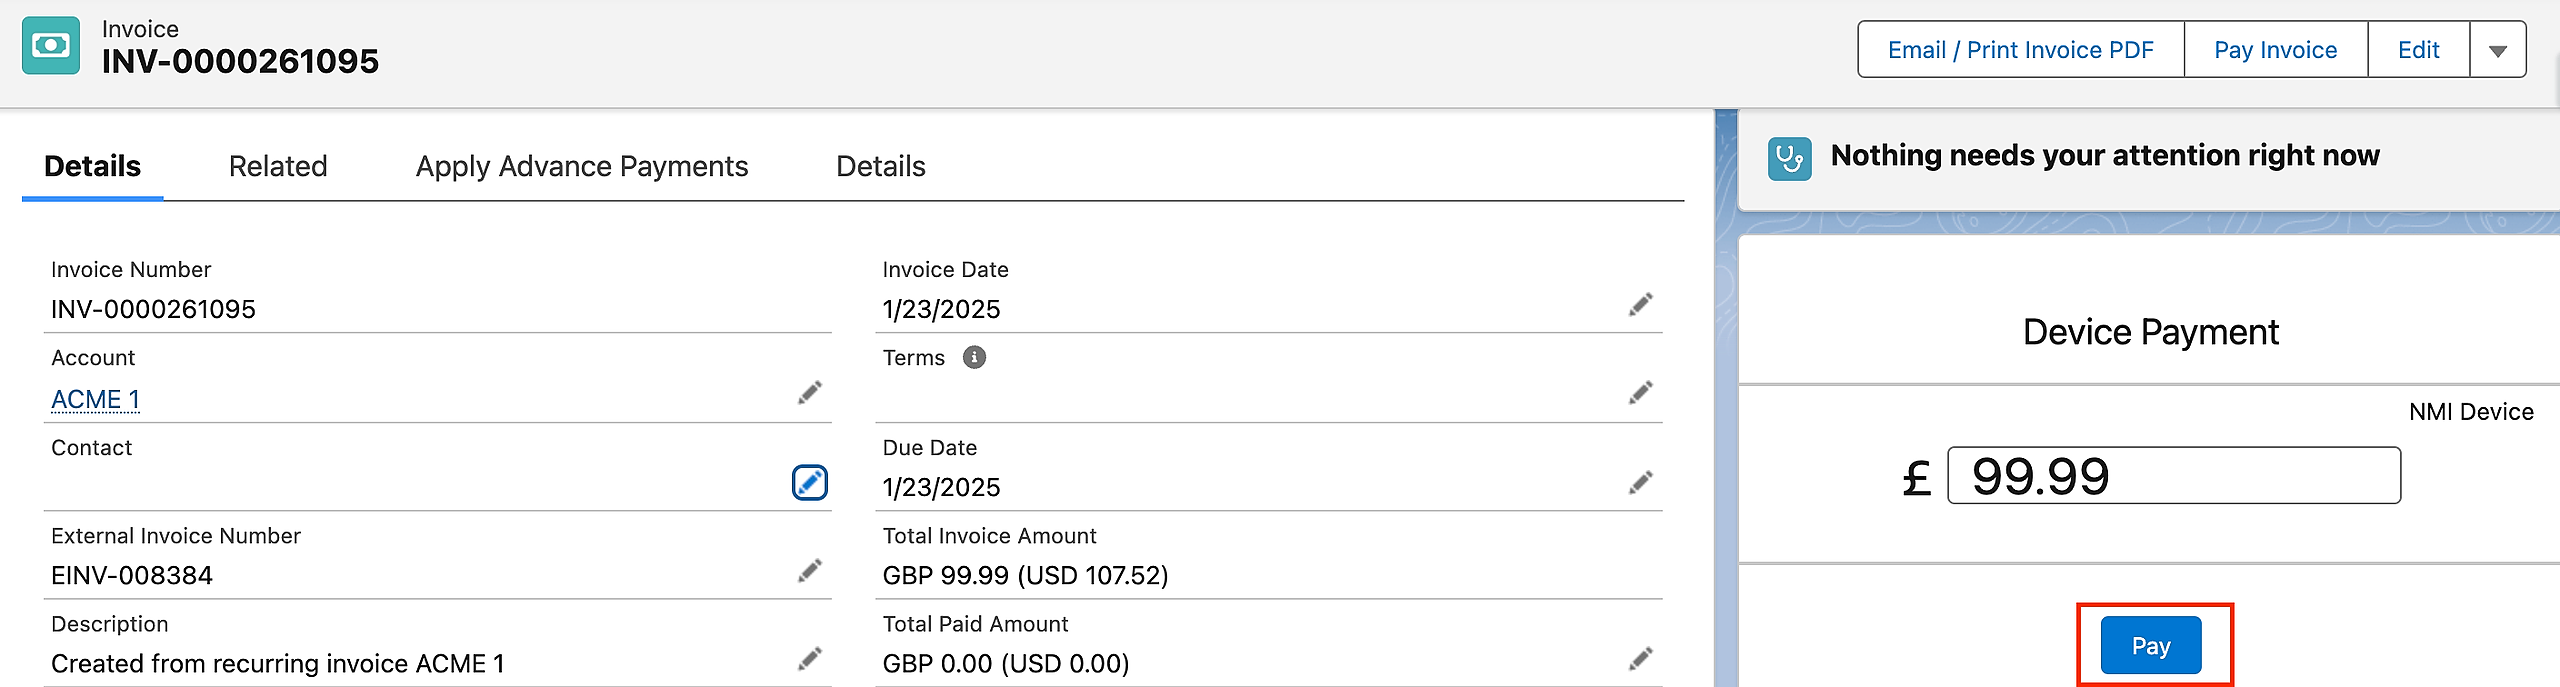
3. On the page, click Pay and have your customer complete their payment by following the instructions on the device.
4. If the Create Profile checkbox is enabled , the Create Profile Screen will allow you to easily set up a payment profile for your customer.
Payment Actions at Your Fingertips
Elavon CPI supports a range of payment actions to keep your business running smoothly:
Capture payments
Void transactions
Refund payments
Process payments using saved payment profiles
By leveraging these features, you can streamline your operations and ensure a smooth, secure payment process for both you and your customers.
Going Live
To go live, go to Payment Center Settings tab. Under Payment Processors related list, click Elavon CPI.
Check Live and Use As Default boxes, then click Save:
Availability: Winter '25