How can we help you?
Search our knowledge base to get answers to your questions, access video training & more!
Setup
NMI - Device payments
Updated 1 week ago
For NMI Processor setup, please refer to NMI Setup article.
NMI - Pay by POI Device
A Point of Interaction (POI) device is a physical terminal that a cardholder uses to interact with a merchant to process payments. The Payment Card Industry Security Standards Council (PCI SSC) manages the POI standard, which includes an online list of approved POI devices. POI devices are used in many settings, such as grocery stores, gas stations, and restaurants.
Device Registration/Deregistration
Login to your Salesforce account and go to Payment Center Settings tab.
Go to Payment Processor section and select NMI Processor.
Click the Register Device button. If the button is not available, you need to add it to the Payment Processor Page Layout.

4. Enter Registration Code and Name for the Device. Click Register.
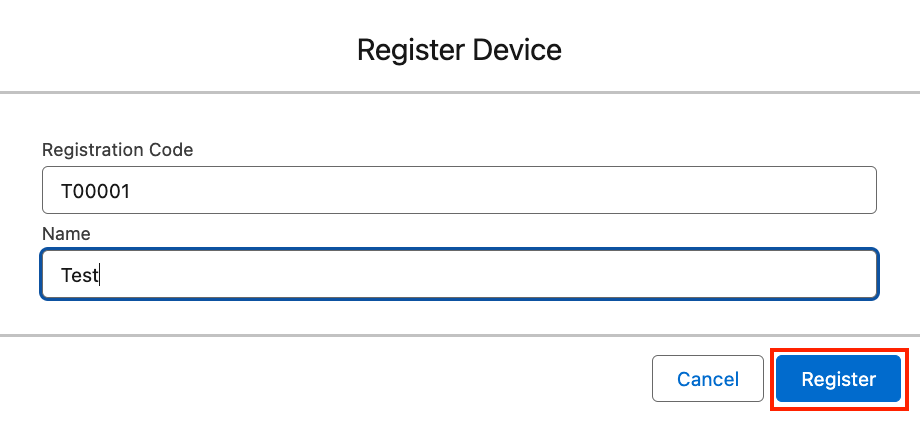
5. If registration is successful, the system will create the Device record.
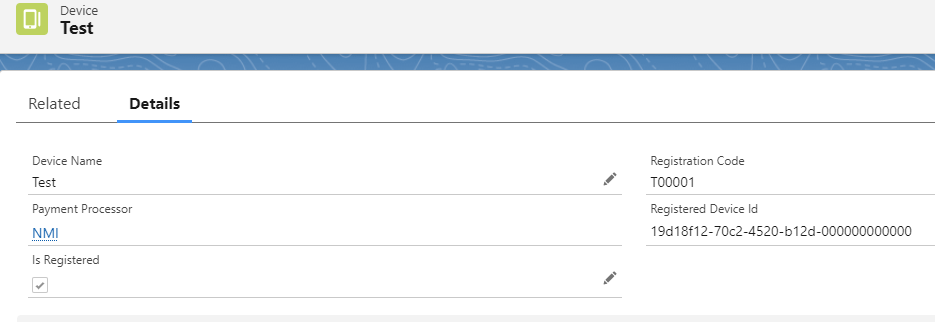
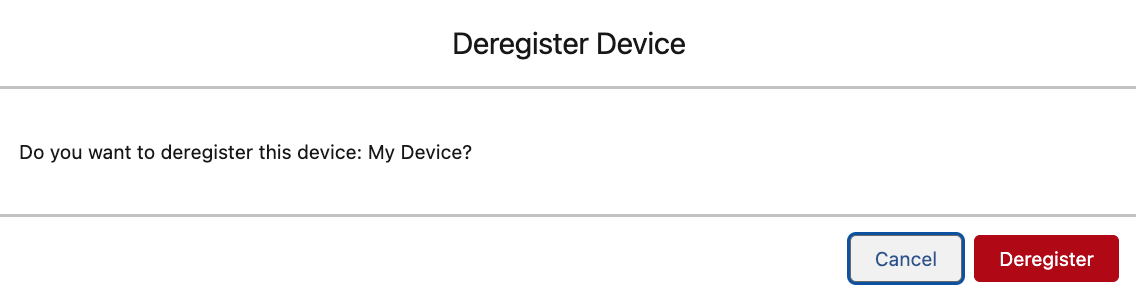
6. On the Device record, there is a Deregister button to deregister device.

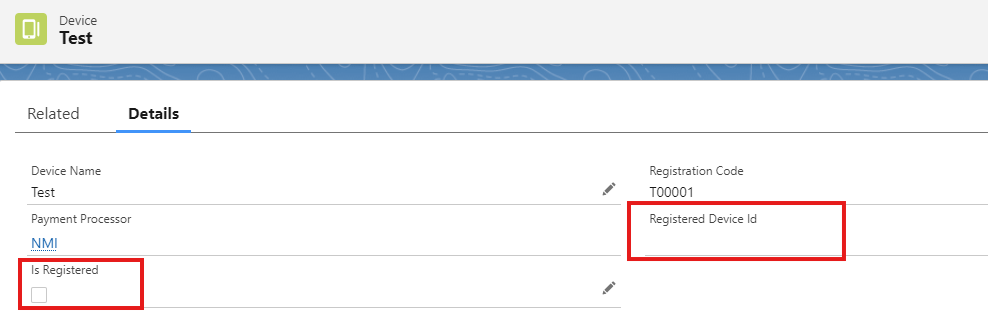
7. Once deregistered, the system will set Is registered to false and empty the Registered Device ID field.
Pay by POI Device component
From your record page e.g. Invoice record page, go to Setup then Edit Page.
Choose where you want to insert the device payment component, select Device Payment from the Custom Component section, and simply drag and drop the component.
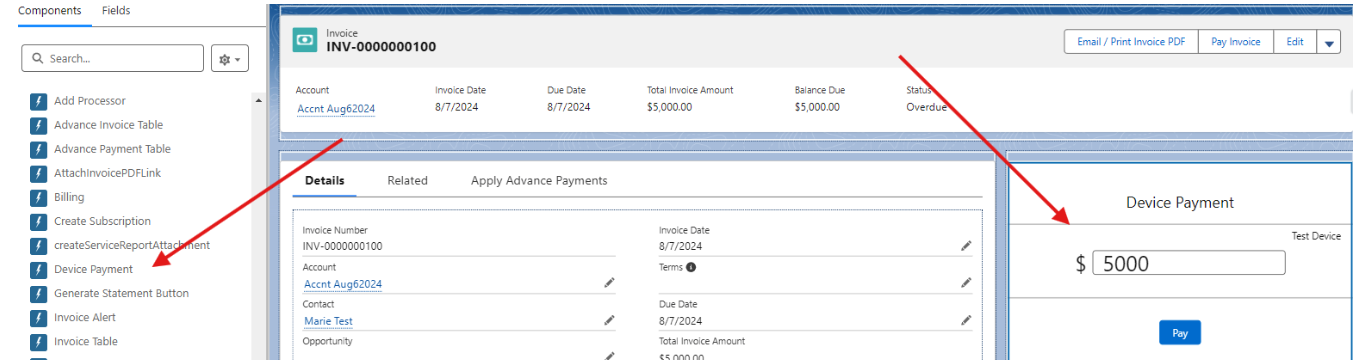
Here is the list of parameters that the DevicePayment Component accepts:
Amount - You can pass the ID or field name of the amount in your object that holds the amount to be charged (i.e Amount__c)
Account - You can pass the ID or field name of the Account lookup field defined in the custom object (i.e. Account__c)
Contact - You can pass the ID or field name of the Contact lookup field defined in the custom object (i.e. Contact__c)
Payment lookup field - The name (API name) of the lookup field defined in the Payment object (i.e. Case__c)
Paid amount field - The name of the field in your object that holds the paid amount (i.e. Total_Paid_Amount__c)
Currency - If you use different currencies, you can pass the name of the field currency or currency value (i.e. Currency__c, {!currency}, USD)
Custom Info - Any information you want saved in the Payment record (i.e. {!any_text}, payment from sample account)
SObject Name* - The name (API name) of your object
Record ID* - The ID of the current record in your object
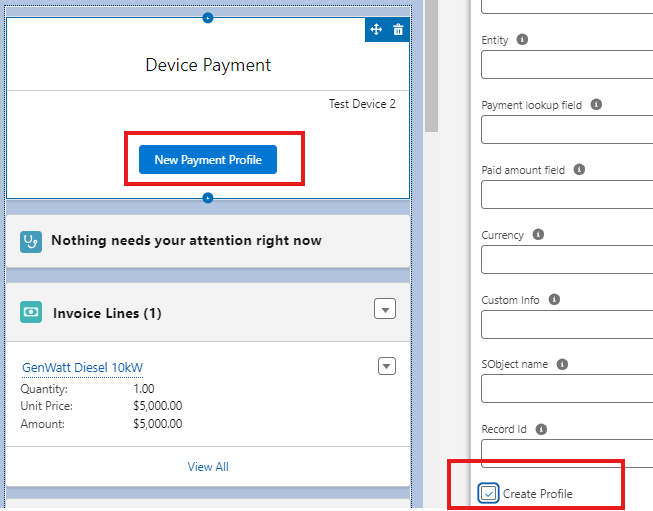
Create Profile (checkbox) - if checked, Payment Terminal will be used to create Payment profile
Device - (Salesforce record Id) Device__c (User object) , a required field, for this input parameter, please ensure that it accepts both actual values (i.e. SF record ID) and a field name (so that value will be dynamic, for example based on what device is associated with the user)
Entity - You can pass the ID or field name of the entity. If passed, the device registered on the processor linked to the entity will be used.
Output
Is Successful (checkbox, Output parameter) - Payment transaction is successful
Payment ID (Output parameter) - The ID of the payment record created
Error Message (Output parameter) - error message
Profile ID (Output parameter) - The ID of the profile record created
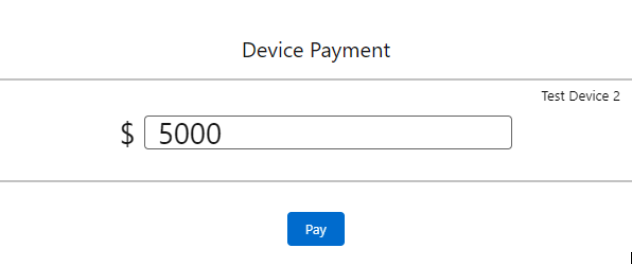
3. On the page, on the Payment Screen, click Pay. When user clicks Pay button, the system will make a callout to POI device endpoint.
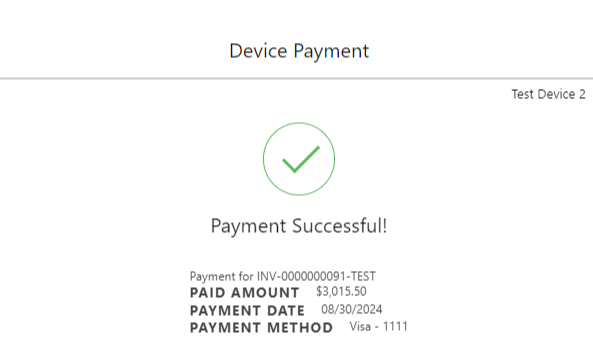
4. For a successful payment:
Payment record is created
Invoice is paid
Profile is created
Payment is linked to custom object
5. For failed declined payment:
Error message is prompted on the screen
6. When timed out:
Payment Intent is created
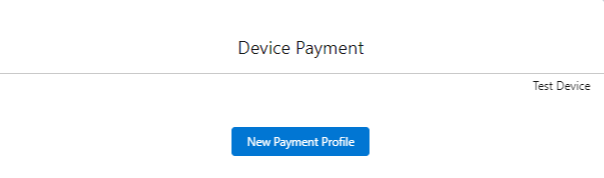
7. If the Create Profile (checkbox) is checked on the component, on the Page, the Create Profile Screen can be use to create Payment Profile.

Tip Amount
Tip amount will be saved in Payment object
Tip amount will be included in the payment Total Paid Amount
If paying for an invoice, Tip amount will be added as Additional Charges
Note: NMI processor only
Availability: Summer '24