How can we help you?
Search our knowledge base to get answers to your questions, access video training & more!
Setup
Square Integration
If you are considering using Square as your Payment Processor, this article will provide information on the settings required to connect Payment Center with Square.
Updated 1 week ago
Square Setup
Open the Square Developer sign-up page. If you already have a Square account, sign in.
After you sign in to your account, create an application.
Open the Developer Dashboard.
On the Applications page, choose an application that you created.
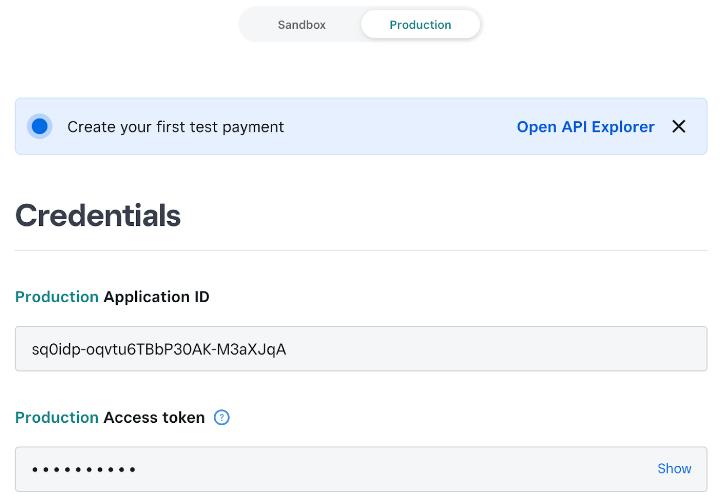
At the top of the page, toggle Production to set your environment.
In the left pane, choose the Credentials tab, make a note of Application Id and Access token
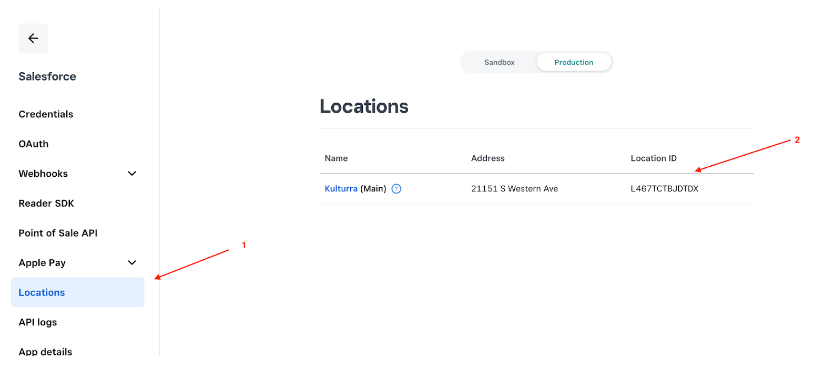
7. In the left pane, choose the Location tab, make a note of Location ID.
Payment Center Settings
Login to your Salesforce account and go to Payment Center Settings tab.
Locate Add Processor component or create New from Payment Processors related list.
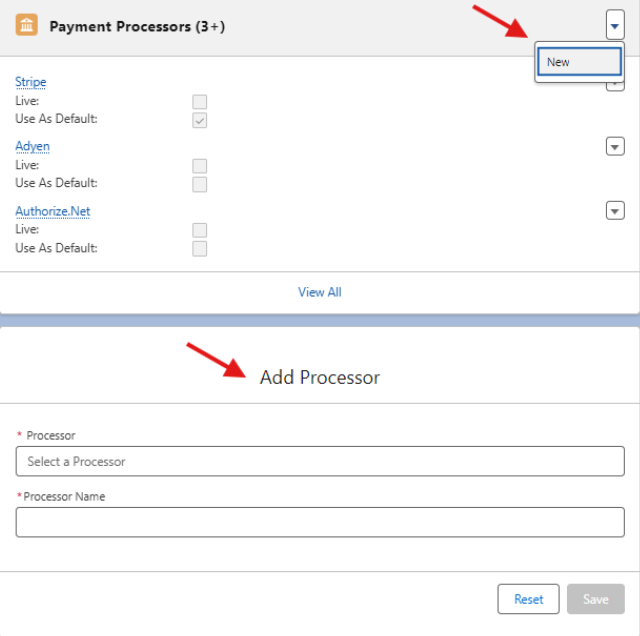
3. Select Square from the payment processors dropdown list.
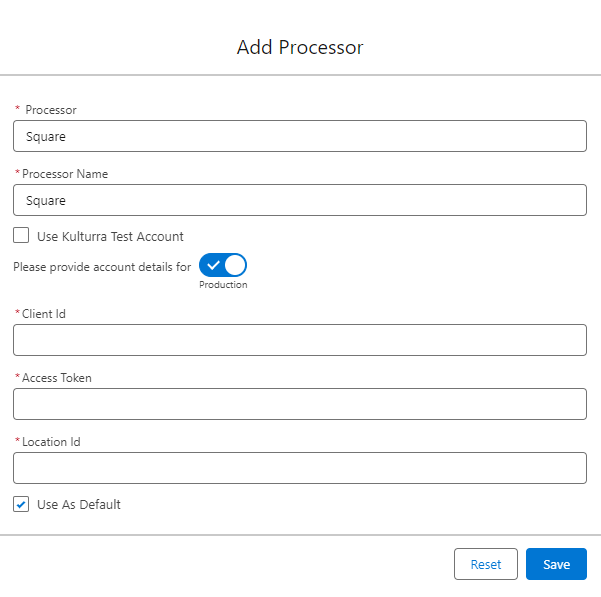
4. Enter Client Id, Access Token and Location Id copied from Square Developer Dashboard.
5. Click Save.
Device Setup
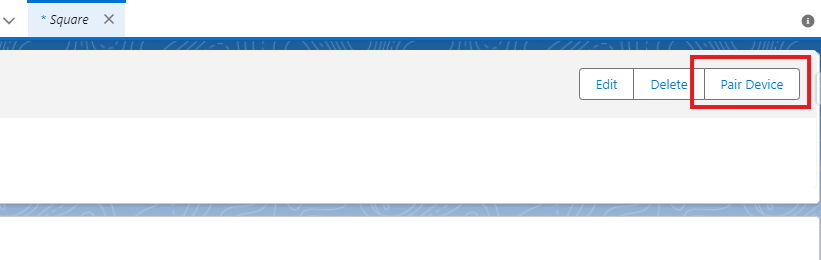
Generate a device code by going to Square processor, click Pair Device.
2. Enter Name for the device, click Generate Code.
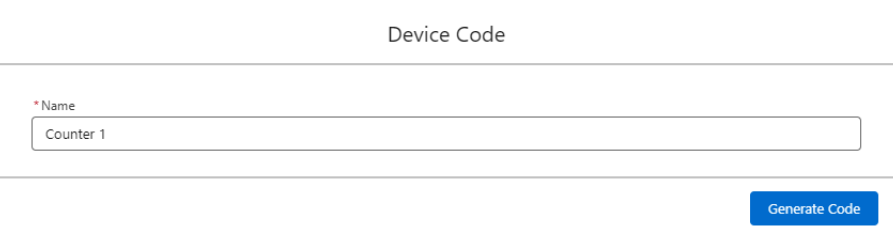
Keep the window open.
Device codes will expire after five minutes. If your device code expires before you complete the pairing process, you'll need to generate a new code by following the same steps again.
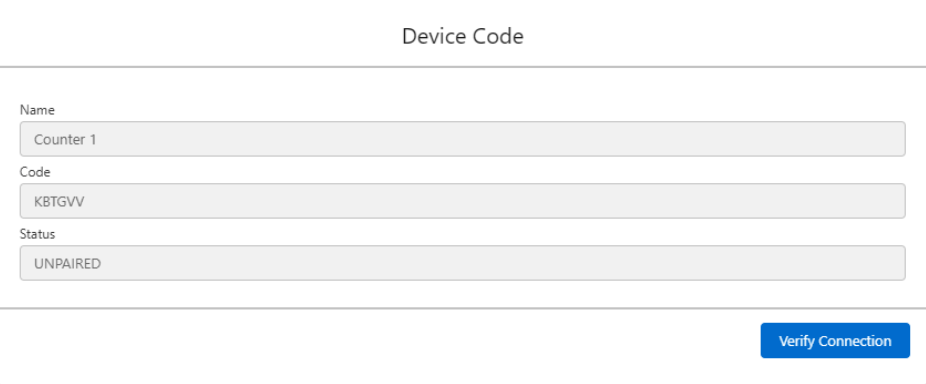
Make a note of this device code, and grab your Square Terminal device to begin the next steps.
2. On your Square Terminal, tap Sign in then Use device code.
3. Enter the device code on your Square Terminal to complete pairing. Then tap Sign In. You’ll receive a confirmation in-app once you’ve successfully connected your Square Terminal to your device, and Square Terminal will display "Powered by Square."
4. Back to Salesforce, click Verify Connection, the system will create Device record with the device Id.
Customizing Square Terminal behavior
Go to Device record, on Device Settings section
Prompt tips
Require signature
Require Zip

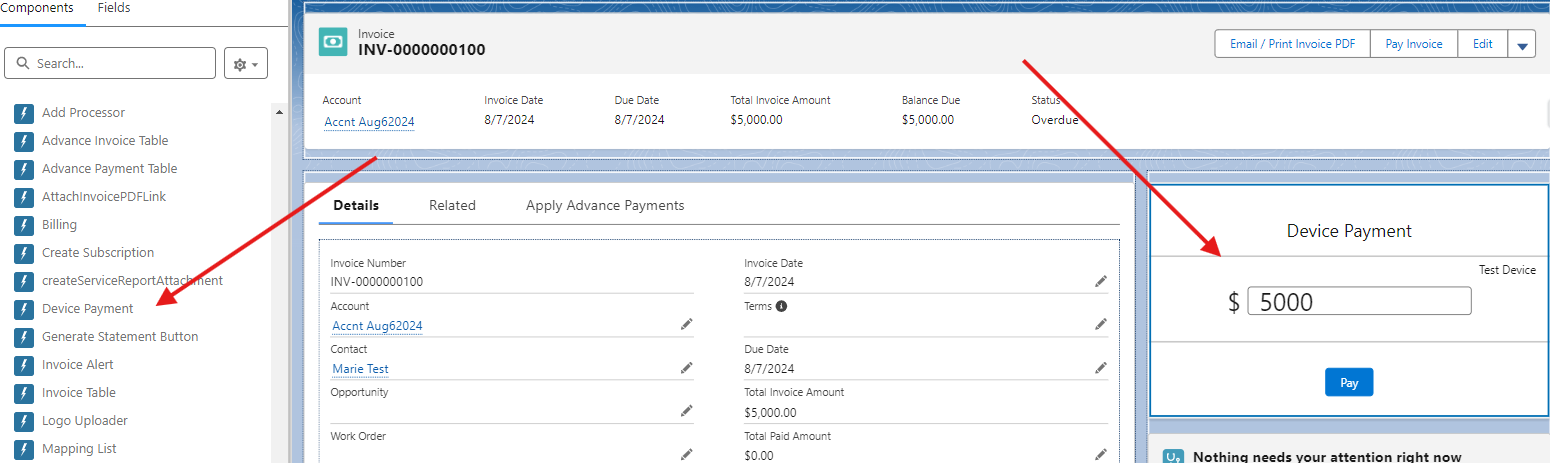
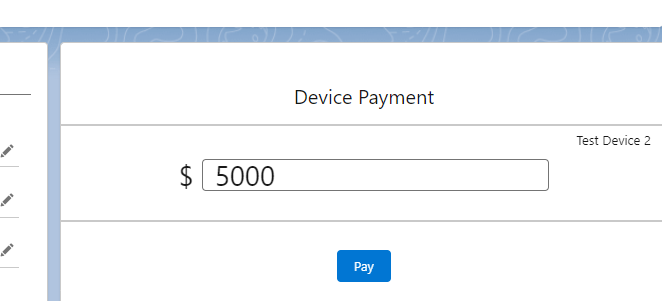
Take Payments with Device Payment component
From your record page e.g. Invoice record page, go to Setup then Edit Page.
Choose where you want to insert the device payment component, select Device Payment from the Custom Component section, and simply drag and drop the component.
Here is the list of parameters that the DevicePayment Component accepts:
Device - You can pass the ID or field in the User object. If blank the device registered on the default processor will be used.
Amount - You can pass the ID or field name of the amount in your object that holds the amount to be charged (i.e Amount__c)
Account - You can pass the ID or field name of the Account lookup field defined in the custom object (i.e. Account__c)
Contact - You can pass the ID or field name of the Contact lookup field defined in the custom object (i.e. Contact__c)
Entity - You can pass the ID or field name of the entity. If passed, the device registered on the processor linked to the entity will be used.
Payment lookup field - The name (API name) of the lookup field defined in the Payment object (i.e. Case__c)
Paid amount field - The name of the field in your object that holds the paid amount (i.e. Total_Paid_Amount__c)
Currency - If you use different currencies, you can pass the name of the field currency or currency value (i.e. Currency__c, {!currency}, USD)
Custom Info - Any information you want saved in the Payment record (i.e. {!any_text}, payment from sample account)
SObject Name* - The name (API name) of your object
Record ID* - The ID of the current record in your object
Create Profile (checkbox) - if checked, Payment Terminal will be used to create Payment profile
Output
Is Successful (checkbox, Output parameter) - Payment transaction is successful
Payment ID (Output parameter) - The ID of the payment record created
Error Message (Output parameter) - error message
Profile ID (Output parameter) - The ID of the profile record created
2. On the page, click Pay and have your customer complete payment by following the instructions on the Square Terminal.
Webhook
When the user clicks the Pay button, a payment record is created with PENDING status. To get the checkout result after the customer completes the checkout on the Square Terminal, subscribe to Square webhook. If Payment Center isn't listening for webhook notifications, it can get the checkout result by running the Payment Status batch.
1. Notification URL endpoint
2. Subscribe to Event Notification
Open the Developer Dashboard and choose Open for the application you want to use.
In the left pane, under Webhooks, choose Subscriptions.
Choose Add subscription.
Enter a name for the webhook and provide the notification URL.
Choose an API version that includes the events you want to be notified about, choose below events to be notified, and then choose Save.
terminal.checkout.updated
payment.updated
Availability: Spring '24