Accounting Seed Connector
Due to popular demand, we have created a connector for Accounting Seed. Accounting Seed is a native financial suite on the AppExchange, more information on the app can be found here: https://appexchange.salesforce.com/listingDetail?listingId=a0N30000003JL6jEAG
Our connector provides payment capability to the financial suite, that is, as a user of Accounting Seed, you now have the ability to collect credit card payments within the app. You can now also give your customers the ability to pay their bills online.
Things are always better with pictures so here are screenshots of the features that the connector provides.
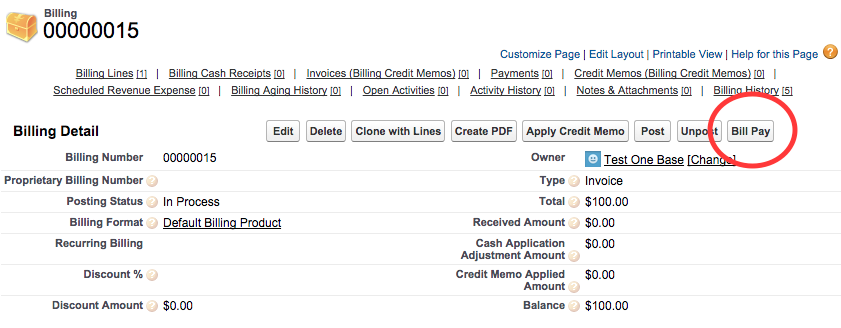
A Bill Pay button in the billing page:
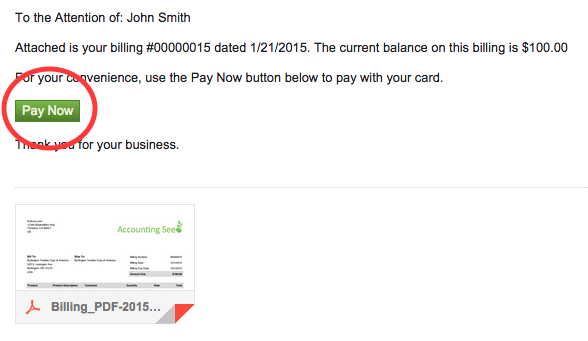
A Pay Now button in the email that goes out to your customers:
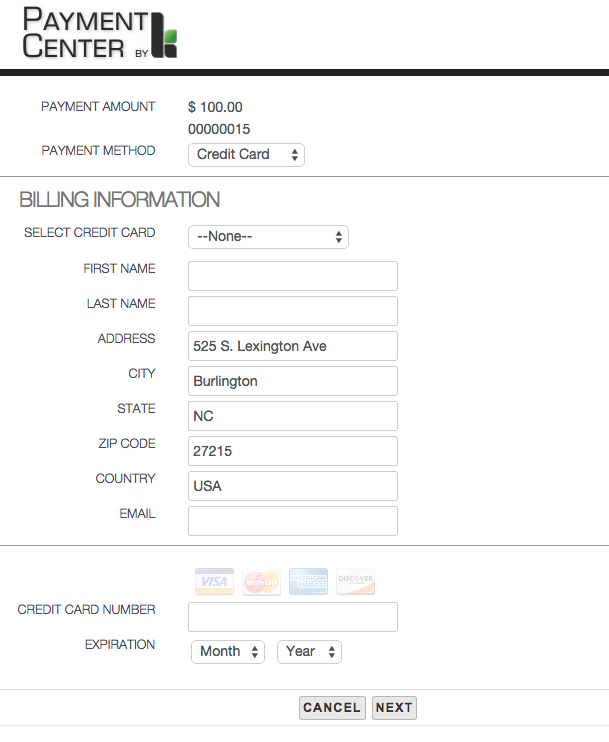
The buttons lead to a page where payment information can be entered:
Upon successful payment, the necessary cash receipt will be created for your accounting records:

So how do you get the connector? Simply follow the steps below:
Install the connector using this link: Payment Center Connector For Accounting Seed. Note that you need to have Payment Center and Accounting Seed Financial Suite installed first.
After installation, edit your billing page layout to expose the Bill Pay button. You may also want to display the Payments related list so you’ll see the payment made to the bill.
To add the Pay Now button to your email template, follow these steps:
Setup online payment per these instructions. Note that if you have done this previously as part of setting up Payment Center, then you don’t have to do it again.
Assign permission set Payment Center + Accounting Seed Permissions to the Sites user. Go to Setup | Develop | Sites. Click on your site to go to site details then click Public Access Settings. At the Public Access Settings page, click View Users. Click the Site Guest User. Under Permission Set Assignments, click Edit Assignments. Add Payment Center + Accounting Seed Permissions, then Save. More information here.
Edit email template Bill Payment Request (under folder Payment Center Templates) and add your domain name, i.e.:
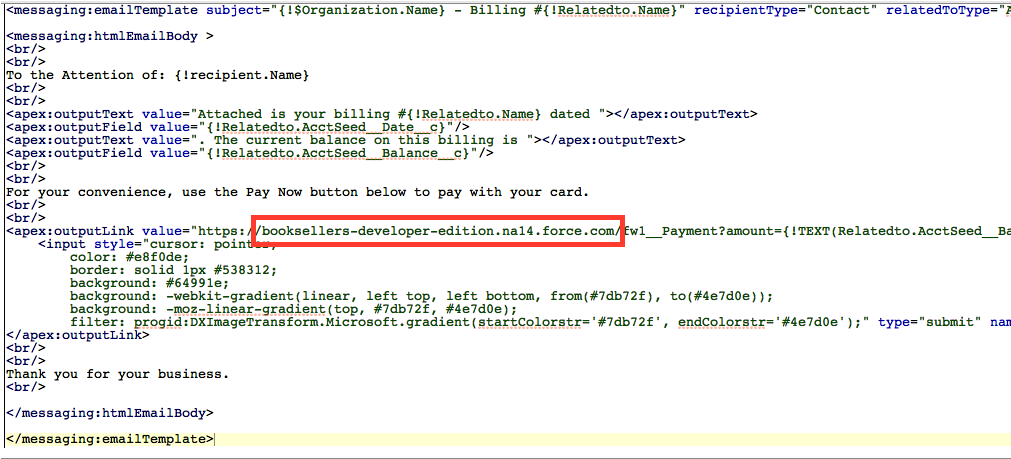
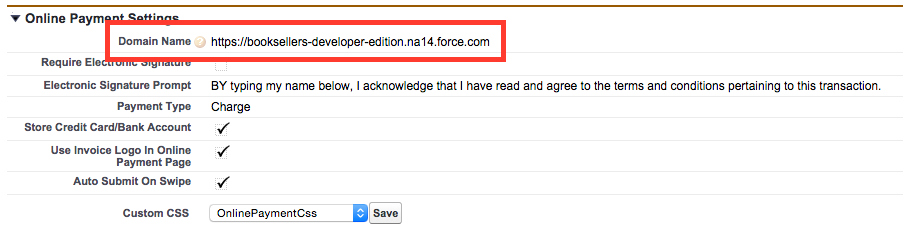
The domain name was part of the online payment setup and can be found in Payment Center Settings tab:
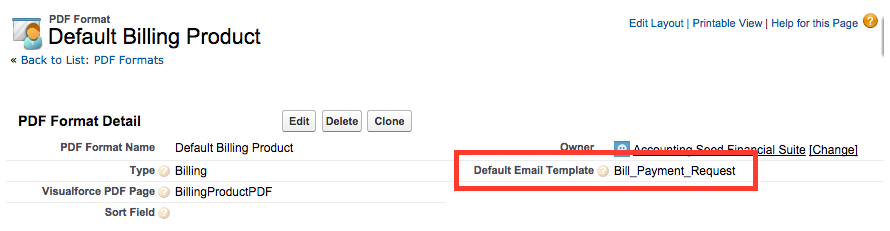
Go to the PDF Formats tab and edit the appropriate PDF format (i.e.: Default Billing Product). Replace Default Email Template with Bill_Payment_Request:
Refunds
You can do refunds in Payment Center and the corresponding transactions/audit trail will be created in Accounting Seed, which includes creation of negative cash receipts. In order to be able to create negative cash receipts, the following validation rules need to be disabled.
Go to Setup | Create | Objects | Cash Receipt, in the Validation Rules section, disable the following:
Balance_Must_Be_Positive
Cash_Receipt_Can_Not_be_Negative
More information about the above prerequisites can be found here.
To do a refund, go to the payment record and click Refund.
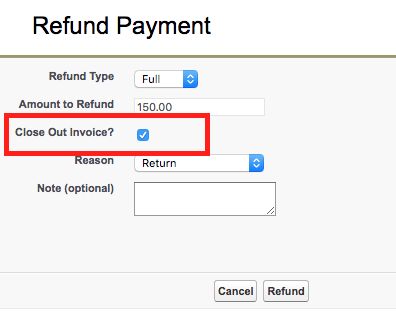
In the screen that pops up you can select to close out the related invoice or not. If you decide to close it out, a credit memo will be created and applied to the invoice. If not, the invoice will be opened.
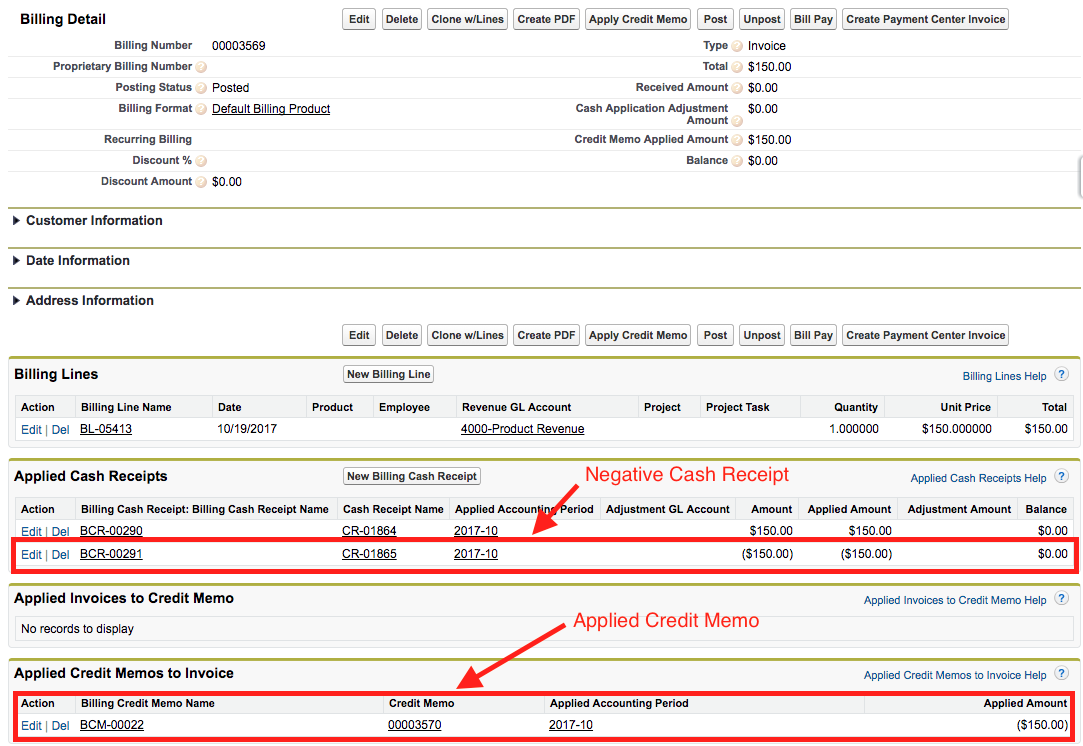
After a successful refund, a negative cash receipt will be applied to the billing, and if you chose to close out the invoice, a credit memo will be created and applied as well:
Miscellaneous Settings
Certain behaviors of this extension can be controlled. If you go to Setup, and search for Custom Settings | Payment Center + Acctng Seed Settings, you will see the following options:
Automatically Post Cash Receipts – when checked, will automatically post cash receipts after payment.
Use Billing Number As Invoice Number – when you convert an Accounting Seed billing to a Payment Center invoice, you can choose to use the Billing Number as the Invoice Number.
Copy Billing Line Comments – use this option to copy billing line comments into the invoice line description.
Automatically Post Billings – use this option to automatically post billing after payment. Note that the billing has to be in “Approved” status in order to be posted.
Do not Create Cash Receipts - when payment is made, a cash receipt is automatically created. Check this box if you want to create the cash receipts manually instead.
Do Not Apply Cash Receipt to Billing - when checked, cash receipts will not automatically link to the Billing record.
Use Product Name as Invoice Line - Use this option to use Product names as Invoice Line item names.
Create Billing Line For Surcharge Fee - when enabled, a Billing Line will be created that will store the amount of the surcharge fee