This article describes settings necessary to allow your customers to pay their invoices online.
Force.com Sites
Force.com Sites is a Salesforce feature that enables you to create public websites and applications that are directly integrated with your Salesforce.com organization. Online Payments require that you have Force.com Sites set up.
For more information on setting up Force.com Sites, please follow this link.
Assigning Permission and License
If you already have a site set up, there is no need to create another site. Simply perform the succeeding setup. If you don’t have a site, go ahead and create one then perform the following setup to give your customers ability to view and pay their invoices online.
Go to Setup | Develop | Sites. Click on your site to go to site details then click Public Access Settings, as shown below:
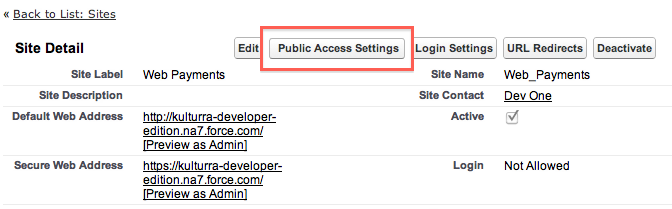
At the Public Access Settings page, click View Users:
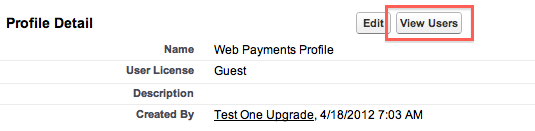
Click the Site Guest User, as shown below:

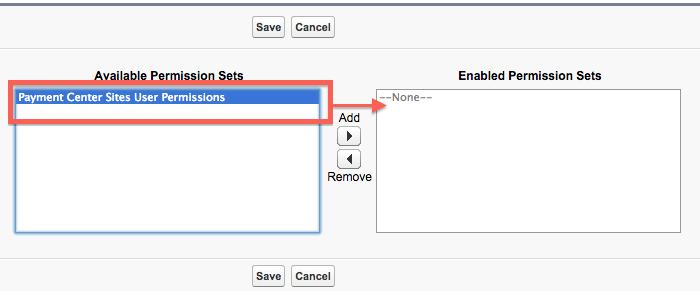
Under Permission Set Assignments, click Edit Assignments:

Add Payment Center Sites User Permissions, then Save:
Under Managed Packages, click Assign Licenses, as shown below (Note: this step does not apply on sandbox environments):

Follow onscreen instructions to assign Payment Center license. Payment Center comes with one free license for the Site User. If you need more licenses, please contact support@kulturra.com.
Sharing Settings
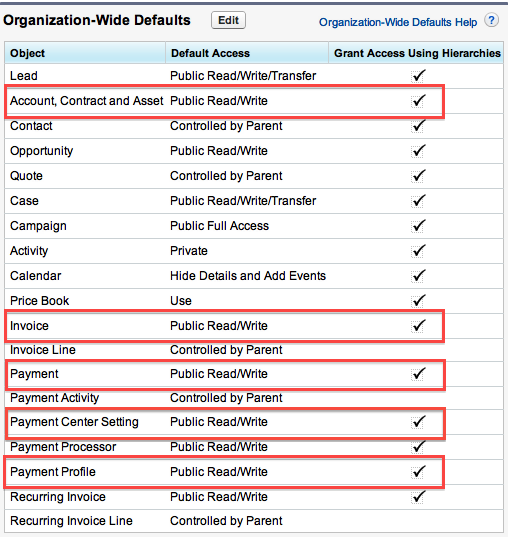
The following objects need to have Public Read/Write access:
Account
Invoice
Payment
Payment Center Setting
Payment Profile
Go to Setup | Security Controls | Sharing Settings. Ensure that the above objects have the proper access rights:
If you need to set Account to private (for Customer Portal for example), please follow this post.
Payment Center Settings
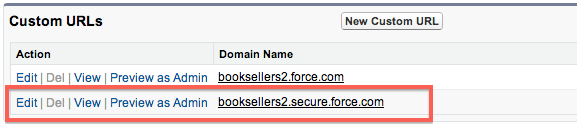
After setting Site security and assigning license, you need to enter your site URL in Payment Center settings so that it will know that you are ready to accept online payments. Go to Setup | Develop | Sites. Click on your site to navigate to the site details where you will find your secure custom URL:
Right-click View to get the exact link:
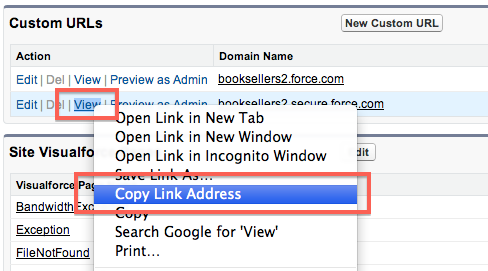
Copy link address and put it in Domain Name in Payment Center Settings, under Online Payment Settings, as shown below:

Require Electronic Signature – check this box to require your customers to e-sign in the payment page. More info here: June 2013 Release
Electronic Signature Prompt – this is the text that will appear in the payment page if Require Electronic Signature is checked. A sample prompt can be: BY typing my name below, I acknowledge that I have read and agree to the terms and conditions pertaining to this transaction.
Payment Type – this is the type of credit card transaction for invoice payments.
Store Credit Card/Bank Account – check this box to store your customers’ credit card/bank account in your ORG. The credit card will be stored as a Payment Profile. If the invoice was created from a Recurring Invoice, the credit card will be stored in the Recurring Invoice details.
Ensure that your default Payment Processor is set. Click here for an example on how to set default payment processor.
Disabling Online Payment
To disable online payments for new invoices, simply blank out the Domain Name in settings.
Go to Payment Center Settings tab. Under Online Payment Settings, set the Domain Name to blank. This will cause new invoices not to have the online payment link.
Invoices that were already sent can still be paid online. To disable online payments altogether, simply deactivate your site.