Payment Center provides a Pay Now button that you can add to your existing Salesforce pages in order to collect credit card payments. You can add the button in a standard Salesforce page, in an email template or in a Visualforce page.
Here's an overview of the Pay Now button:
Implementing the Pay Now button involves two steps:
Create a relationship between our Payment object and your object (custom or standard). If your object is the standard Account, Contact or Opportunity objects, then there’s no need to create the relationships because they are already defined as part of the app.
Create the button
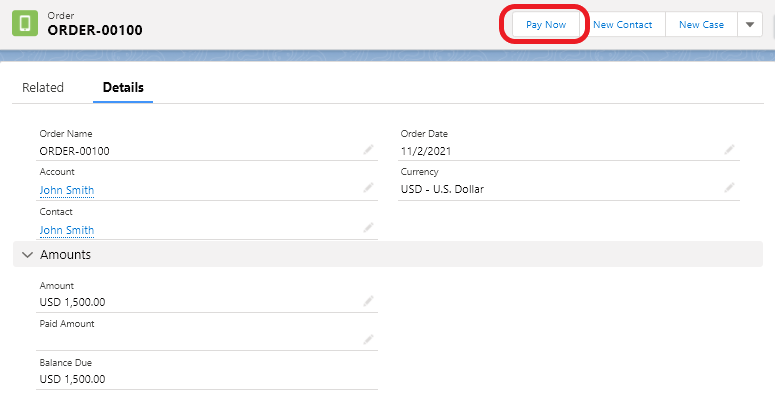
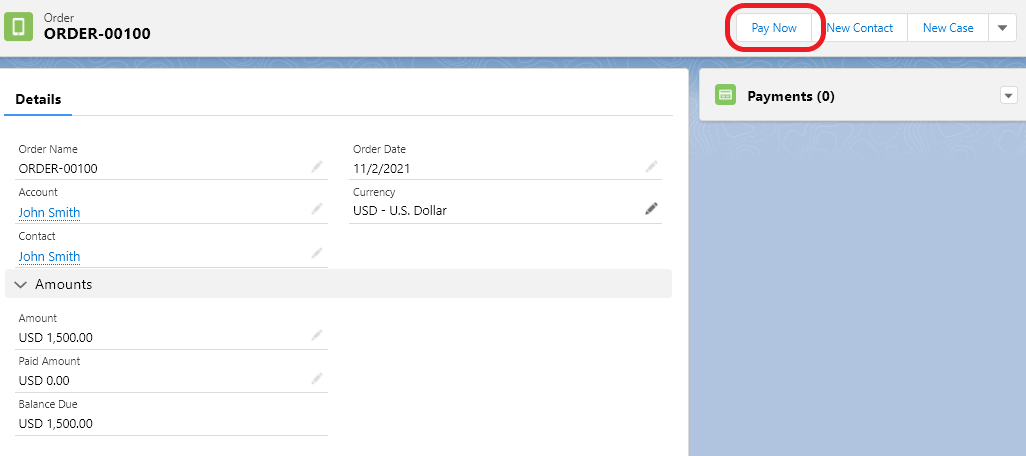
To illustrate, assume you have a custom object called Orders where you keep track of all your sales orders. You wanted the ability to collect credit card payments against an order, and automatically update the balance on that order upon successful payment. You wanted a Pay Now button in your order detail page, as shown below:
To add the Pay Now button, we first need to create a relationship between the Payment object and the Orders object. Go to Setup | Create | Objects | Payment (Payment is an object that comes with Payment Center). Create a new custom field of type Lookup Relationship, related to Order (Order is your custom object where you wanted to collect payment on). Sample is shown below:

After adding the relationship, verify that you now have a Payments related list in your Orders page:
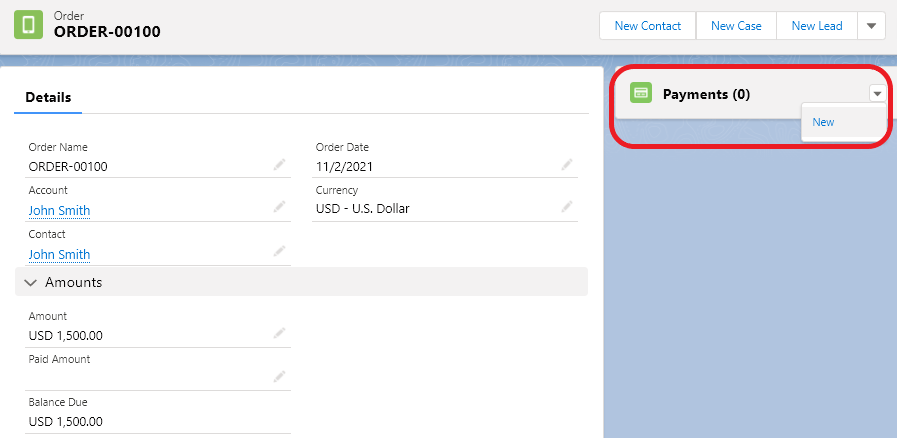
You may want to hide the New button so as not to be confused with the Pay Now button we are about to add.
To add the Pay Now button, go to Setup | Create | Objects | Order (or your custom object). Under Buttons, Links, and Actions, click New Button or Link. Add a button that redirects to the following URL:
JavaScript/apex/fw1__Payment?param1=value1&param2=value2&param3=value3.....
Notice that along with the URL, you pass predefined parameters and their corresponding values, which are usually in the form of merge fields. Here are the possible parameters that you can add to the URL:
amount – The amount to be charged.
accountId – If your object has a lookup on Accounts, you can pass the account ID here. It is strongly recommended that you pass this value so that the billing address defined at the account level will pre-populate the address in the payment page. And if you have defined a payment profile for the account, the information from the profile will also pre-populate the payment page.
contactId – If your object has a lookup on Contacts, you can pass the contact ID here. Just like the account, the appropriate fields in the contact will pre-populate the payment page.
opportunityID - If your object has a lookup on Opportunities, you can pass the Opportunity ID here. Just like the account, the appropriate fields in the Opportunity will pre-populate the payment page.
lookupField – The name (API name) of the lookup field defined in the Payment object, which is normally named the same as the lookup object itself. Note that value of this parameter is not a merge field, instead pass the actual name for the lookup field.
lookupId – The ID of the current record in your object.
reference – Any reference field you want saved in the Payment record.
description1, description2, description3 – Additional parameters that can hold any information to be displayed in the payment page.
currency – If you use different currencies, you can pass the desired currency here. If you don’t pass any currency, the default currency in settings will be used.
billingStreet, billingCity, billingState, billingZip, billingCountry – If you have not passed the Account ID or Contact ID, you can explicitly pass the billing address using static values (e.g billingStreet=123 Main St).
firstName, lastName – If Contact ID is not passed, you can pass the first and last name as they appear on the credit card.
email – You can optionally pass the payer’s email address.
processor – If you are using different processors, you can explicitly pass the processor name here as defined in settings. If you don’t pass the processor, the default processor will be used.
processorCategory – If you have categorized your processors, you can pass the category here and the system will select the appropriate processor based on the category. More info here: Using Multiple Processors
paymentType – You can pass Charge or Authorization. If this parameter is not specified, then the default payment type in settings will be used.
redirectURL – The payment page is redirected to a confirmation page after processing the payment, if you want it to be redirected to a specific URL, then specify it here.
doNotSendReceipt – true/false, indicates whether or not you want to send a receipt after payment. If you do not pass a value, the default settings will be used.
defaultPaymentMethod – When the payment page comes up, you can select a payment method from a dropdown. If you wanted the page to default to a specific payment method, you can pass the default here. More info on payment methods here.
entity – You can pass an entity as defined here. Pass the ID of the entity. Details of the entity will be used where appropriate. For example, when sending the receipt, the sender and company name of the entity will be used.
custom – Anything passed here will be saved in the payment record under Custom Information. For the processor PayPal Payments Pro, this information will also be passed onto the CUSTOM field in PayPal.
profile – Possible value: new – if a payment profile exists it is normally defaulted in the payment page. But if you pass “new” to this parameter, the payment page will ask for new payment information.
isAdvancedPayment - true/false, receive payment in the form of an advance payment.
Each payment will be recorded in the Payments object. But you probably want the payment to reflect in the order as well. To do that add these parameters to the URL:
lookupObject – The name (API name) of your object. Note that value of this parameter is not a merge field, instead pass the actual name of the object.
paidAmountField – The name of the field in your object that holds the paid amount. Since there could be more than one payment per record, the total will be accumulated in this field. Note that value of this parameter is not a merge field, instead pass the actual field name.
In our example, we can formulate our URL as follows:
JavaScript/apex/fw1__Payment?amount={!TEXT(Order__c.Balance_Due__c)}&accountId={!Order__c.AccountId__c}&lookupField=Order__c&lookupId={!Order__c.Id}&reference={!Order__c.Name}&lookupObject=Order__c&paidAmountField=Paid_Amount__c
Note that when passing the amount, you need to add the TEXT function in order to pass only the number portion of the field. Otherwise you might get the following error:

We can then define our button as follows:
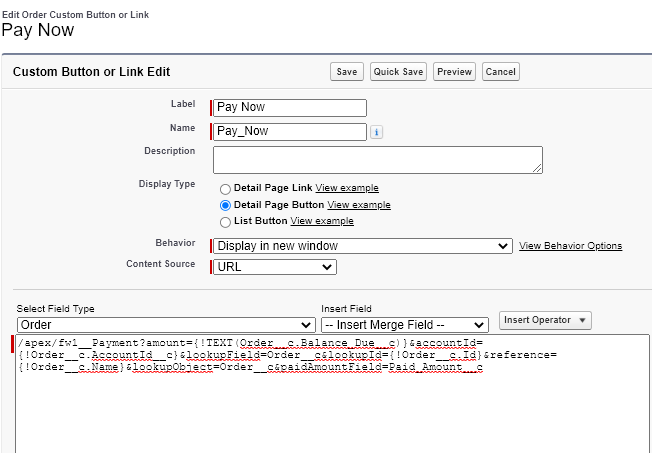
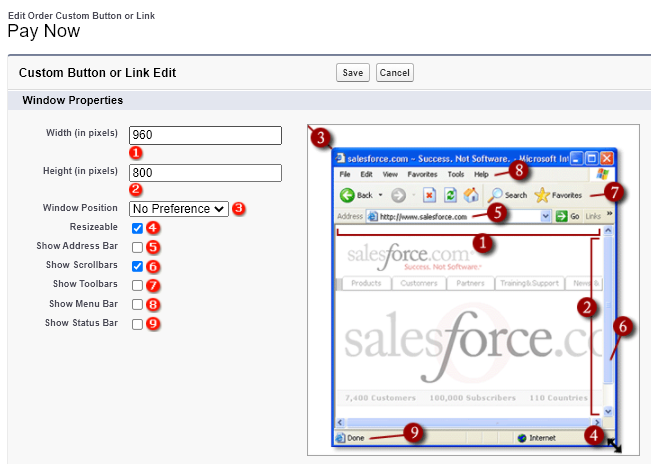
Note that you should open a new window with a suggested size of 960 px (width) by 800 px (height):
After defining our button, we can then expose the button in the detail page:
When you click Pay Now, the payment page will be displayed with the appropriate fields pre-populated:

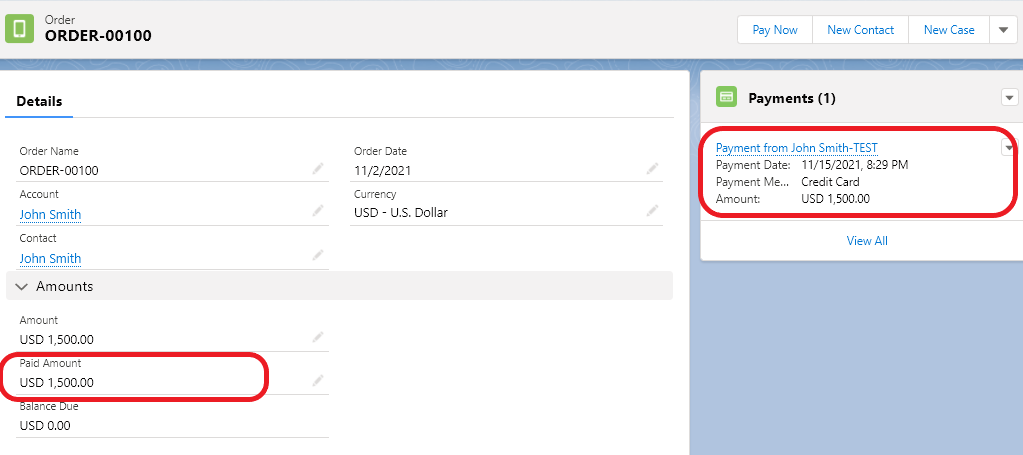
Fill up the rest of the fields and follow onscreen instructions to process the payment. Upon successful payment, a payment record will be attached to the order and the paid amount is also reflected on the order:
Styling the Payment Page
The page can be styled to match your company branding. This is done by creating your own CSS. To start with, you can download the default CSS that came with the app. Go to Setup | Develop | Static Resources and download OnlinePaymentCss (you do this by clicking View file). Extract and edit the CSS file. It is best to rename the CSS file to something else (i.e. CustomCSS) so as not to be confused with the original CSS. Use the following predefined classes to style certain elements on the page:
k-textbox – applied to textboxes to set border, text and background color
k-combobox – applied to comboboxes
k-button – applied to elements that look like push button. The class sets text color, background color and background image
k-linebreak – applied to section lines
k-banner-image – applied to header image
k-text – applied to display text
k-label – applied to field labels
You can display the logo you use for invoices in this page. But if you must use a different logo, you can do so by editing k-banner-image. Here’s a sample code:
CSS.k-banner-image {
 display: block;
 background:url('PaymentCenterLogo.png');
 height: 60px;
 width: 200px;
 overflow: hidden;
 background-repeat: no-repeat;
}
PaymentCenterLogo.png in the sample above is an image uploaded as a static resource.
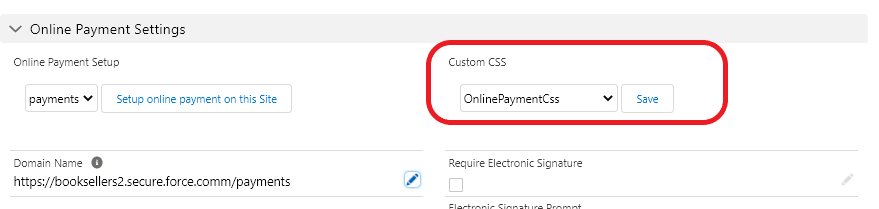
When you’re done with your CSS, zip it up and upload it to Salesforce as a new static resource. Note that when zipping it up, the CSS name should be the same as the zip file name. Also the static resource name should be the same as the CSS and zip file name. After uploading as a static resource, you then go to the settings area (Payment Center Settings tab) and set your CSS in the Custom CSS dropdown:
Calling the Payment Page outside Salesforce
You can also call the page outside of Salesforce (i.e. your website) with the following URL:

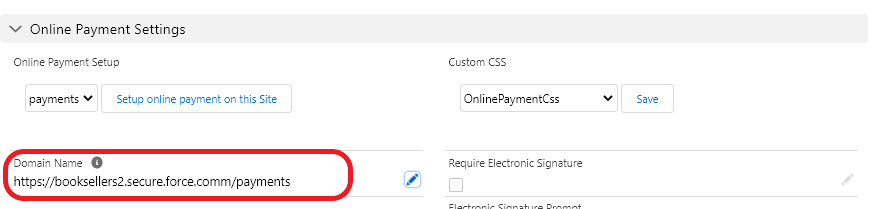
Your domain name can be found in Payment Center Settings:
Prerequisite to calling the page outside of Salesforce is that the online payment setup should have been done.
This feature is available in the November 2013 release.