Did you know that Payment Center comes with a Payment component that can be added in any Salesforce object and allows you to collect payments anywhere in Salesforce?
Let's say, you are using Opportunities in your sales process to manage and close deals. When you close a deal, you can conveniently take payments from the Opportunity page without navigating to other pages using the Payment Lightning Component or more commonly known as the Payment Terminal.
Add Payment Lightning Component in your Lightning Record Page
From your record page i.e. Opportunity record page, go to Setup | Edit Page. Choose where you want to insert the payment component, select Payment Terminal from the Custom Component section, and simply drag and drop the component. You can also create a new Payment tab for a cleaner look as shown in the screenshot below.
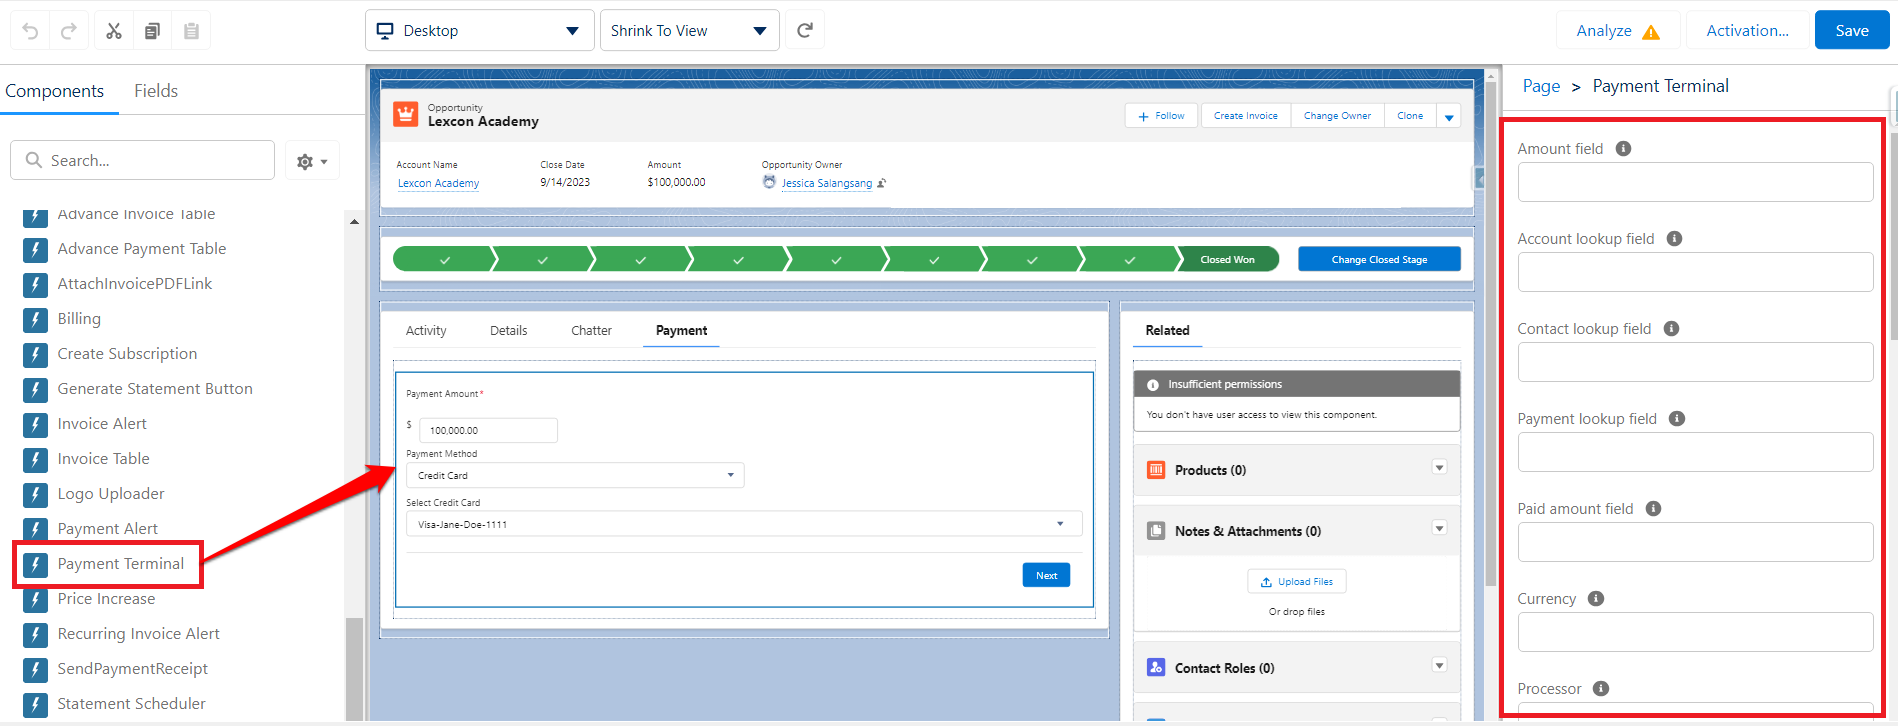
On the right-hand side of the screen, you can populate the parameters with a default value or with field API names that could reference your desired value.
For example, if you have a custom field in the Opportunity object that holds the amount you wish to collect, you can enter the API name of that field in the Amount field, otherwise, the Payment Amount defaults to the Opportunity Amount.
Here is the list of parameters that the Payment Lightning Component accepts:
Amount field - The name of the field in your object that holds the amount to be charged (i.e2 Amount__c)
Account lookup field - The name (API name) of the Account lookup field defined in the custom object (i.e. Account__c)
Contact lookup field - The name (API name) of the Contact lookup field defined in the custom object (i.e. Contact__c)
Payment lookup field - The name (API name) of the lookup field defined in the Payment object (i.e. Case__c)
Paid amount field - The name of the field in your object that holds the paid amount (i.e. Total_Paid_Amount__c)
Currency - If you use different currencies, you can pass the name of the field currency or currency value (i.e. Currency__c, {!currency}, USD)
Processor - If you are using different processors, you can explicitly pass the processor name here as defined in settings (i.e. Processor__c, {!processor}, Stripe)
Processor Category - If you have categorized your processors, you can pass the category here and the system will select the appropriate processor based on the category (i.e. Processor_Category__c, {!processor_category}, CAD)
Payment Type - You can pass 'Charge' or 'Authorization'
Entity - You can pass the ID or field name of the entity. Details of the entity will be used where appropriate (i.e. Entity__c, {!entity_id}, 0011F00000v82kYQAQ)
Custom Info - Any information you want saved in the Payment record (i.e. {!any_text}, payment from sample account)
Default Payment Method - If you want the page to default to a specific payment method, you can pass the default here (i.e. PaymentMethod__c, {!payment_method}, eCheck)
Do not send receipt (checkbox) – Indicates whether or not you want to send a receipt after payment
SObject Name* - The name (API name) of your object
Record ID* - The ID of the current record in your object
Is Successful (checkbox, Output parameter) - Payment transaction is successful
Is Payment Submitted (checkbox, Output parameter) - Payment is submitted
Payment ID (Output parameter) - The ID of the payment record created
Error Message (Output parameter) - error message
Show invoice lines (checkbox) - indicates whether invoice lines are displayed
Display Company logo (checkbox) - indicates whether company logo is displayed
Amount - The amount to be charged. You can pass variable or numeric value (i.e. {!amount}, 99.99)
Time Out functionality:
Time elapsed - Time elapsed before Payment entry screen
Session Timed Out (checkbox, Output parameter) - Session Timed Out
Time Out - Time in seconds before payment timed out.
The Payment Lightning Component can also be used to create payment profiles. Read this article for more information: Creation of Payment Profile from the Payment Terminal
Create Profile (checkbox) - if checked, Payment Terminal will be used to create Payment profile
Profile ID (Output parameter) - The ID of the profile record created
* mandatory parameters
To add the Payment Lightning Component in a Screen Flow, you may check this article: Add Payment Lightning Component in a Screen Flow
Availability: Spring '21 Release